Getting Started With Social Media Panel
Using a Social Media Management Panel allows you to streamline and automate your social media activities from one centralized platform. This helps in managing multiple social media accounts, scheduling posts, monitoring engagement, and analyzing performance, all in one place.
SMS
Email
WhatsApp
Social Media Management Panel
Access the Social Media Management Panel
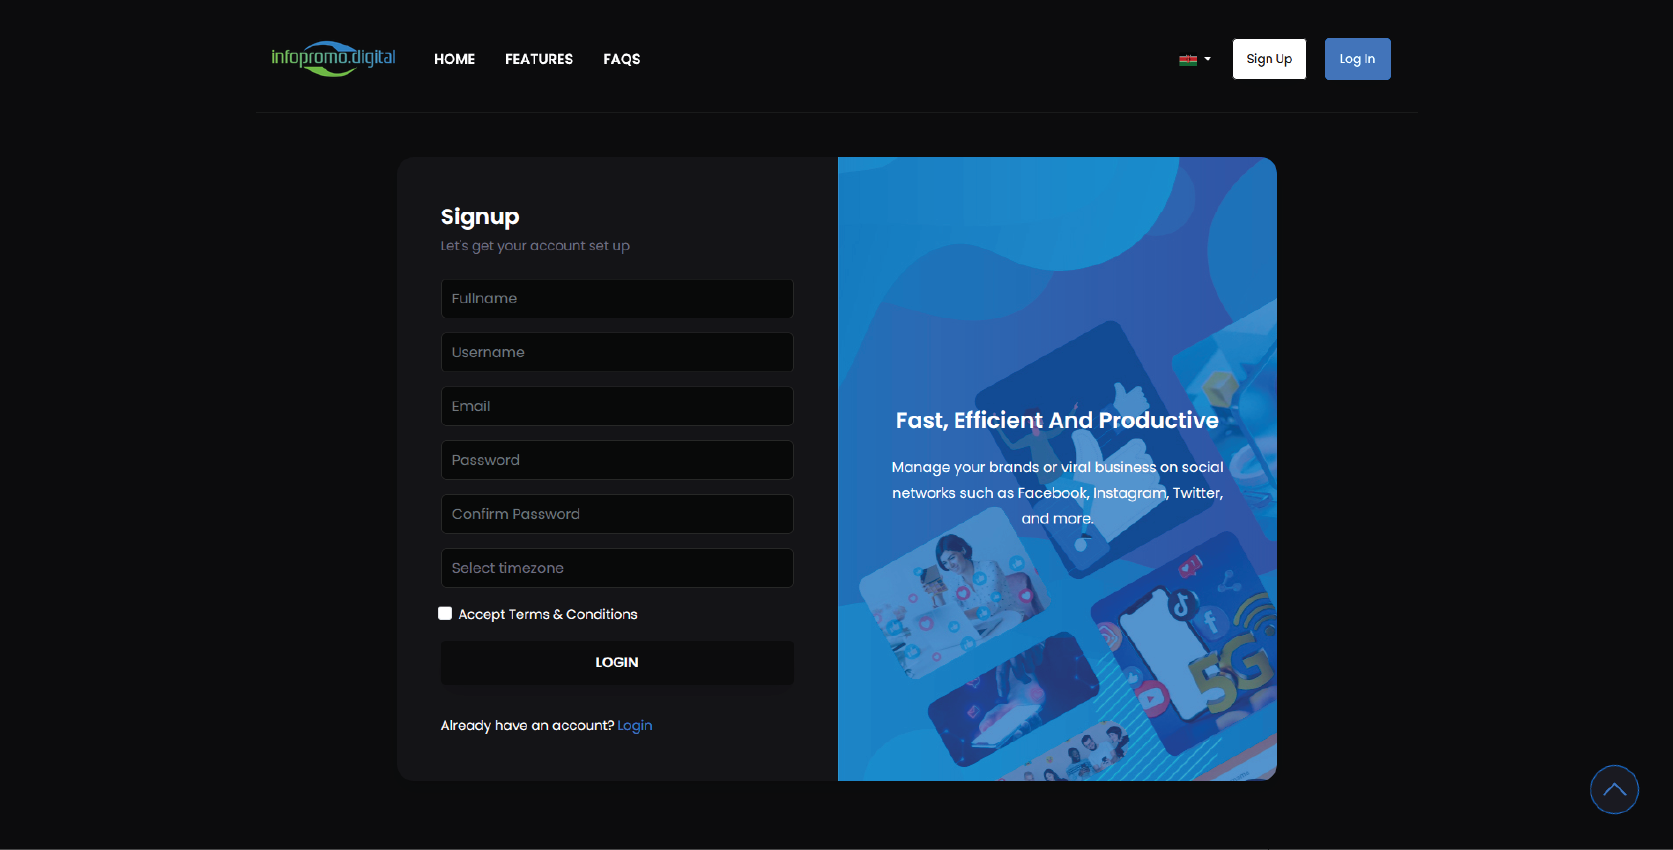
– Sign up for an account & log in to your account on the Social Media Management platform via this link: social.infopromo.digital you will be required to put in your name, set password, your email, and your time zone & accept the terms and conditions.
—
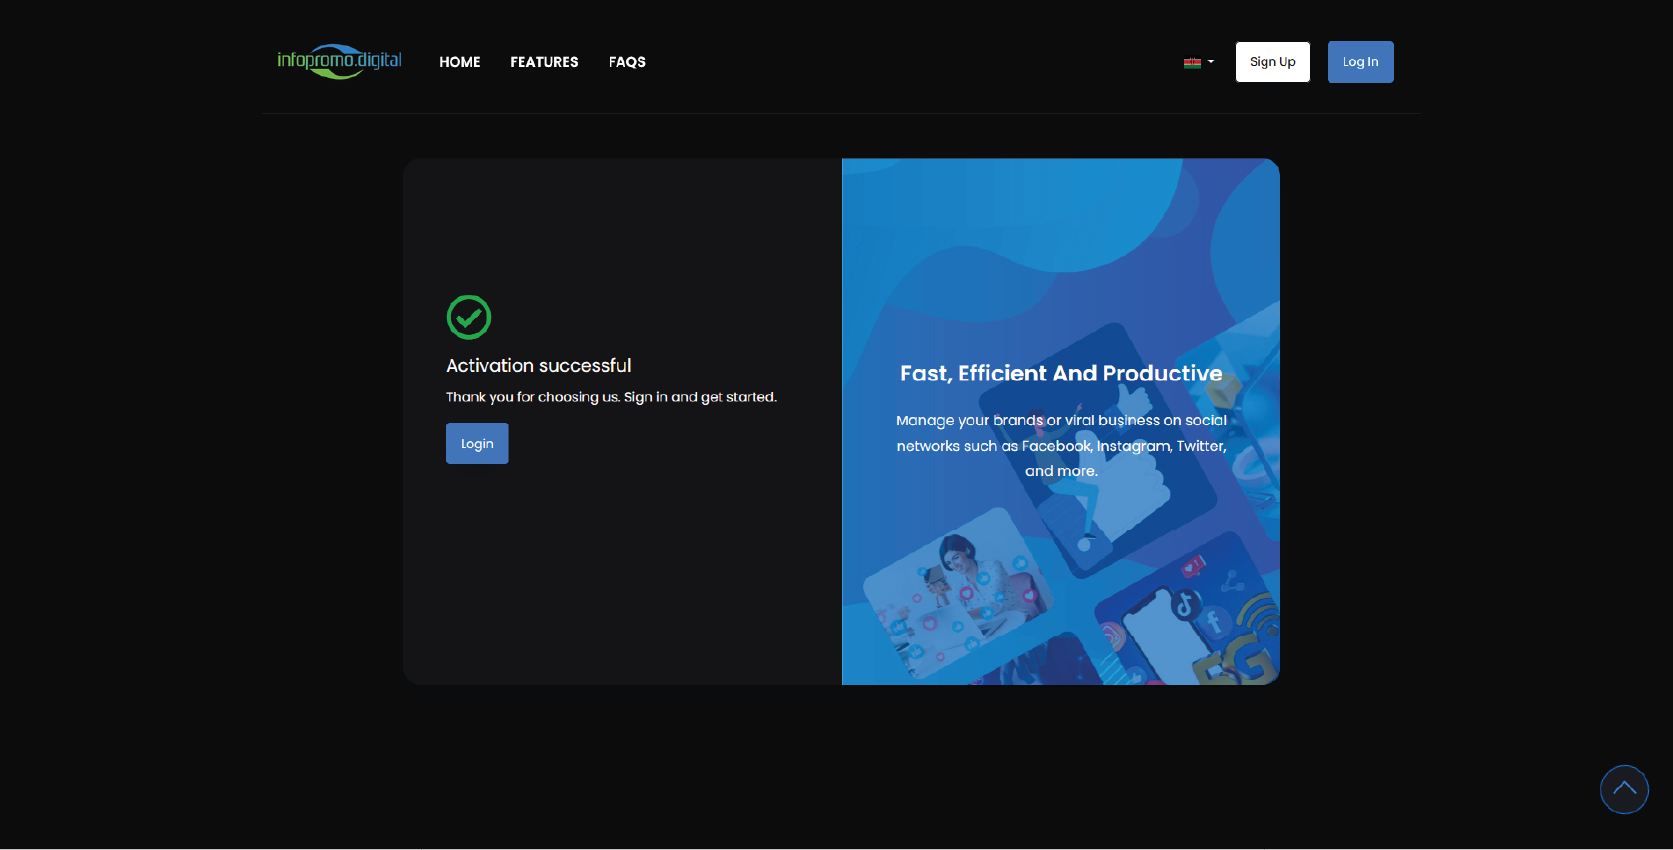
– You will receive an email and will be required to activate your email by clicking a link sent to your email.
—
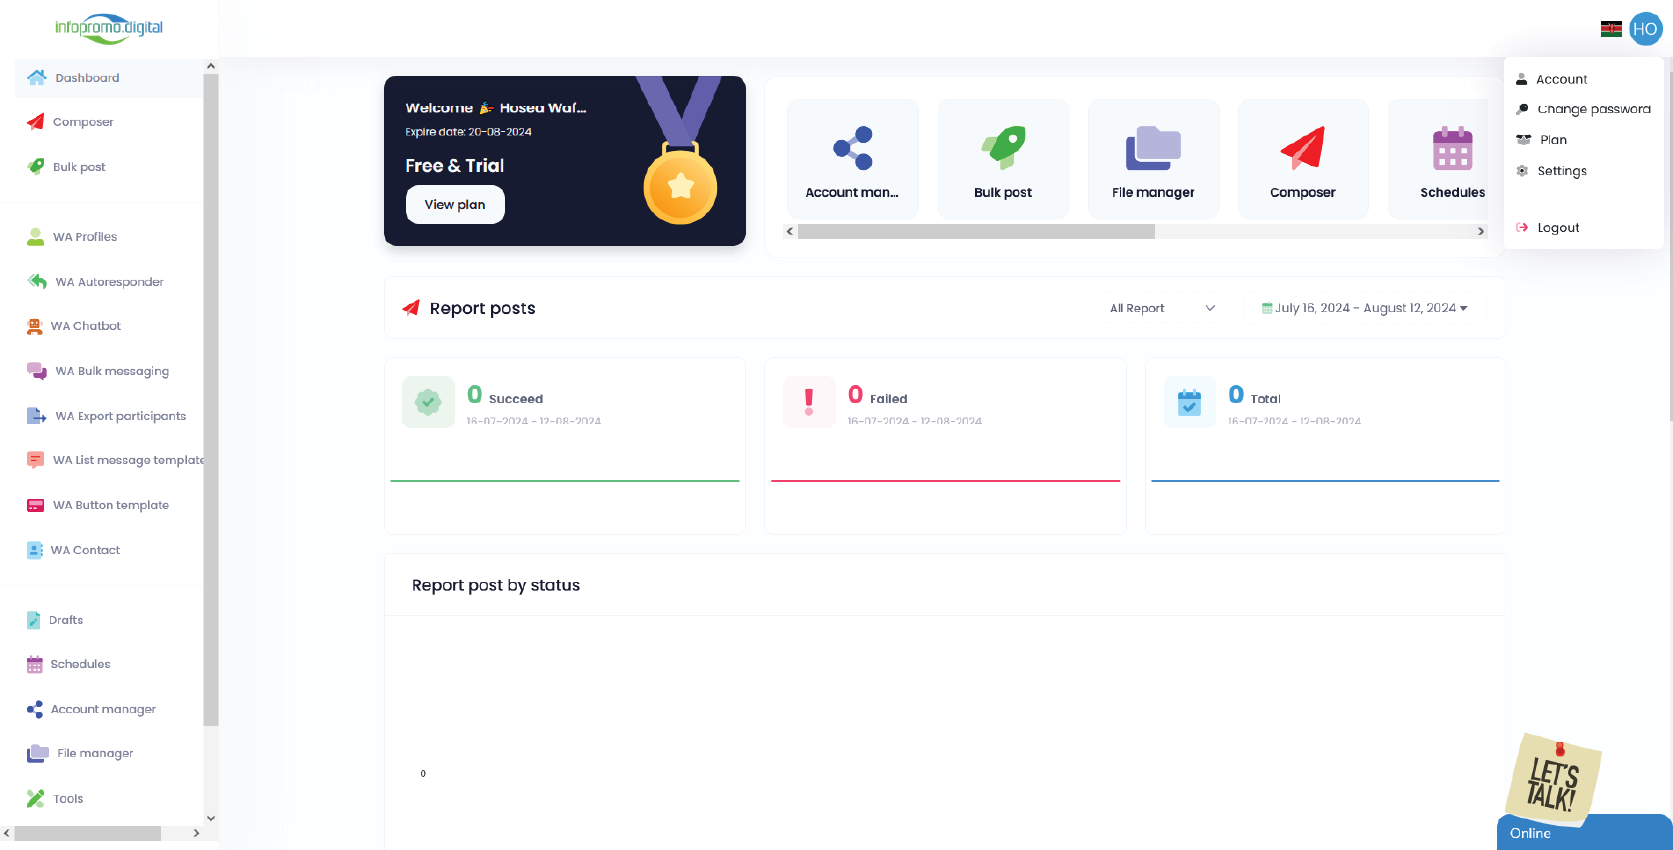
– After successfully signing in, you will have a trial package and you will receive a login confirmation email.
– Navigate to the “Dashboard” section to get an overview of your connected social media accounts, schedule posts, bulk posts, or even navigate to the top right to customize your profile setting.
—
How to add your social media accounts
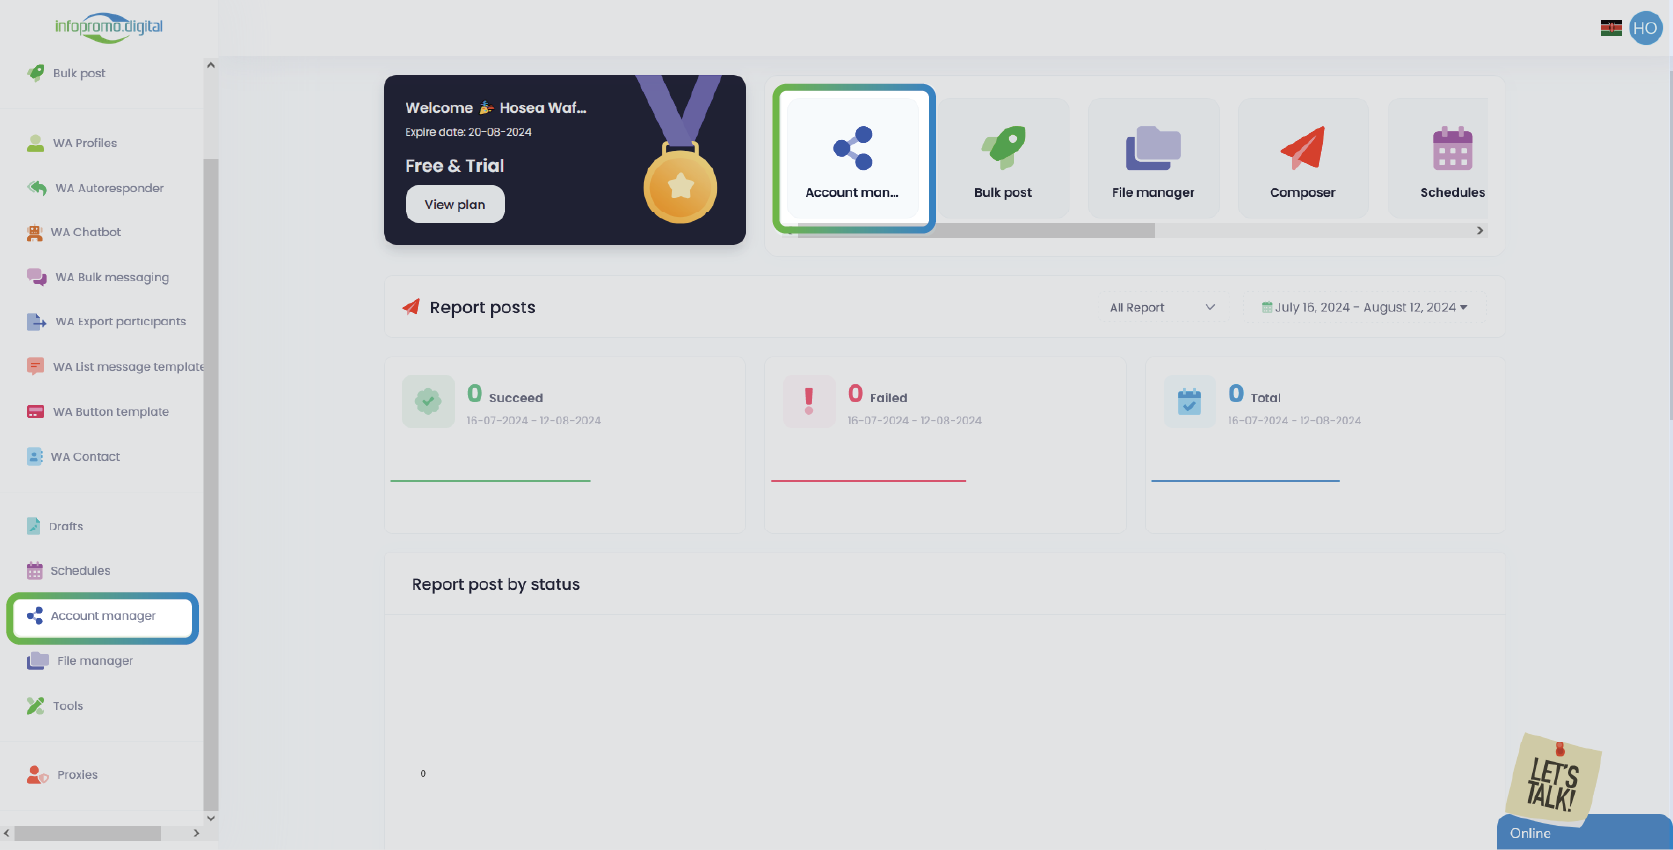
– Go to the “Account Manager” tab in the left section of the dashboard; alternatively, while still in the dashboard, click on the “Account Manager” icon.
—
– Select the social media platforms you want to add (e.g., Facebook (profile, group, page), Twitter, Instagram, LinkedIn, etc).

—
– Follow the prompts to log in and authorize the platform to manage your accounts.
How to post on multiple platforms at once
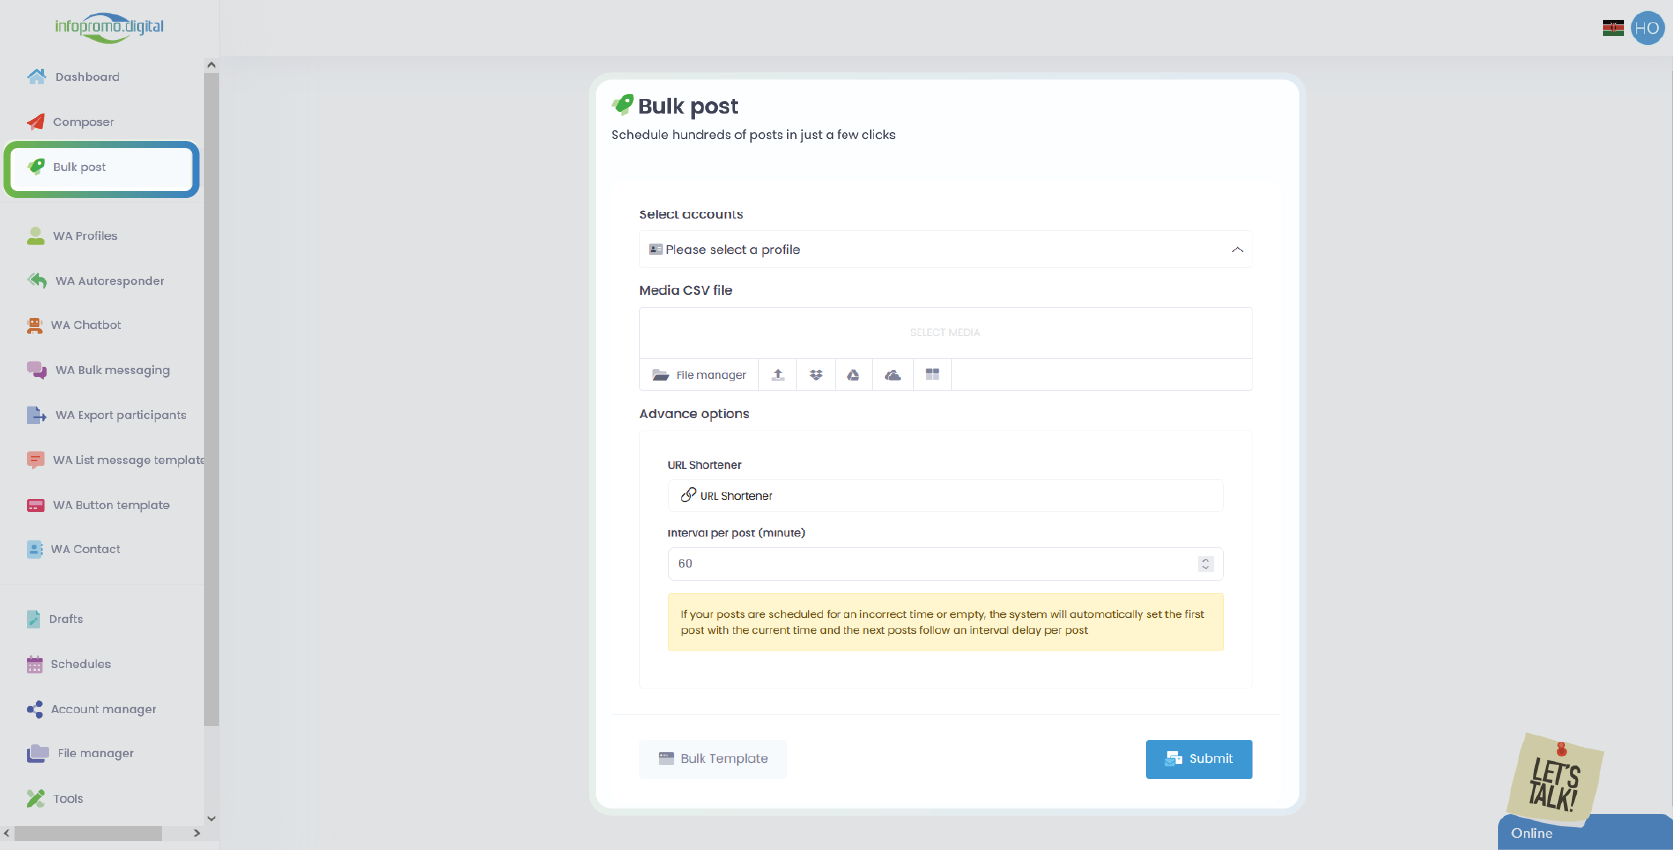
– Click on the “Bulk Post” tab in the dashboard.
– On the select accounts drop-down list, click “Please select a profile” to select the platforms you want to bulk post.
– Proceed to select media and the various options available and provided, you can upload from your computer, upload from your Google Drive, Dropbox, or One Drive, alternatively, click on the ‘square’ icon and you will have these options;
• ‘AI Image‘ to create an AI-generated image, ChatGPT-backed
• ‘Search Image Online‘ to get stock images from Pixabay and Pexels.
Alternatively, click the “Bulk Template” utton and a CSV file will automatically download, proceed to add your content in the CSV file then upload.
After setting the interval post (minutes), and verifying your content is fit for posting, you can click “Submit” to proceed and bulk post.
—
How to add files
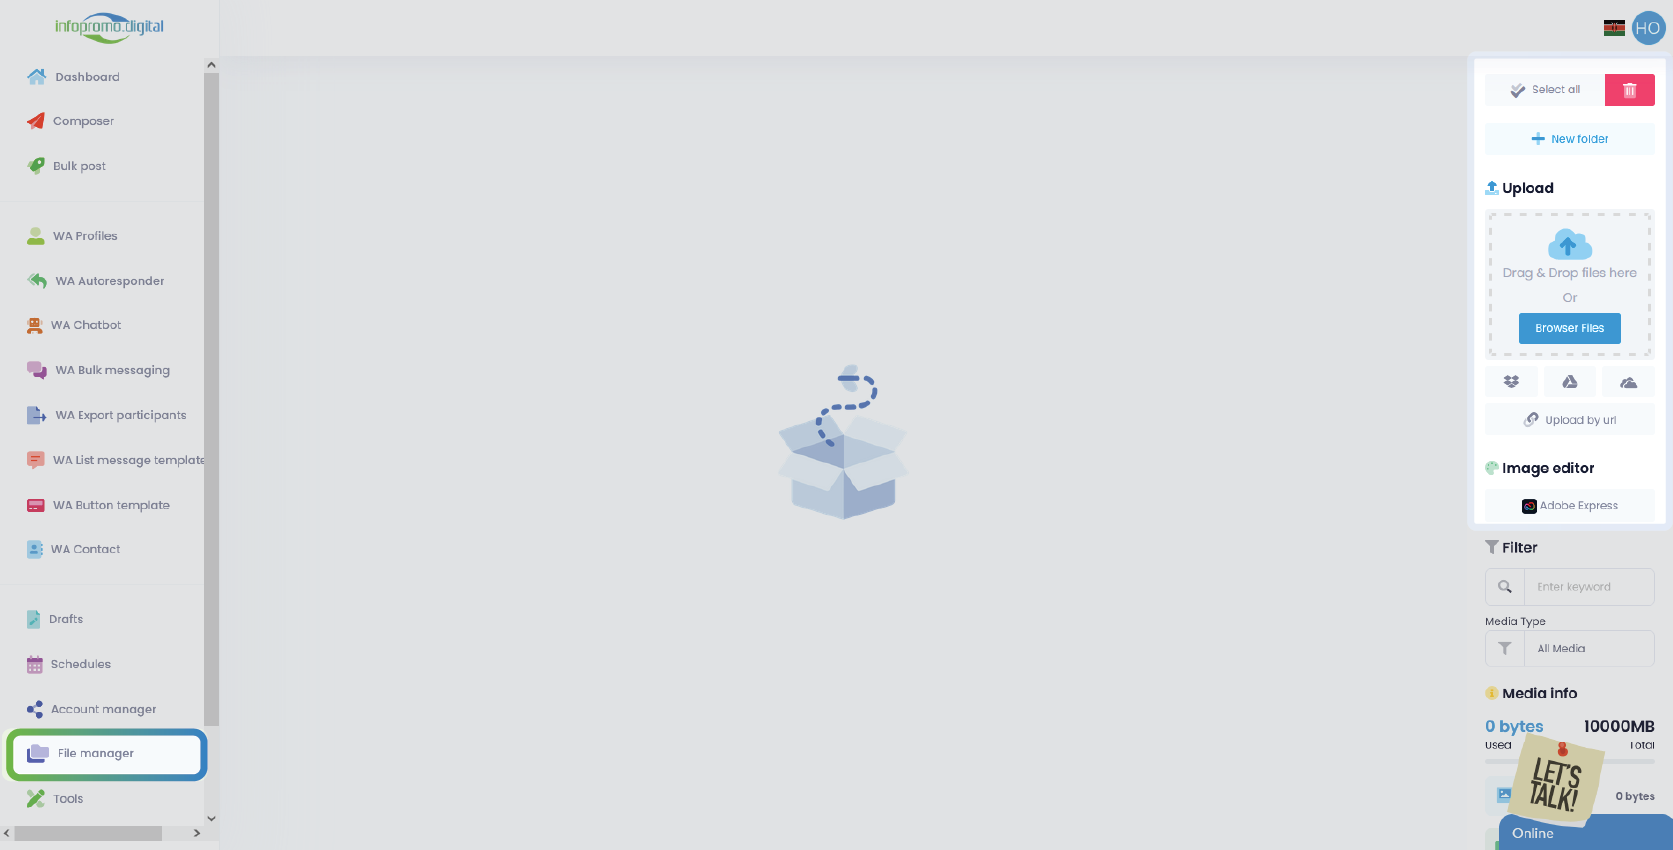
– Navigate to the “File Manager” tab on the left of the dashboard.
– In the extreme right, you will be able to either drag and drop or browse files to be able to upload them in the panel and choose to upload them in folders, when you click the “+ New Folder” button.
– Alternatively, you can add a link and upload a photo to the panel in the “Upload by URL” button.
– You can also upload them from your Onedrive, Google Drive, or Dropbox accounts by selecting either of the platform icons and signing in to your personal respective accounts.
– Alternatively, instead of uploading your content to the panel, you can upload to either your Onedrive, Google Drive, or Dropbox accounts by signing in to the accounts; click their respective icons to sign in to your personal accounts.
– You can also create an image from the image editor using Adobe Express.
Click here to learn how to use Adobe Express
—
Create and Schedule Posts
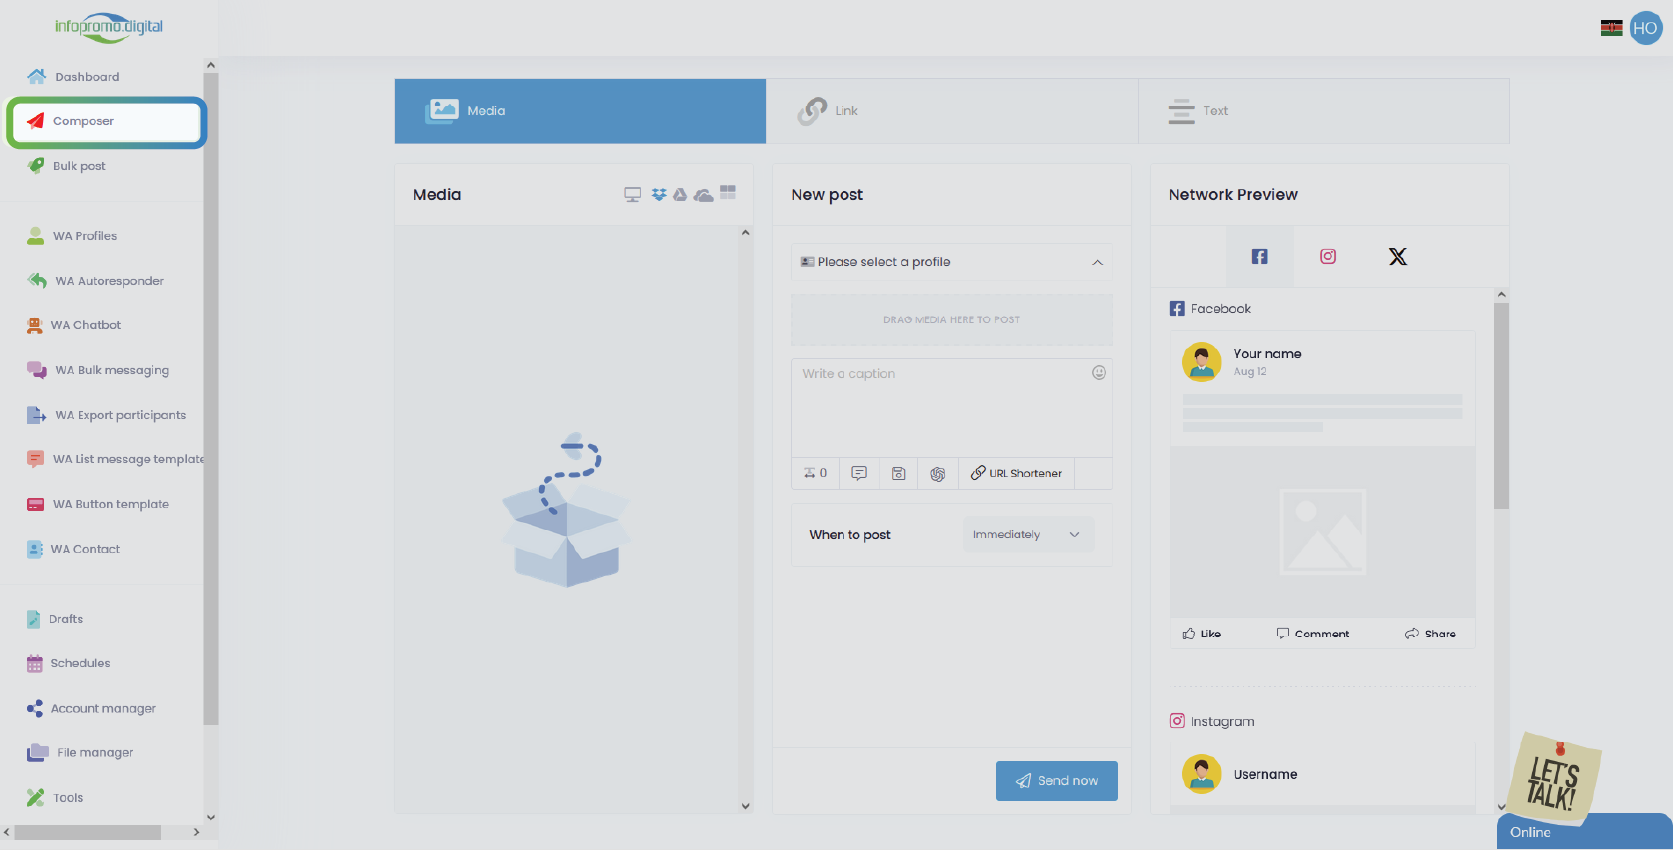
– Select the social media platform(s) for your post in the ‘New Post‘ section by clicking on “Please select a profile“. Use the text editor to write your content. You can customize the post for each platform if needed.
– You can click on the ‘Get Caption‘ icon to select your saved captions. (Create and save a caption by clicking on ‘Captions’ under the “Tools” tab in the dashboard
– You can use the ‘URL shortener‘ to shorten your URLs or click on the ChatGPT icon to get AI-generated captions.
You can choose to post an image, link, or text by clicking on the ‘Media‘, ‘Link‘, or ‘Text‘ respectively, and by default ‘Media’ will be selected.
—
How To Add Media
-Upload images, videos, or GIFs to enhance your post. Ensure the media is optimized for each platform’s requirements. You can click on the icons in the Media section to add media from your computer, or your Google Drive, One Drive, or Dropbox account, or more, by clicking on the boxed icon, and you will get these options:
• ‘Search media online‘ to get stock images from Pixabay or Pexels
• ‘AI Image’ to get AI-generated images from Chat GPT
• ‘Adobe Express‘ to create content using the Adobe Express editor
– Preview the Post: On the ‘Network Preview‘ section to see how your post will look once published. Make adjustments if necessary.
To Schedule or Publish Content
Once satisfied, choose to either schedule the post for later or publish it immediately.
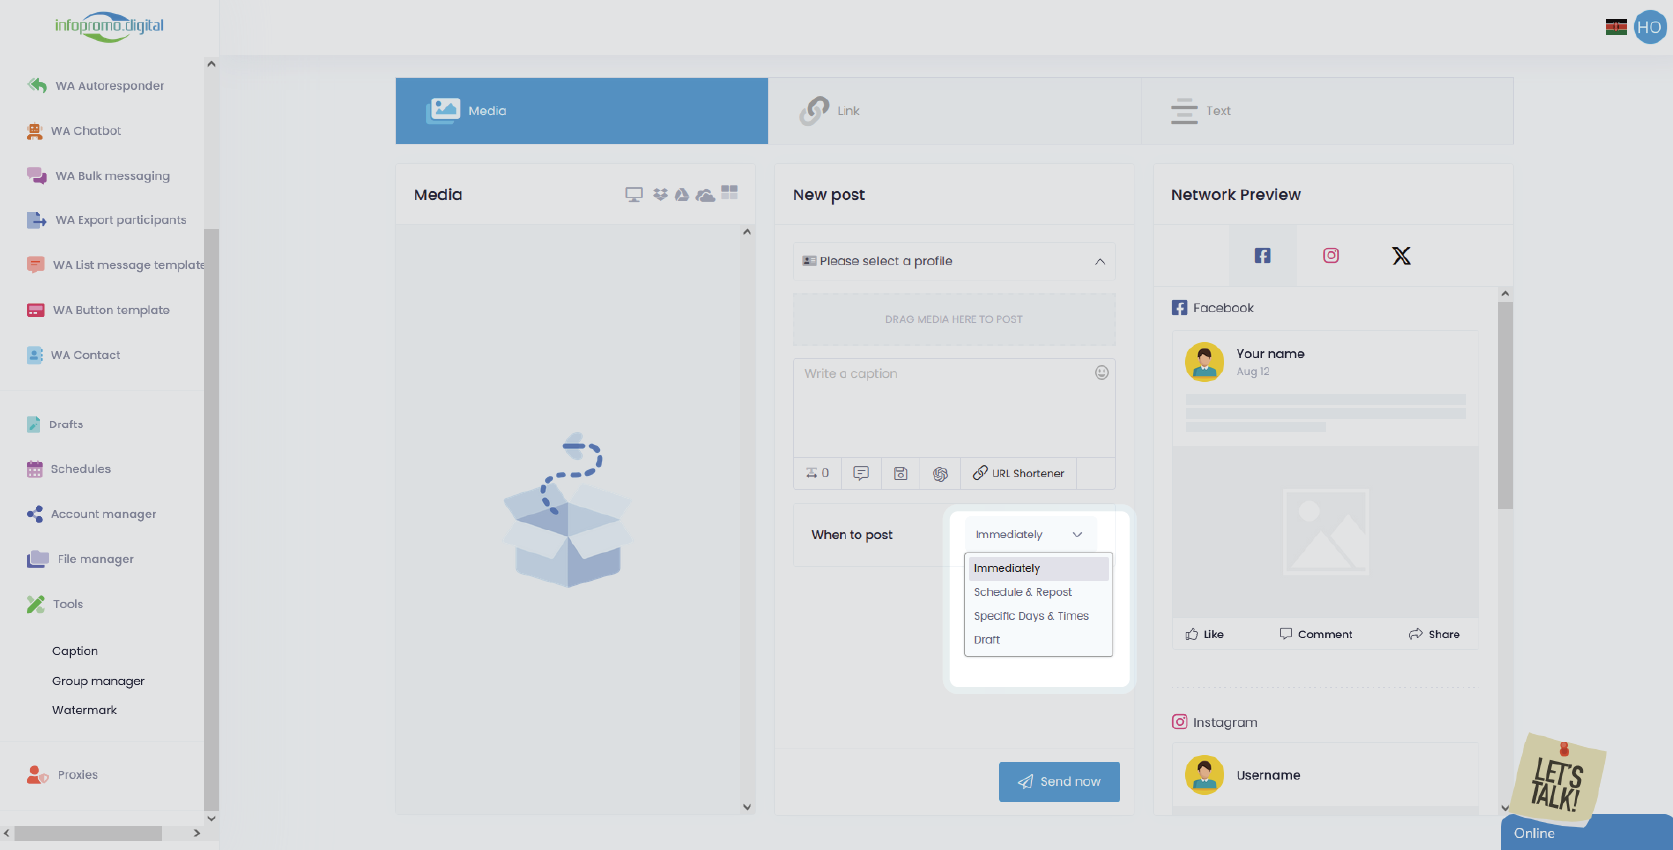
– Click on the drop-down list next to ‘When to post‘ and you will get these options;
• Immediately
• Schedule & Repost
• Specific days and times
• Draft (This option will send your content to draft, and you can later view your draft posts when you click on the “Draft” tab in the dashboard.
—
To view your content calendar
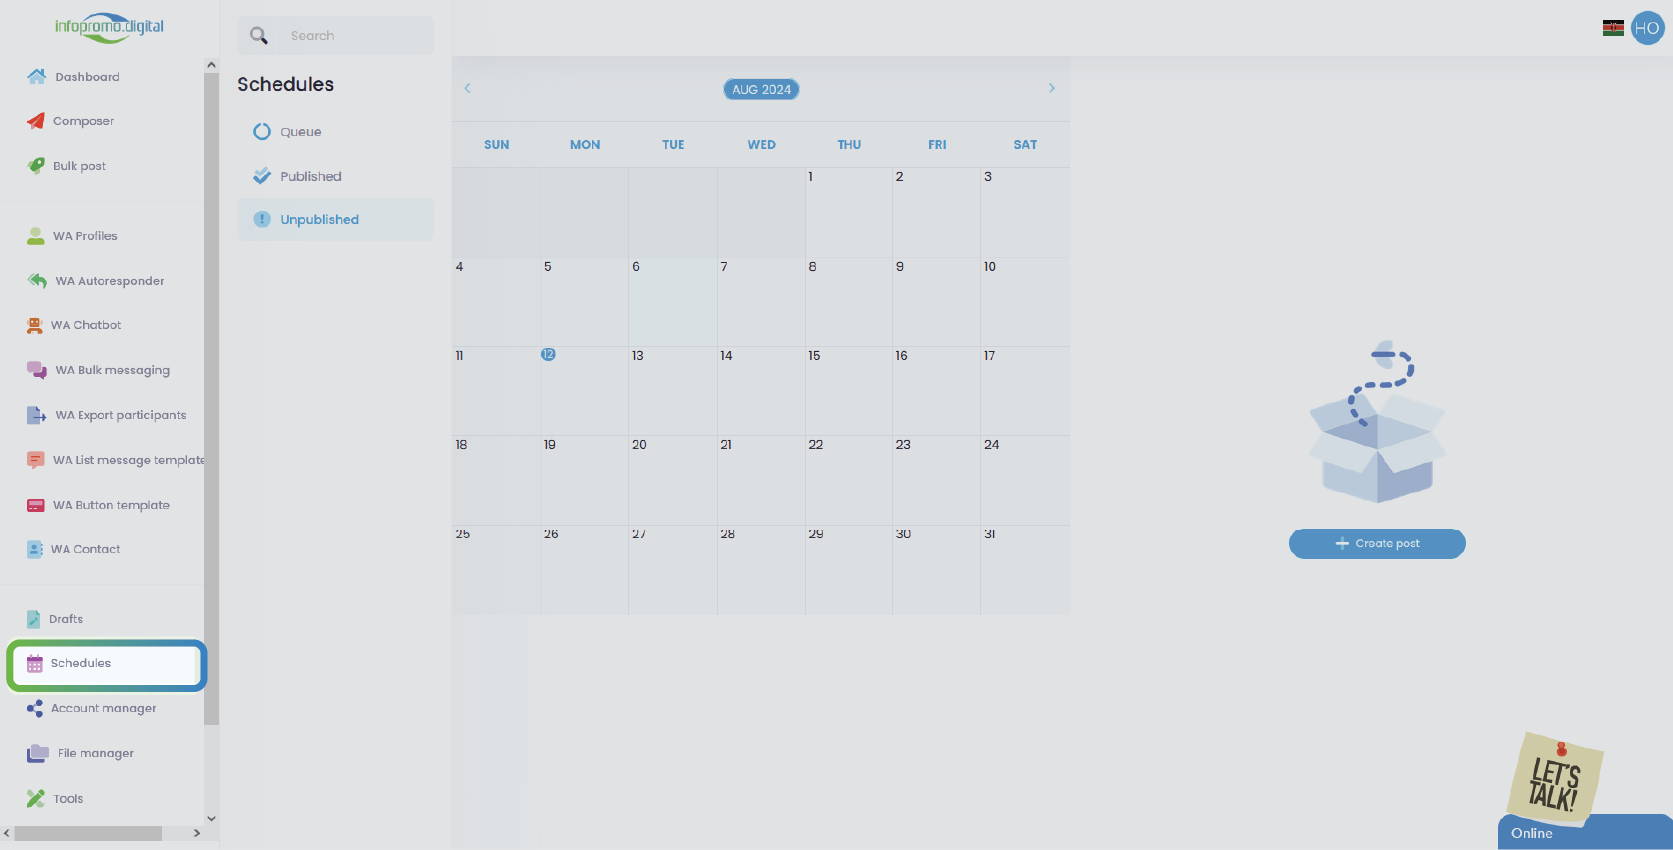
– Navigate to the “Schedule” section of the panel and click on it.
– Click on ‘Queue‘ to view the queued posts, ‘Published‘ to see the already published posts, and ‘Unpublished‘ to see posts that were not published.
– You can click on the “+Create Post” button to create a post. You will be directed to the ‘Composer’ section.
—
By following these steps, you can effectively manage your social media presence, ensuring consistent posting, active engagement, and data-driven decision-making. The Social Media Management Panel becomes a powerful tool for optimizing your brand’s online presence across multiple platforms.
[ The Infopromo Library ]
Stay Ahead With Social Media Expert Tips
From industry news to actionable strategies, our posts are designed to help you maximize your social media presence and drive engagement.

How to Create Engaging Content
Learn the art of crafting content that resonates with your audience and boosts engagement to seeing credible results.
Learn More
Automating Your Social Media
Explore the benefits of automation and how it can save you time and enhance your social media efforts.
Learn More

Top Social Media Trends of 2024
Stay updated with the latest trends and how to leverage them for your business success in and improve your ROI.
Learn More
