Import & Export Contacts
Seamlessly manage your contact lists by importing contacts from CSV files or exporting your existing contacts for backup or analysis. This feature ensures your contact data is always up-to-date and easily accessible for your SMS/WhatsApp campaigns.
SMS
Email
WhatsApp
Social Media Management Panel
Importing Contacts
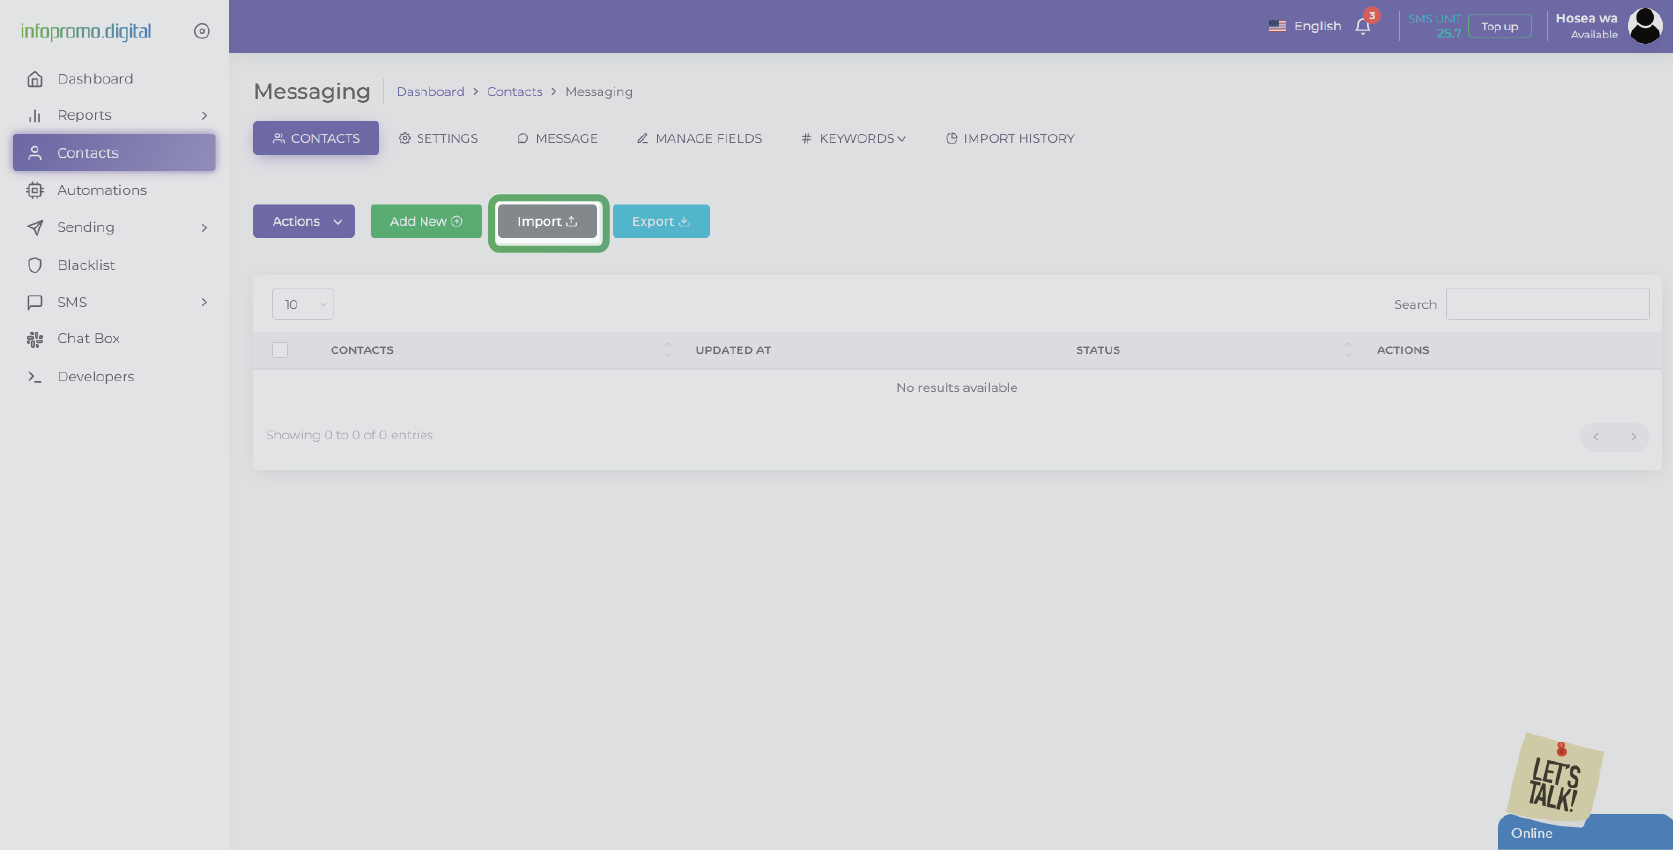
Step 1: Navigate to the “Contacts” section on the dashboard menu.
Click on the specific contact group/ list you need to add several contacts at once (import) and on the first tab named ‘Contacts’, you will click on the “Import” option
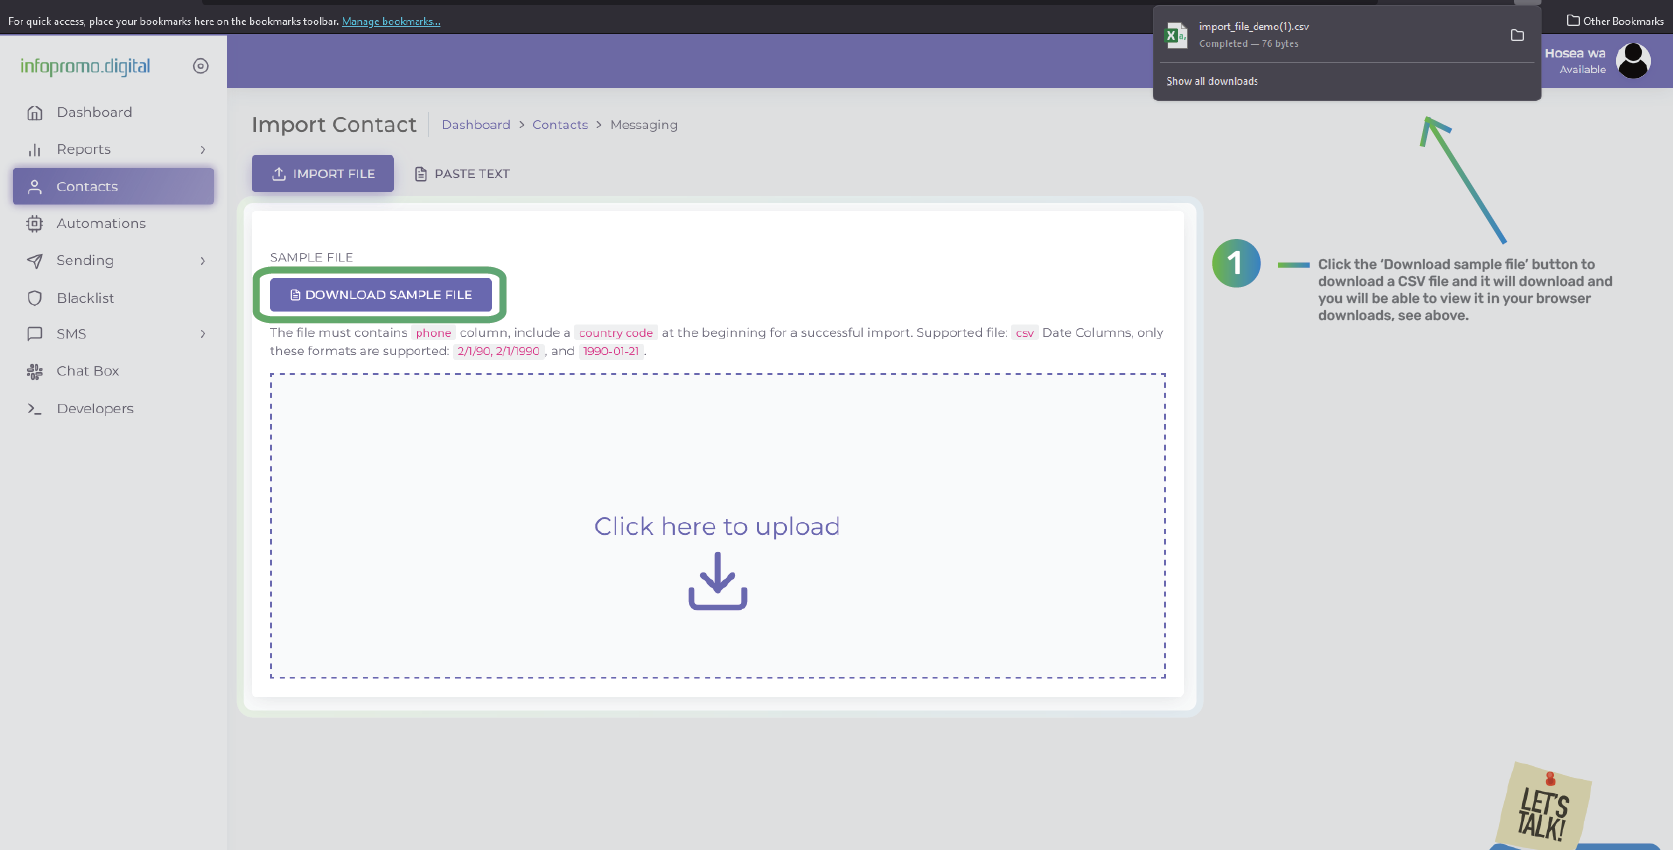
Step 2: Download a sample file
Click the ‘Download sample file’ button to download a CSV file and it will download and you will be able to view it in your browser downloads.
Click here to know how to add contacts in a CSV file
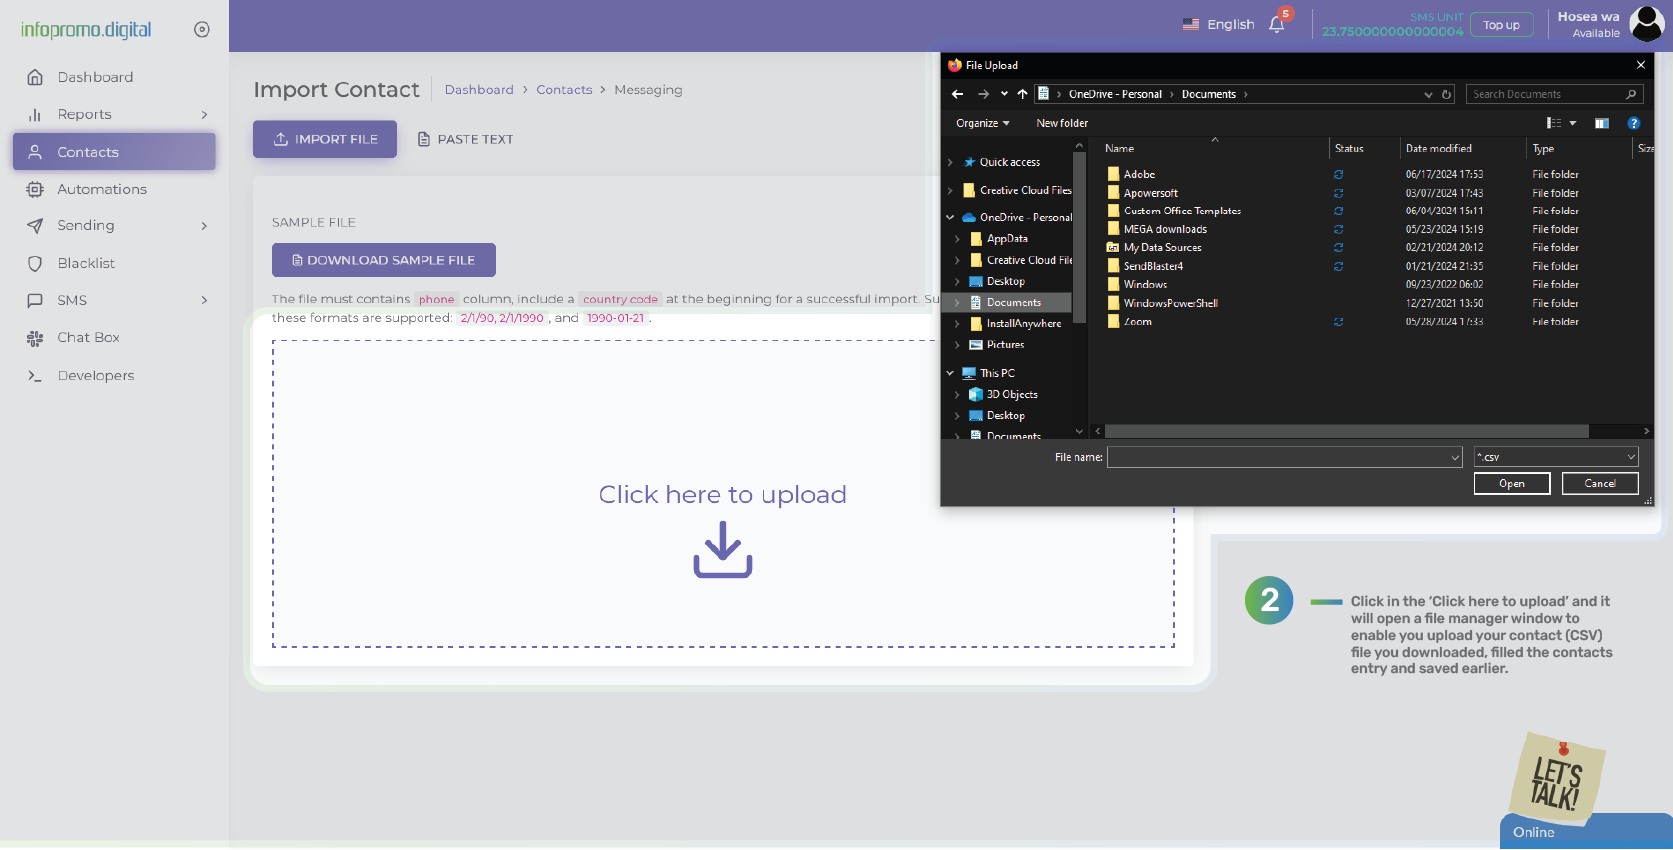
Step 3: Upload contacts.
Click in the ‘Click here to upload’ section and it will open a file manager window to enable you to select & upload the contact (CSV) file you downloaded, filled the contacts entry, and saved earlier.
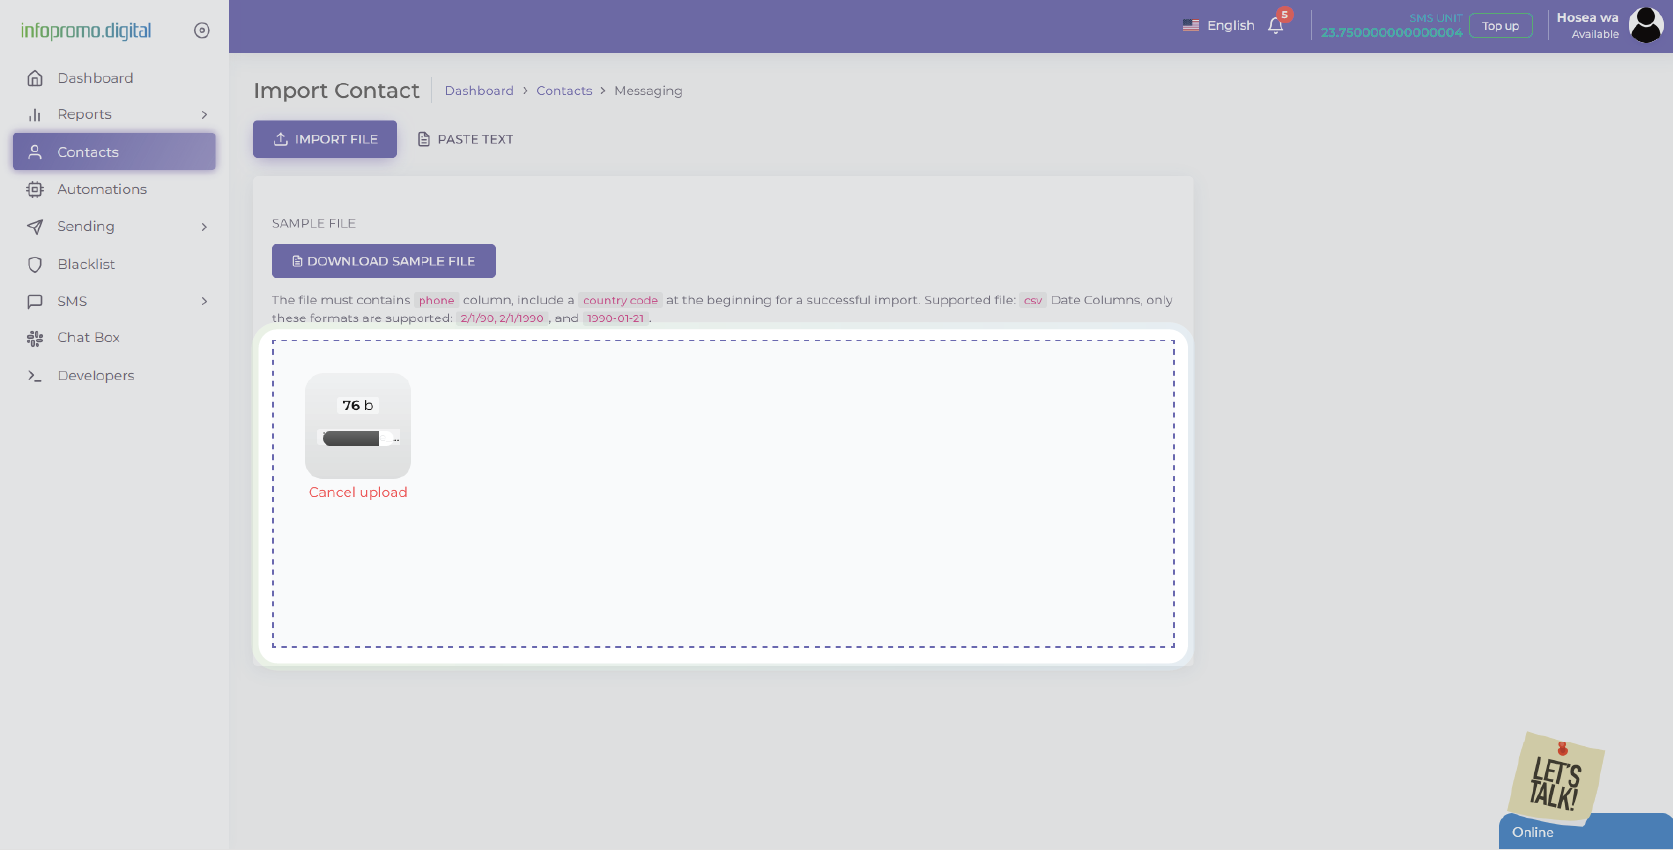
After CSV file uploading, it will display the uploaded file in the ‘Click here to upload’ section in an uploading state.
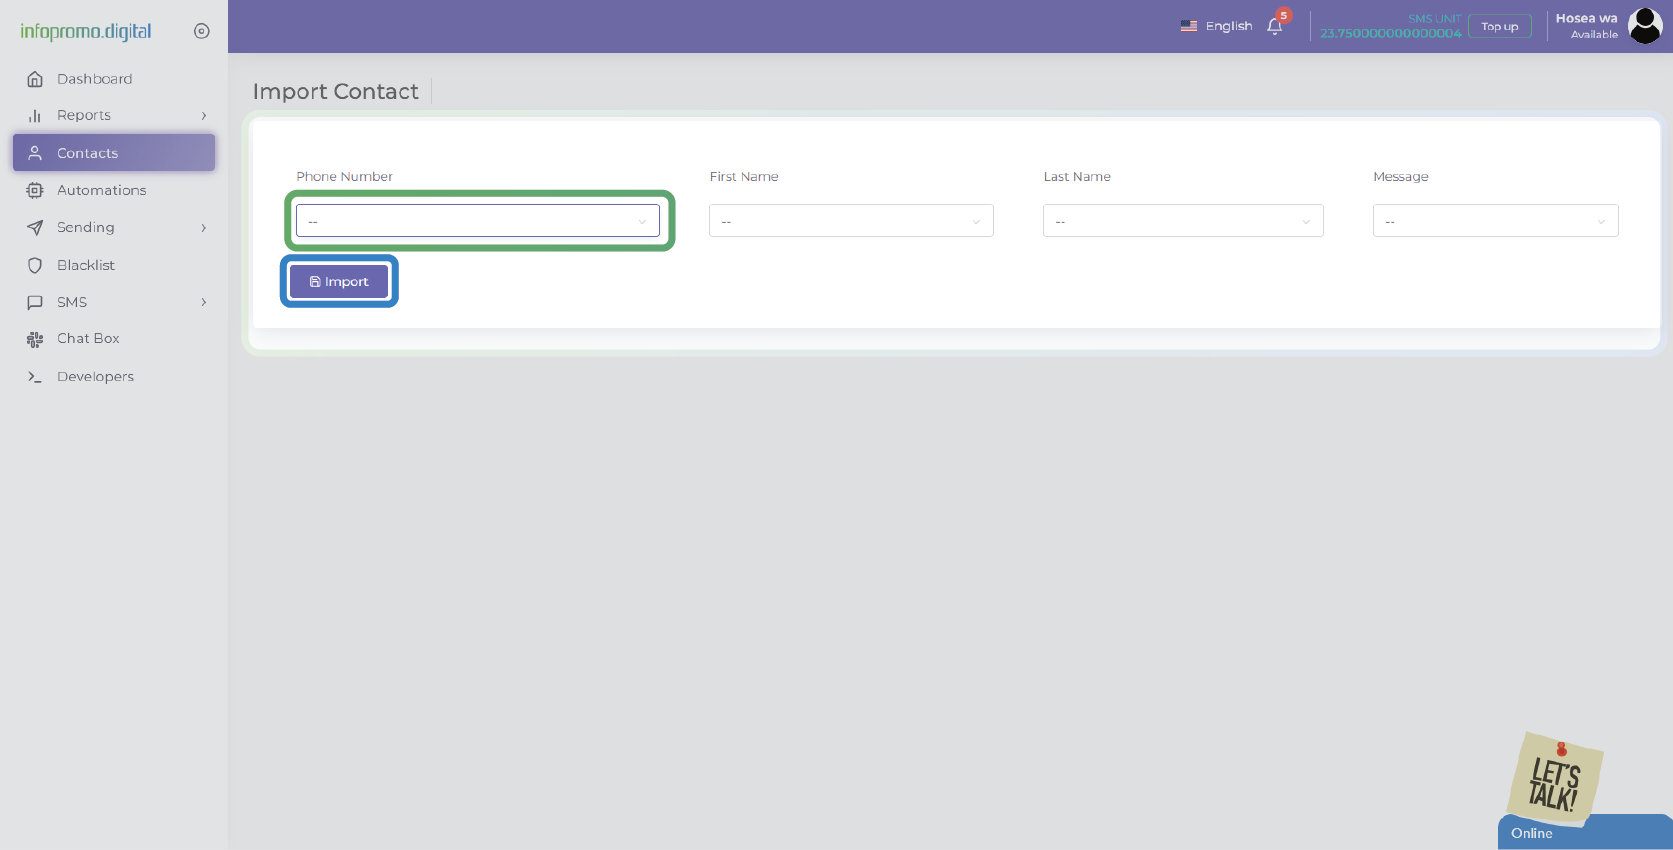
Immediately after the uploaded file has finished uploading, it will redirect you to a ‘Import Contact’ page, to prompt you to select the particular field of choice.
Under the ‘Phone number‘ column, you are required (MUST) to select the ‘Phone’ option in the drop-down list.
In the subsequent fields; first name, last name, message, or whichever was chosen earlier in the group settings (click to see how to set it here), and if you included the field information in your CSV list, you can optionally choose to select them. If you added a first name in your CSV list, then under the first name drop-down list after selection, you will select ‘first name’. Likewise, if you added a second name in your CSV list, then under the second name drop-down list after selection, you will select the ‘second name’ option and likewise to other fields.
The contacts will import with the fields you selected onto the SMS/WhatsApp platform but remember, the ‘Phone Number’ option is to be MANDATORY selected
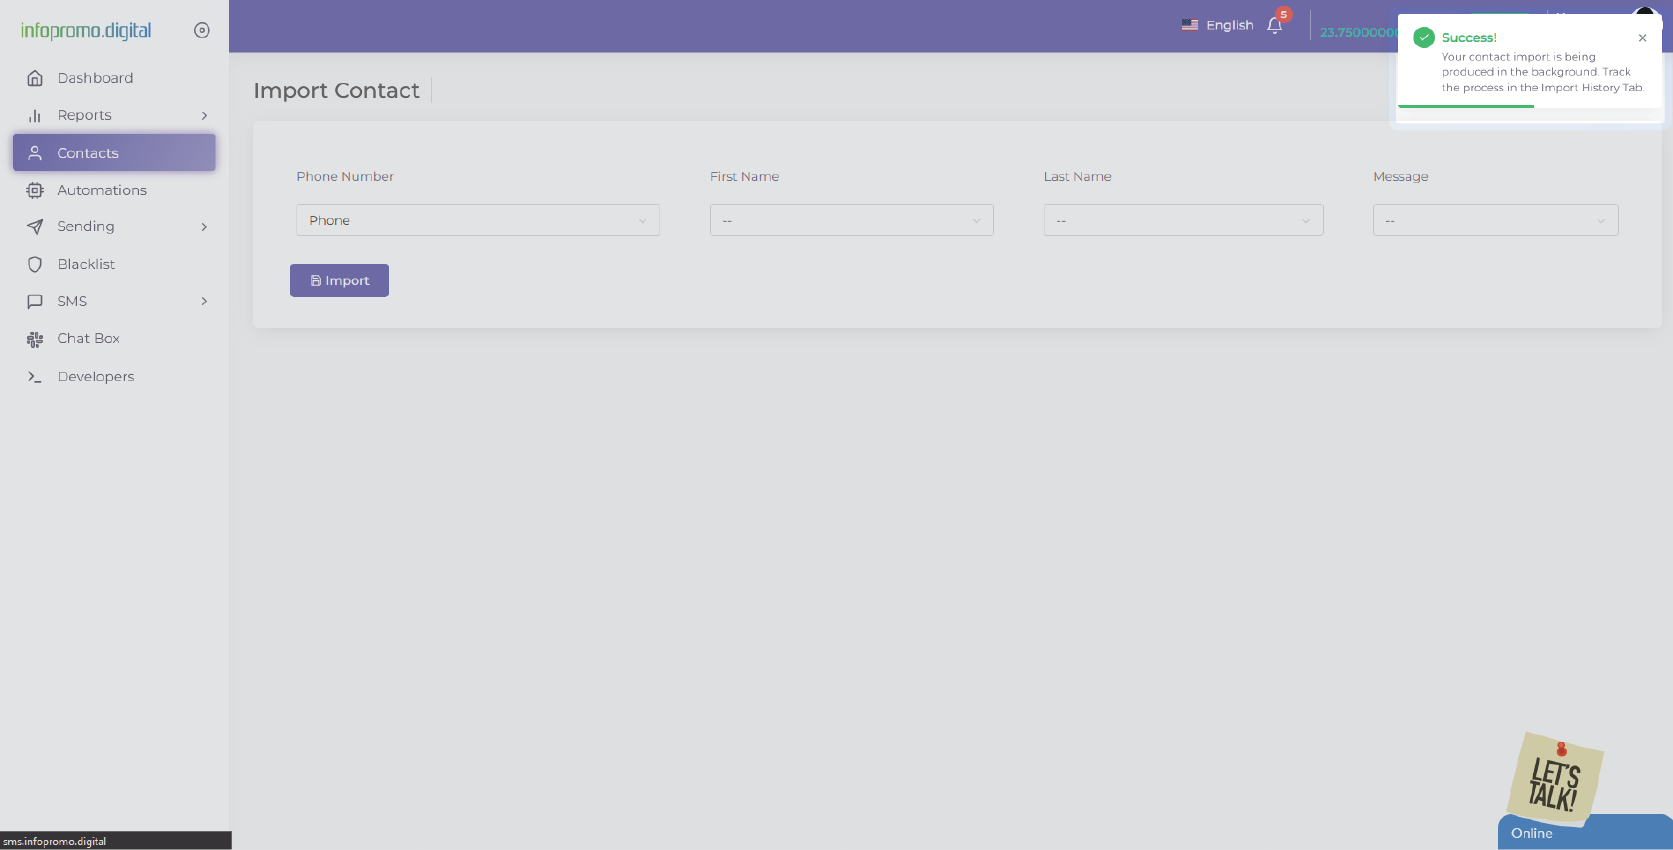
Step 3: Successful contact importing.
After the fields have been selected, you will click on the ‘Import’ button and a success message will be displayed on the top left corner of your account dashboard.
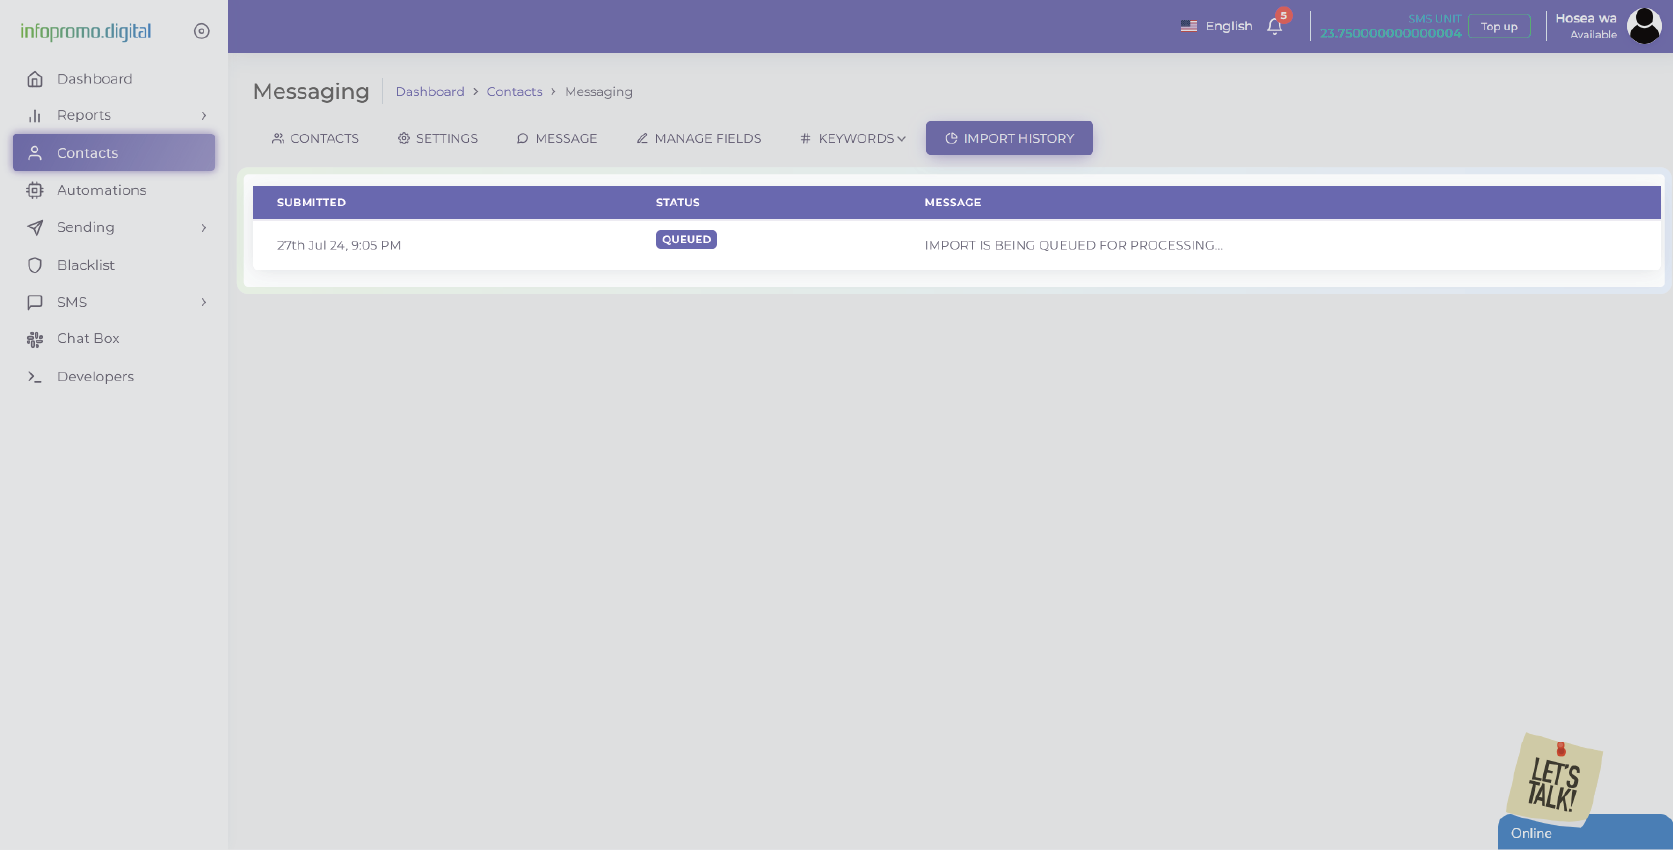
Step 4: Import Progress.
You will be redirected to the ‘Import History’ tab to view the progress of your mass contact upload (uploading using a CSV file). It should take a few seconds and you should view the added contacts in the ‘Contacts’ tab
Exporting Contacts
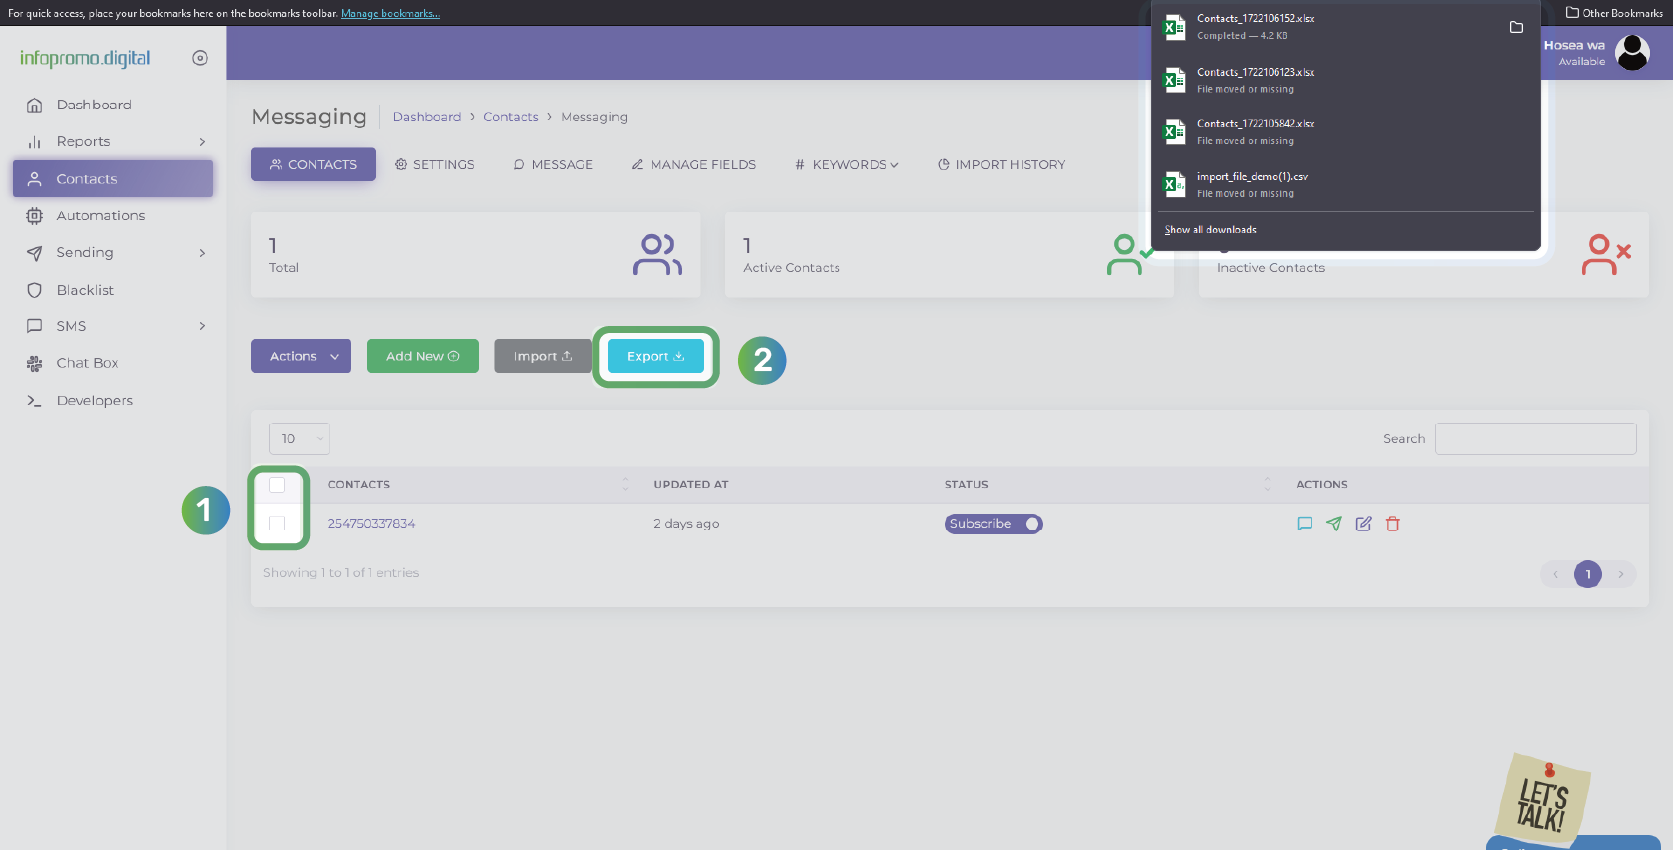
Step 1: Select contacts to export.
In the “Contacts” section, select the contacts or contact lists you want to export. You can select individual contacts or entire lists.
Step 2: Click the “Export” button.
Find and click the “Export” button. This will export a CSV file and you will see it in the browser download section.
[ The Infopromo Library ]
Unlocking the Potential of Bulk SMS
Learn practical tips, best practices, and real-world examples to leverage bulk SMS effectively and drive results.
A Comprehensive Guide To Bulk SMS
Delve into the world of bulk SMS and uncover its potential as a powerful marketing tool; guide to navigating our portal.
Learn More

Crafting Bulk SMS Campaigns
Explore proven strategies for crafting compelling bulk SMS campaigns that resonate with your audience.
Learn More
Legal And Ethical Bulk SMS Practices
Stay informed about bulk SMS regulations and compliance standards to protect your brand reputation and maintain customer trust.
Learn More


