Getting Started with SMS
Begin your SMS marketing journey with ease. Learn the essentials of SMS marketing, set up your account, and understand the crucial regulations to ensure compliance. Follow our step-by-step guides to get started quickly and effectively.
Note that we use a similar platform for SMS & WhatsApp since its an integrated platform, depending on your choice of service.
SMS
Email
WhatsApp
Social Media Management Panel
Creating an Account
Step 1: Navigating the sign-up page of the SMS platform.
Begin by opening your web browser navigating to the sign-up page of the SMS platform and clicking on register. This is where you will start the registration process to create your account. Click here to register
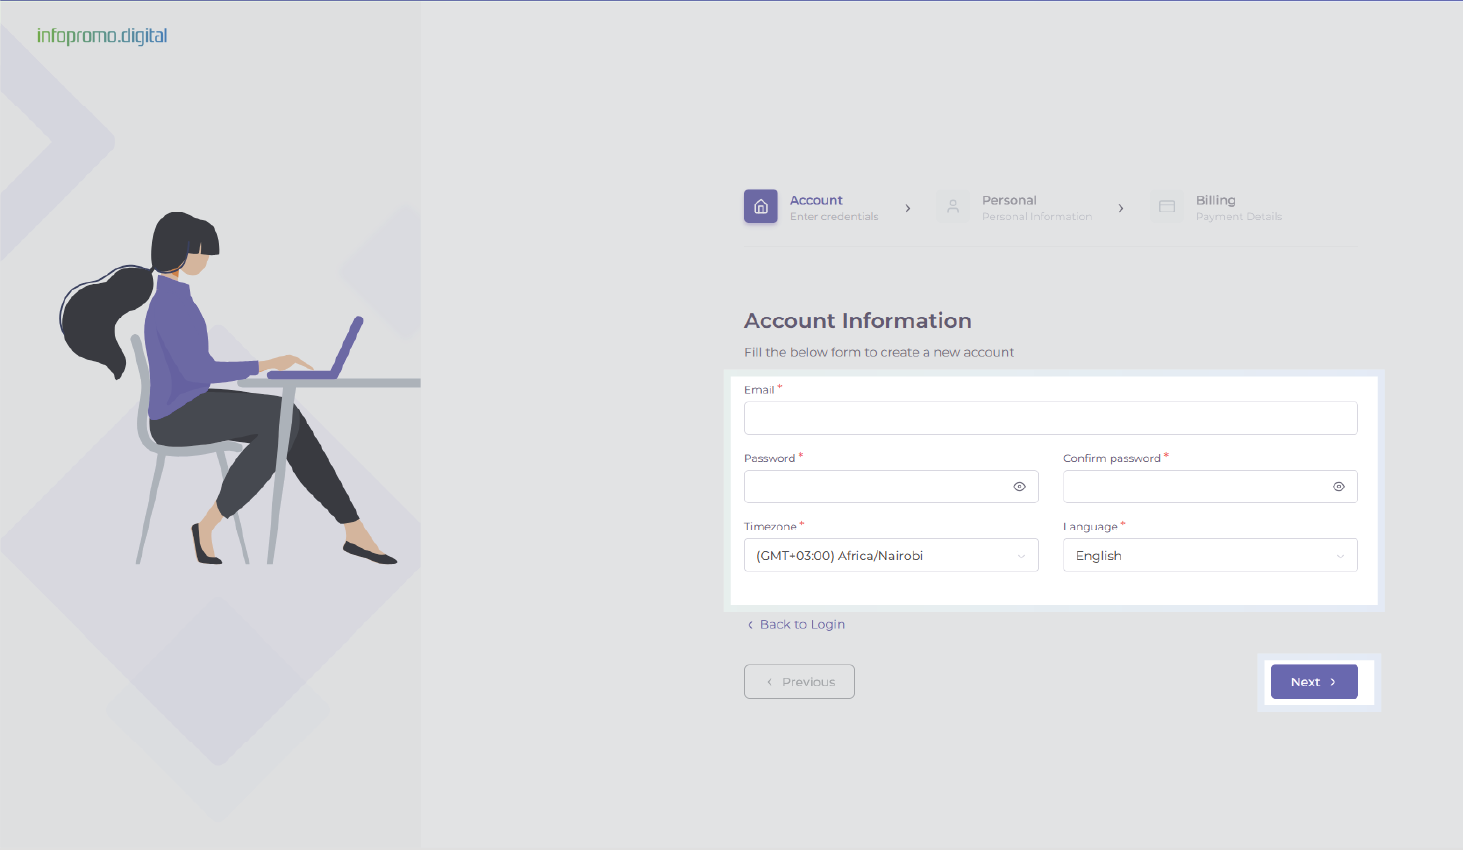
Step 2: Fill out the registration form with the required details (name, email, password).
A) On the sign-up page, you will see a registration form. Enter your email address, and create a secure password. Ensure that your password meets minimum security requirements (a combination of uppercase and lowercase of alphabets, numbers, and special characters), confirm your password by re-entering, set your time zone and language, and click next to proceed with registration.
B) On the next page, enter your personal information; first & last name, phone number, postcode, address, company, city, and country, and click next.
NB: When keying in your phone number, MANDATORILY, add your country code followed by your phone number (i.e For Kenya: +254202337834 and NOT 0202337834)
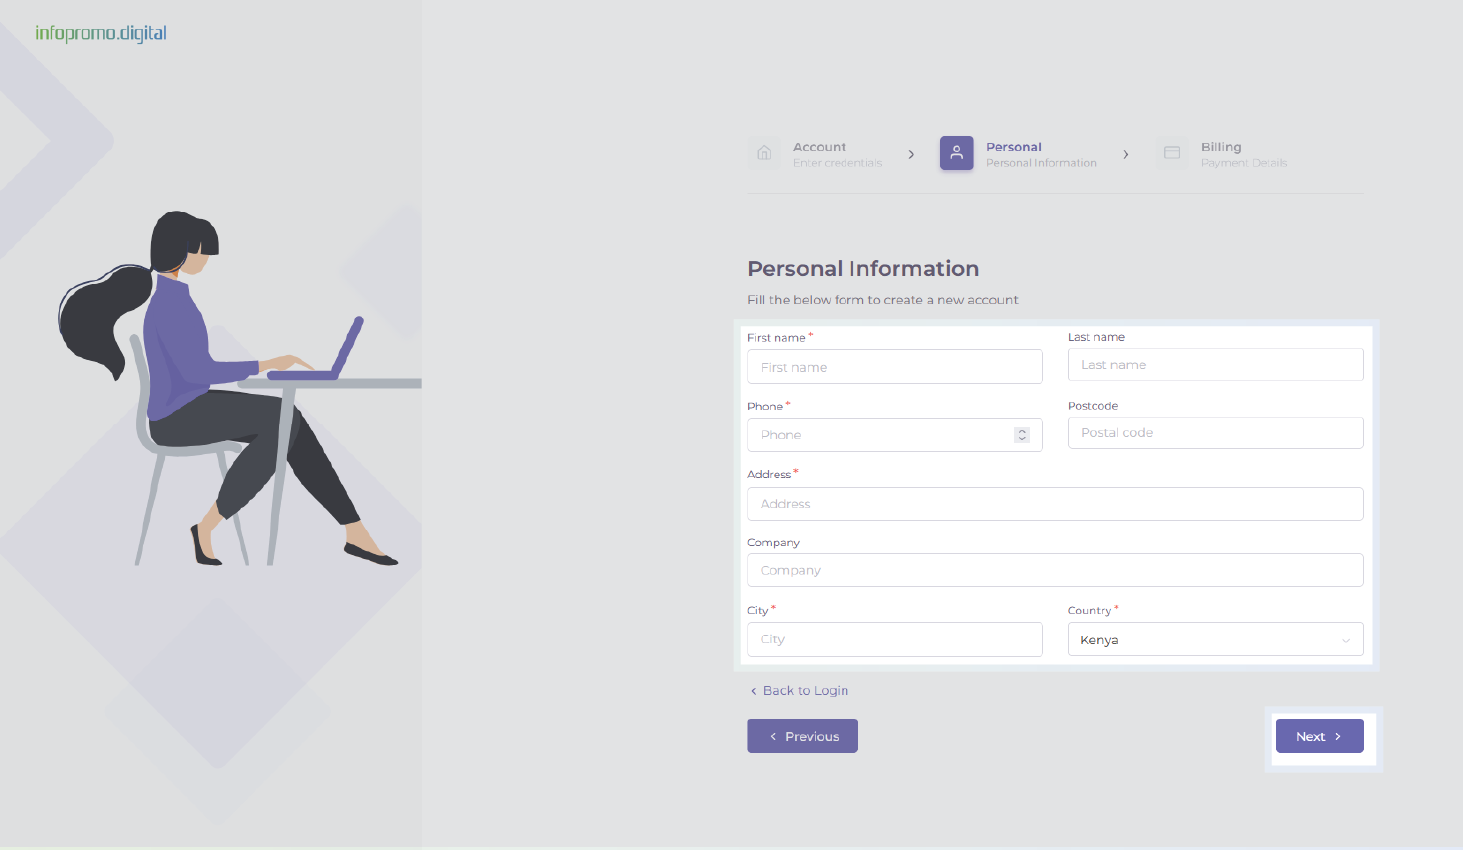
Step 3: Purchase starter SMS credits
After clicking next on step 2 B), you will be directed to the billing section, here you will be required to click on the plan named: Start with Ksh. 5 / $0.038 for 10 SMS, proceed below and click on the payment option radio button named: Mpesa, Credit & Debit cards payment option – Paystacks Redirect and click Submit
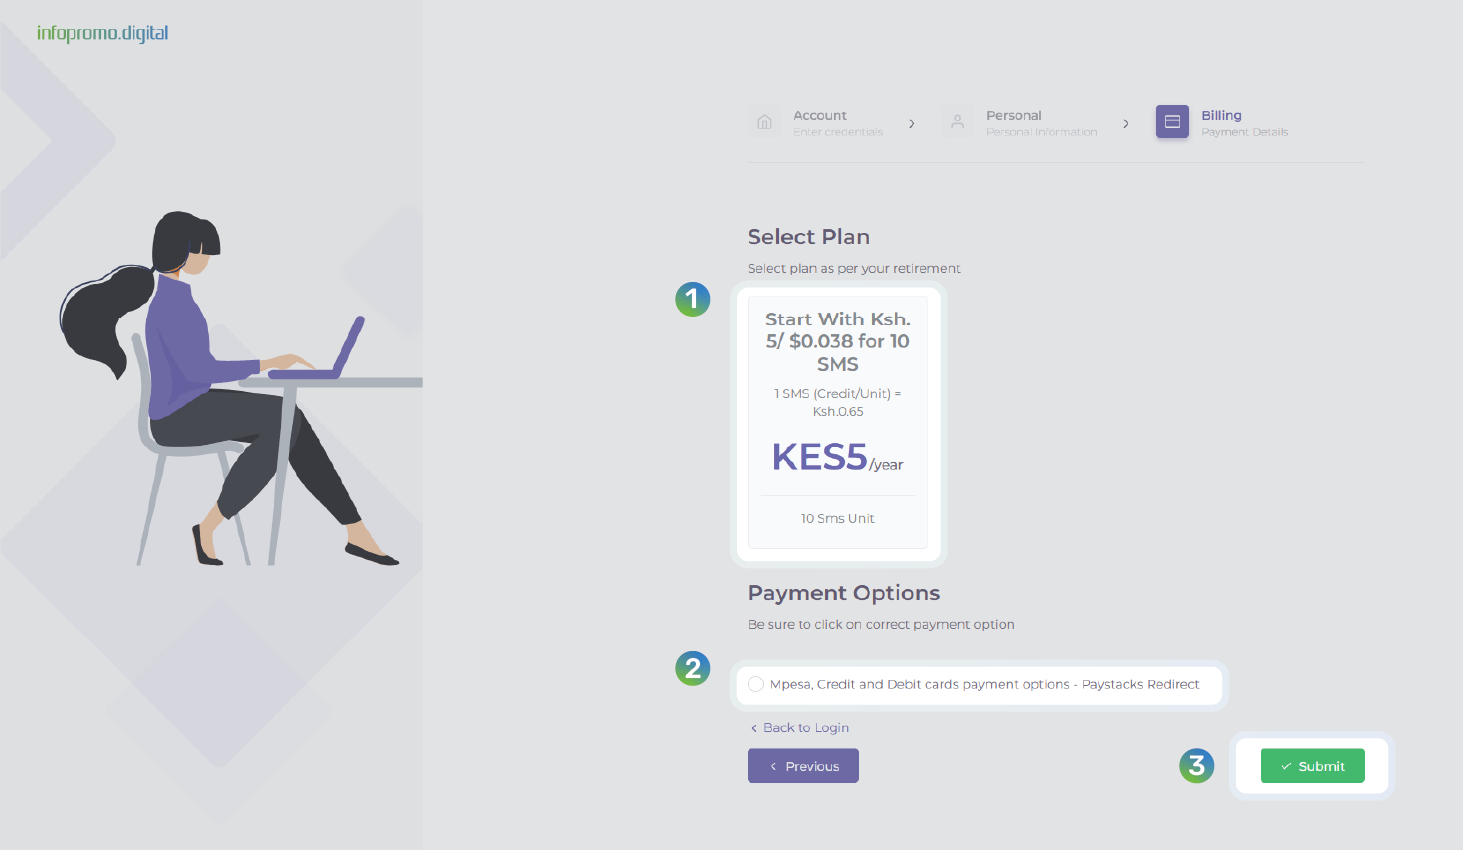
Step 4: Payment & checkout.
You will be redirected to the Paystack payment gateway interface where you will be required to checkout using Mpesa, Apple Pay, Airtel Money, or the credit card of your choice. You will click on Pay then after successful payment, you will see Payment Successful then automatically be redirected to your account dashboard. You will receive a payment receipt from Paystacks in your email used to earlier register.
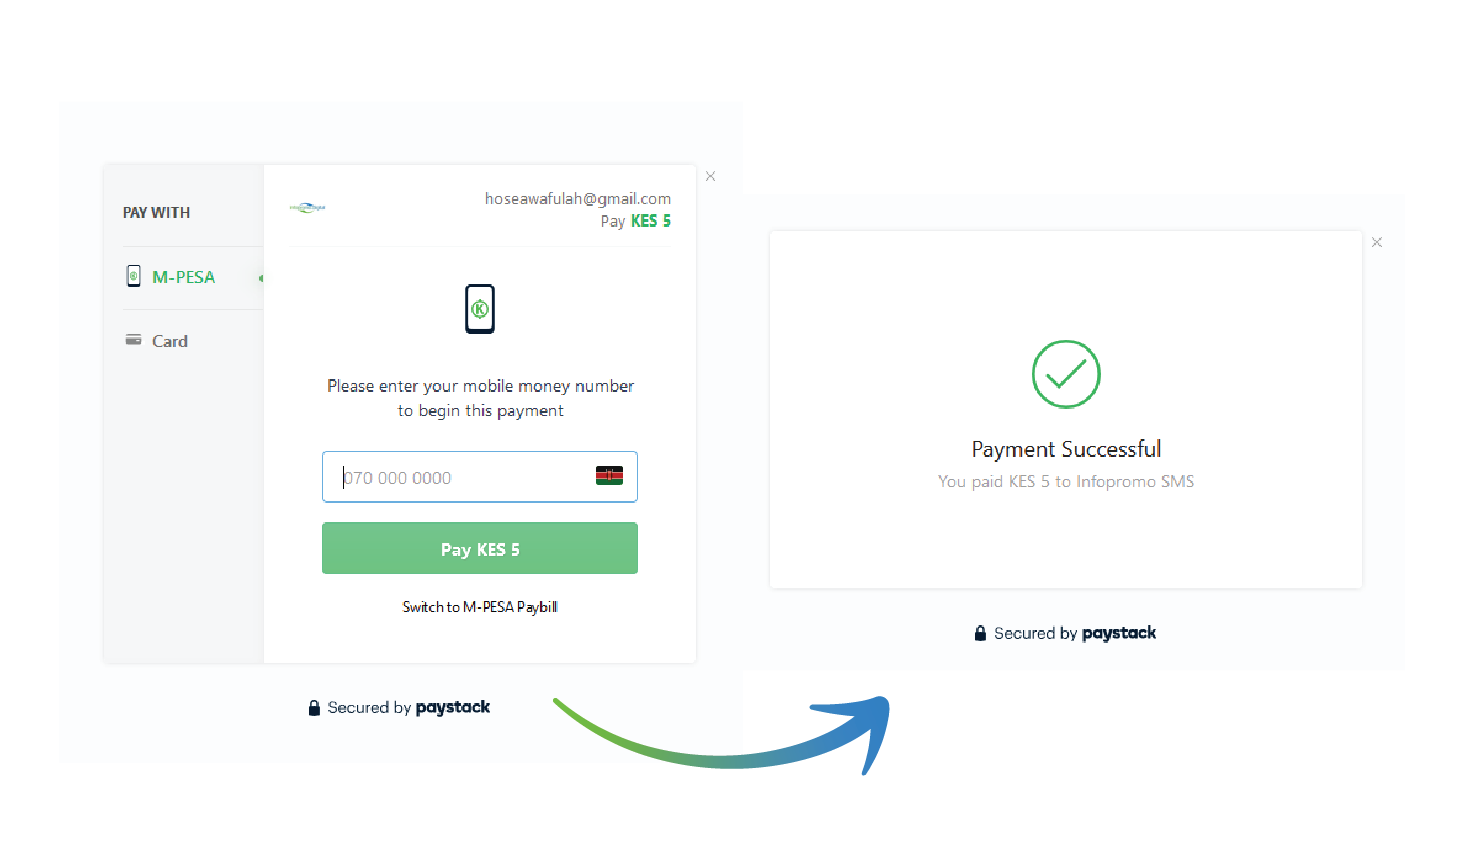
Happy SMSing!!
Navigating the Dashboard
Step 1: Main dashboard layout.
Upon logging in, you will be greeted with the main dashboard. Take a moment to look around and get a feel for the layout and navigation.
Step 2: Frequently used dashboard sections
On the dashboard, locate the key sections that you will use frequently. These typically include “Reports,” “Contacts,” “Sending,” and “SMS,”.Each section serves a specific purpose.
Step 3: Dashboard section’s purpose and functionality.
Click on each section to explore its functionality. For example, “SMS” is where you will create, send, and manage your SMS campaigns, “Contacts” is where you will manage your contact lists, “Reports” is where you will track the performance of your campaigns, and “Sending” is where you will set SMS template.

Configuring Account Settings
Step 1: Manage profile
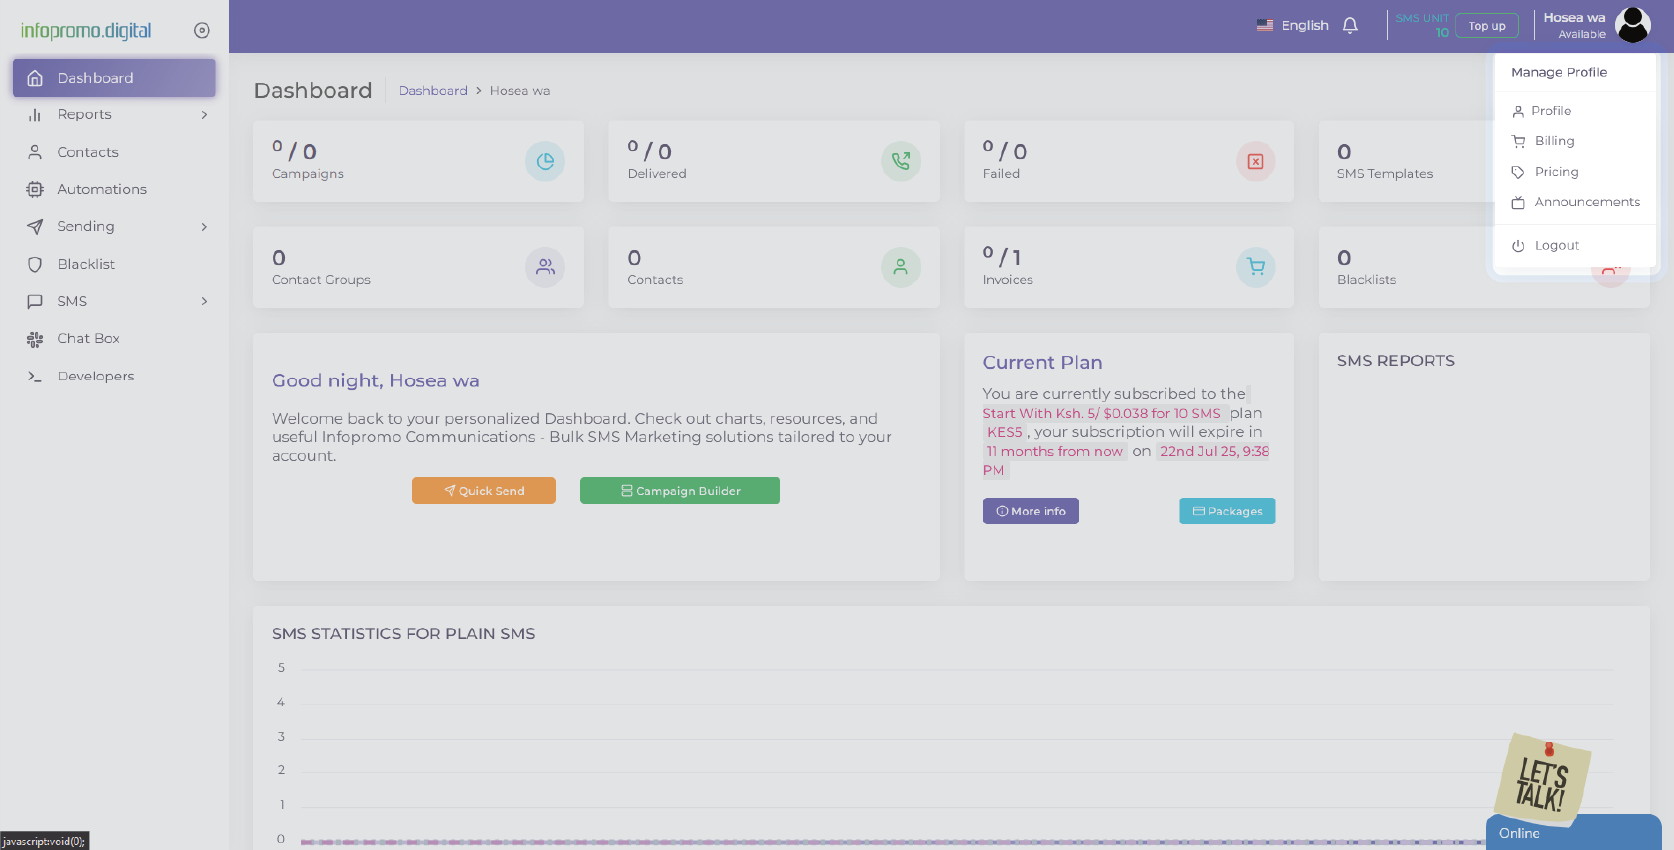
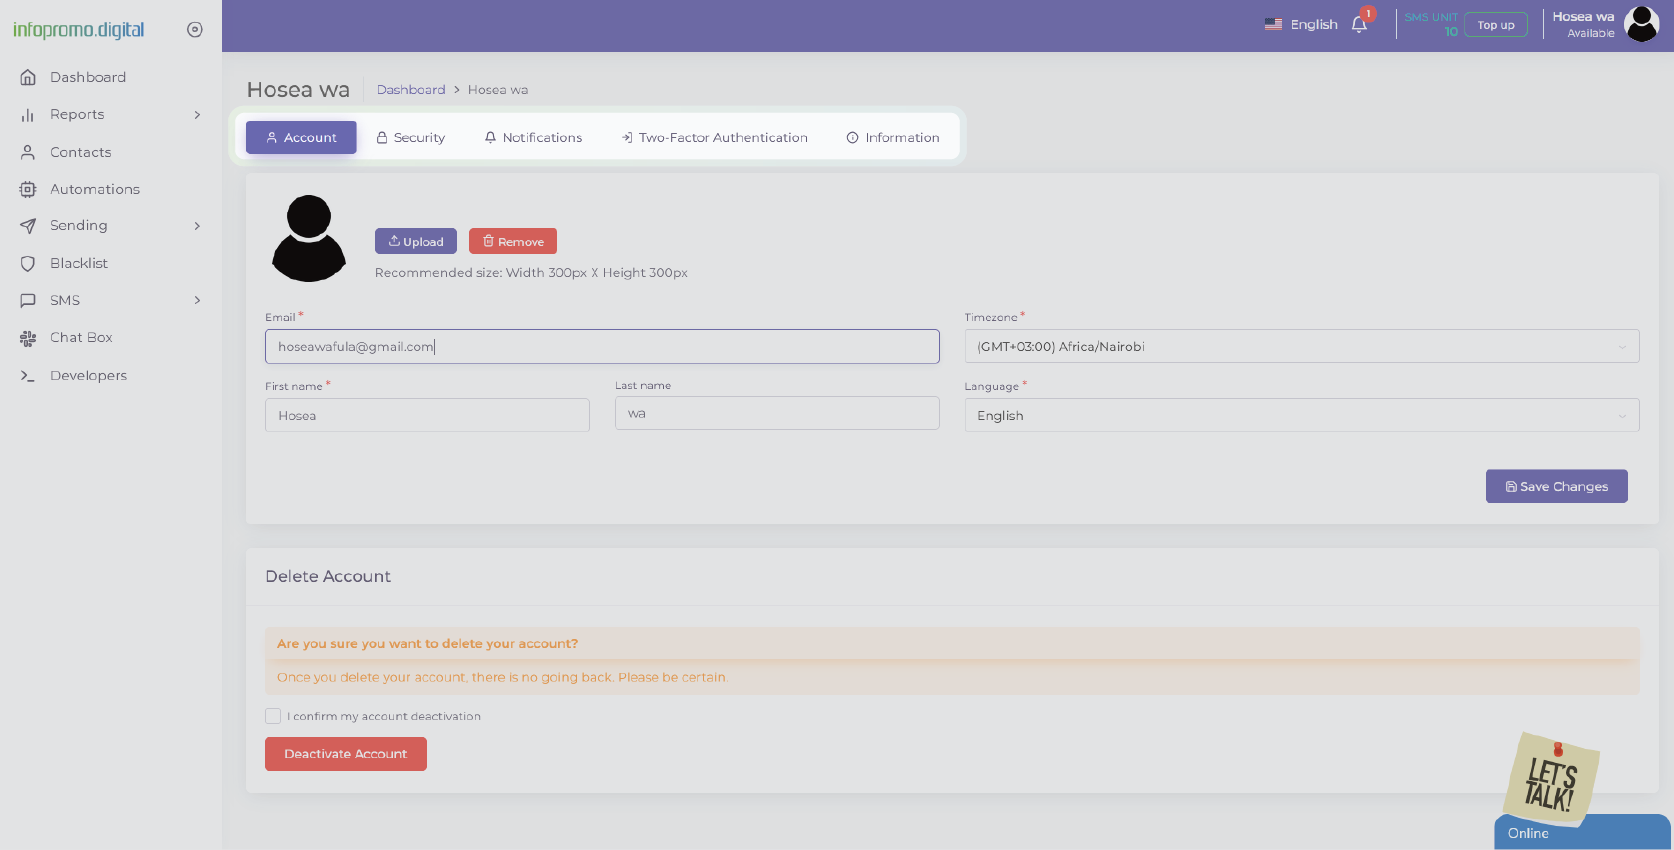
To access your account settings, click on the “Manage Profile” dropdown option located after you click the profile icon. This will take you to the settings page where you can configure various aspects of your account such as email, timezone, first and last name, and language on the first tab named; “Account“. You can also delete your account at the Delete Account option below.
You can change your password on the “Security“, check notifications in the “Notifications” tab, enable or disable 2FA in the “Two-Factor Authentication” and get an overview of your account information in the “Information” tab.
Step 2: Billing
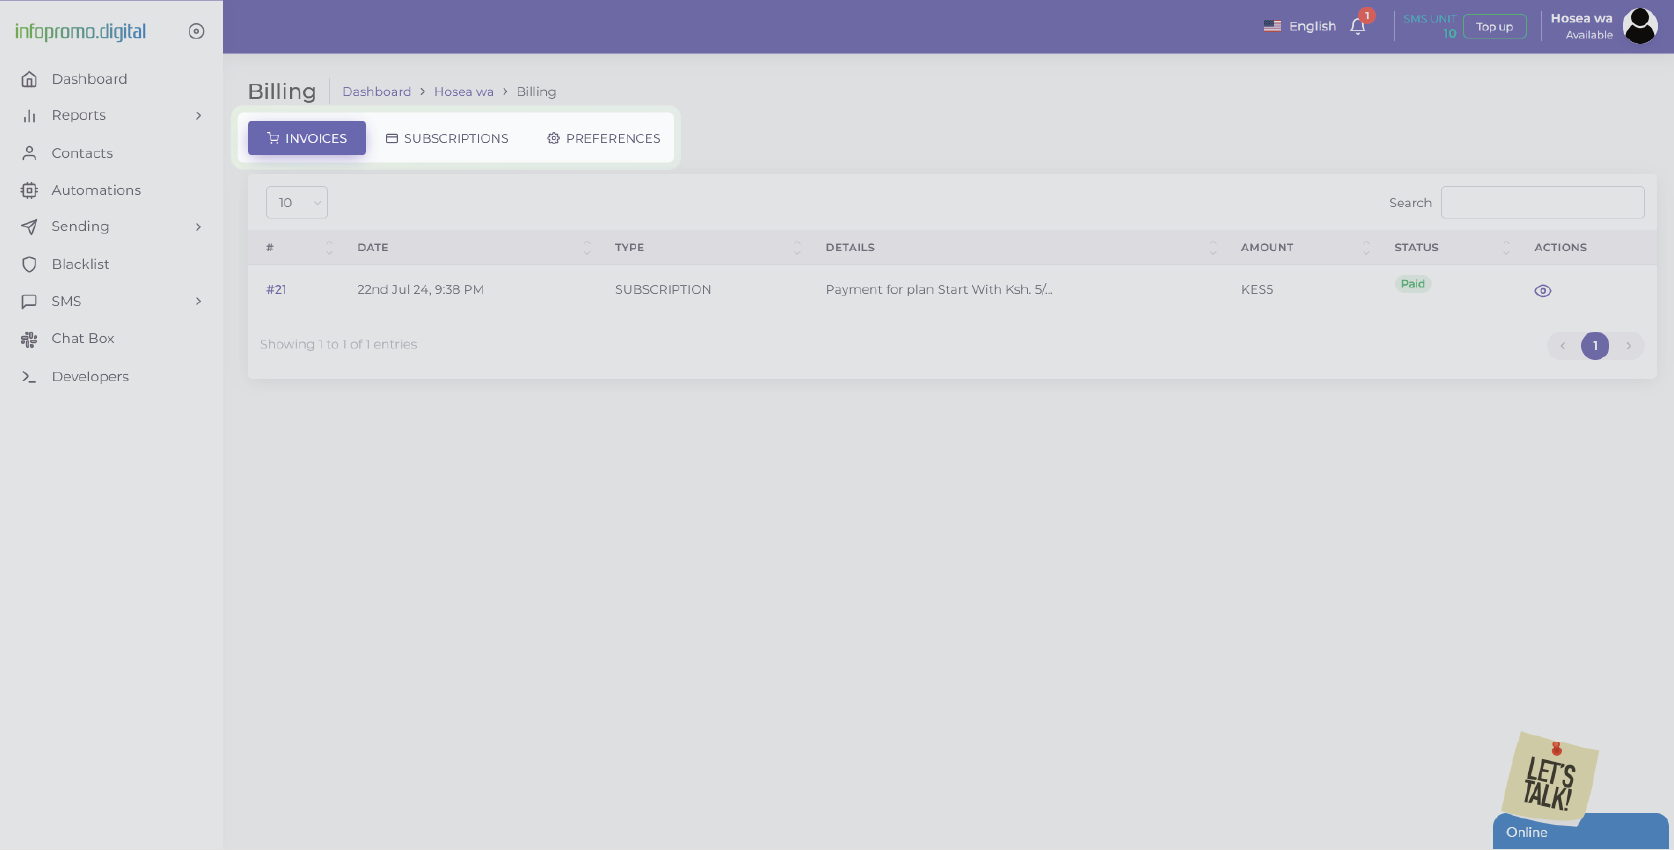
In the second drop-down option, “Billing“, you can find invoices paid (SMS units previously bought), find plan & transaction details in the “Subscription” tab, and set Credit warning (Send an email or SMS anytime your credit runs below a listed amount) and Subscription warning (Send an email or SMS anytime when your subscription going to be expired)
You can also view invoices and print the invoices.
Step 3: Pricing
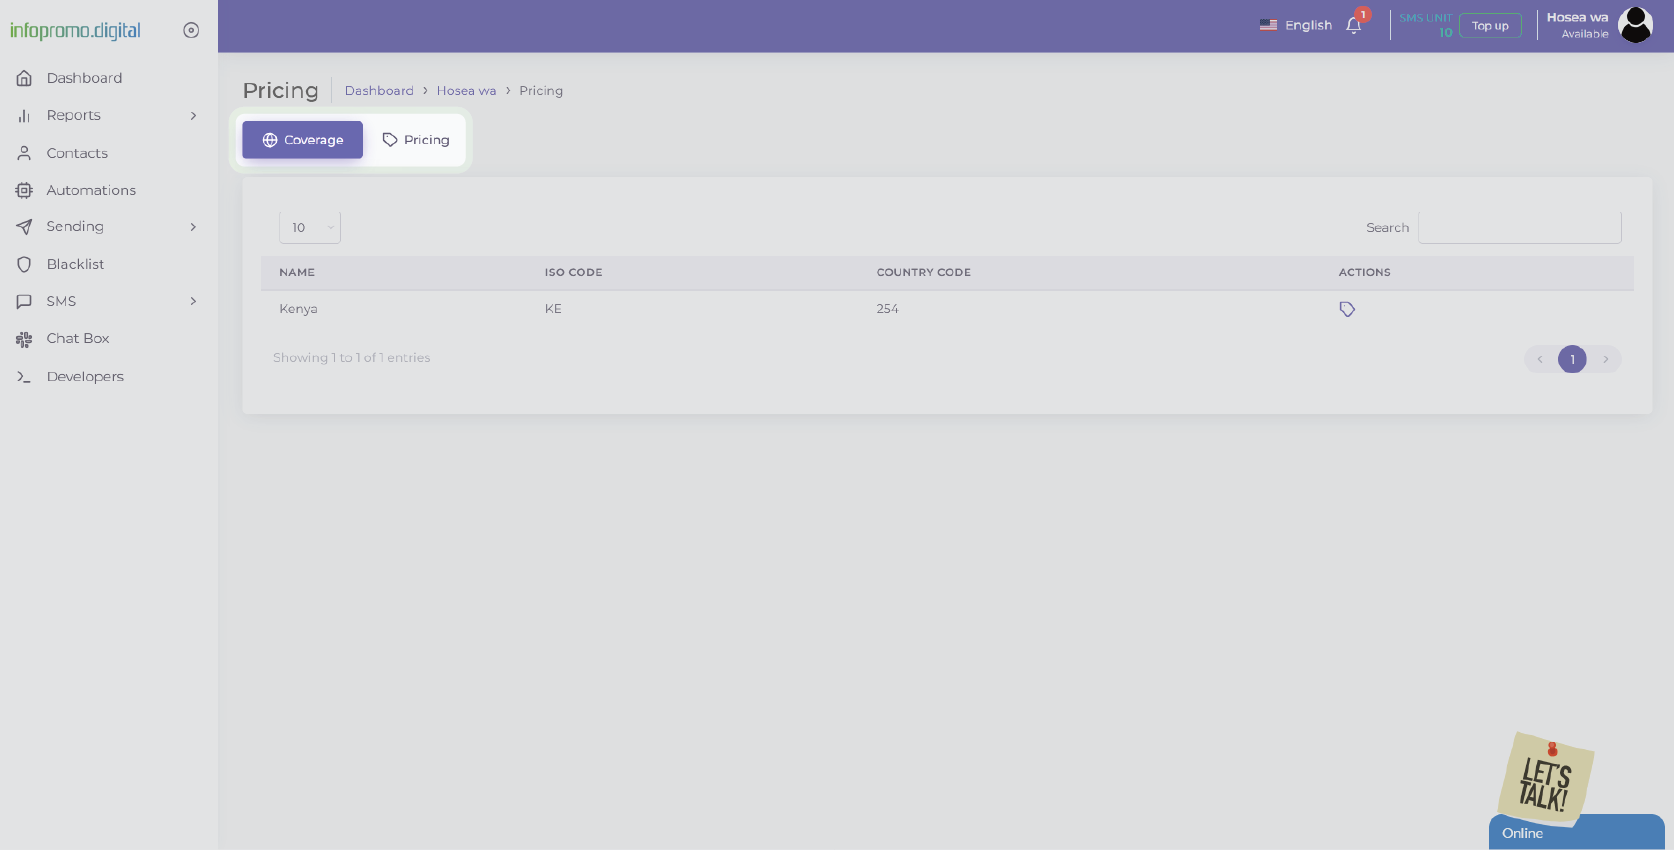
In the third drop-down option, “Pricing“, you can check the coverage of the country you can send SMS to in the “Coverage” tab since we have direct SMS routes to a large number of countries globally. Check coverage here.
In the “Pricing” tab, find pricing caps; recharge volume, per-unit price & number of units. If your country’s currency is not listed, check pricing here.
Step 4: Announcements
In the fourth drop-down option, “Announcements“, you can find any communication regarding your account updates. Alternatively find any notification in the bell icon next to SMS unit information, just next to the profile icon on the top right corner of the dashboard.
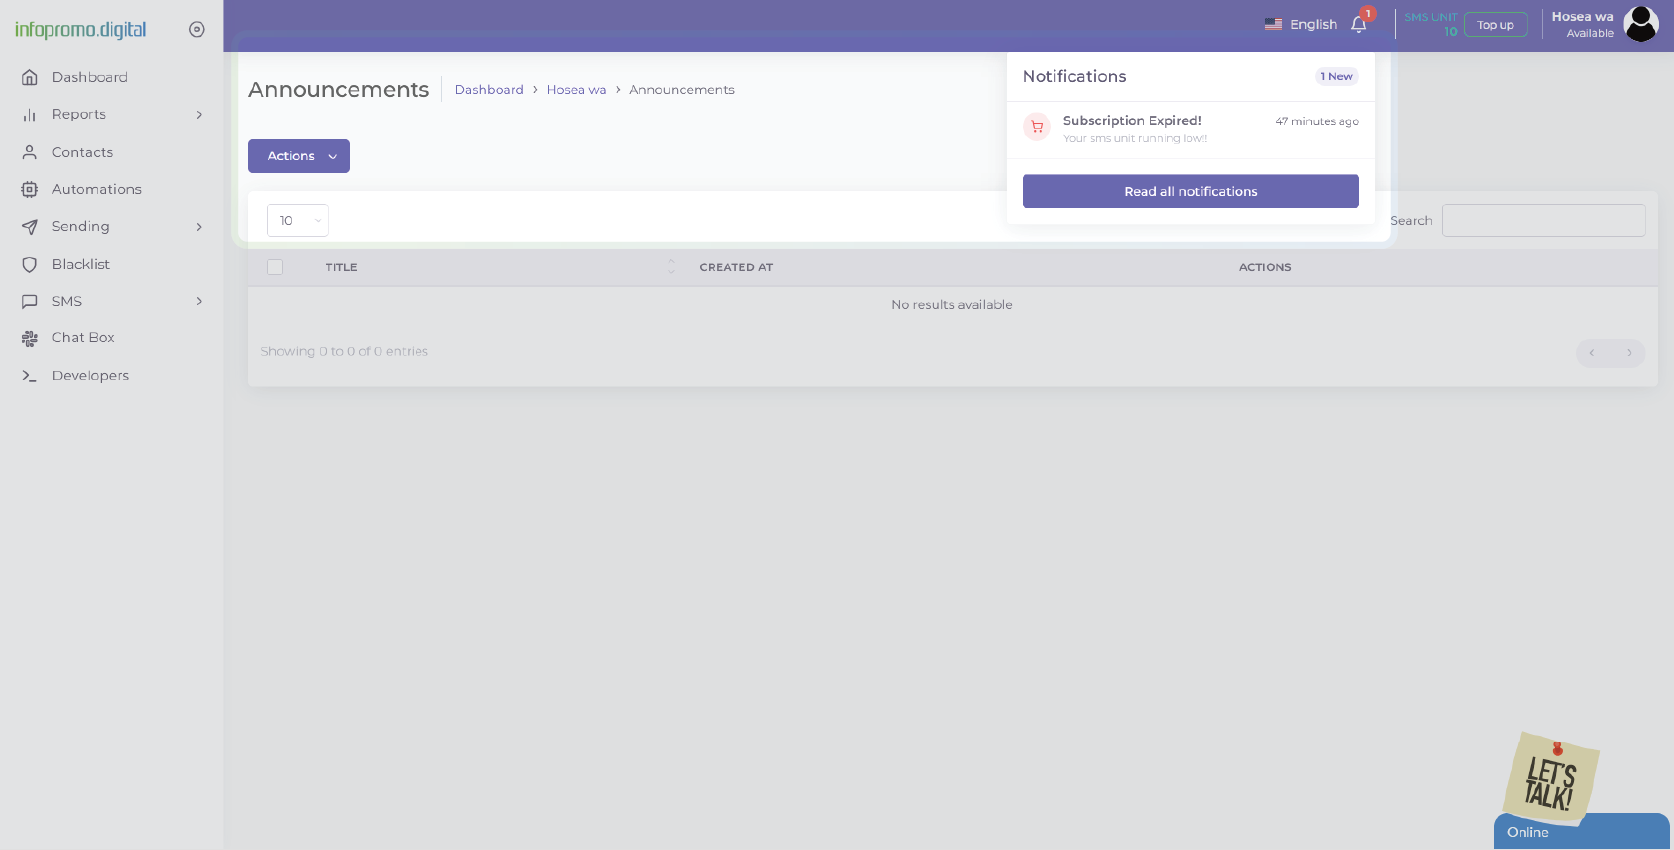
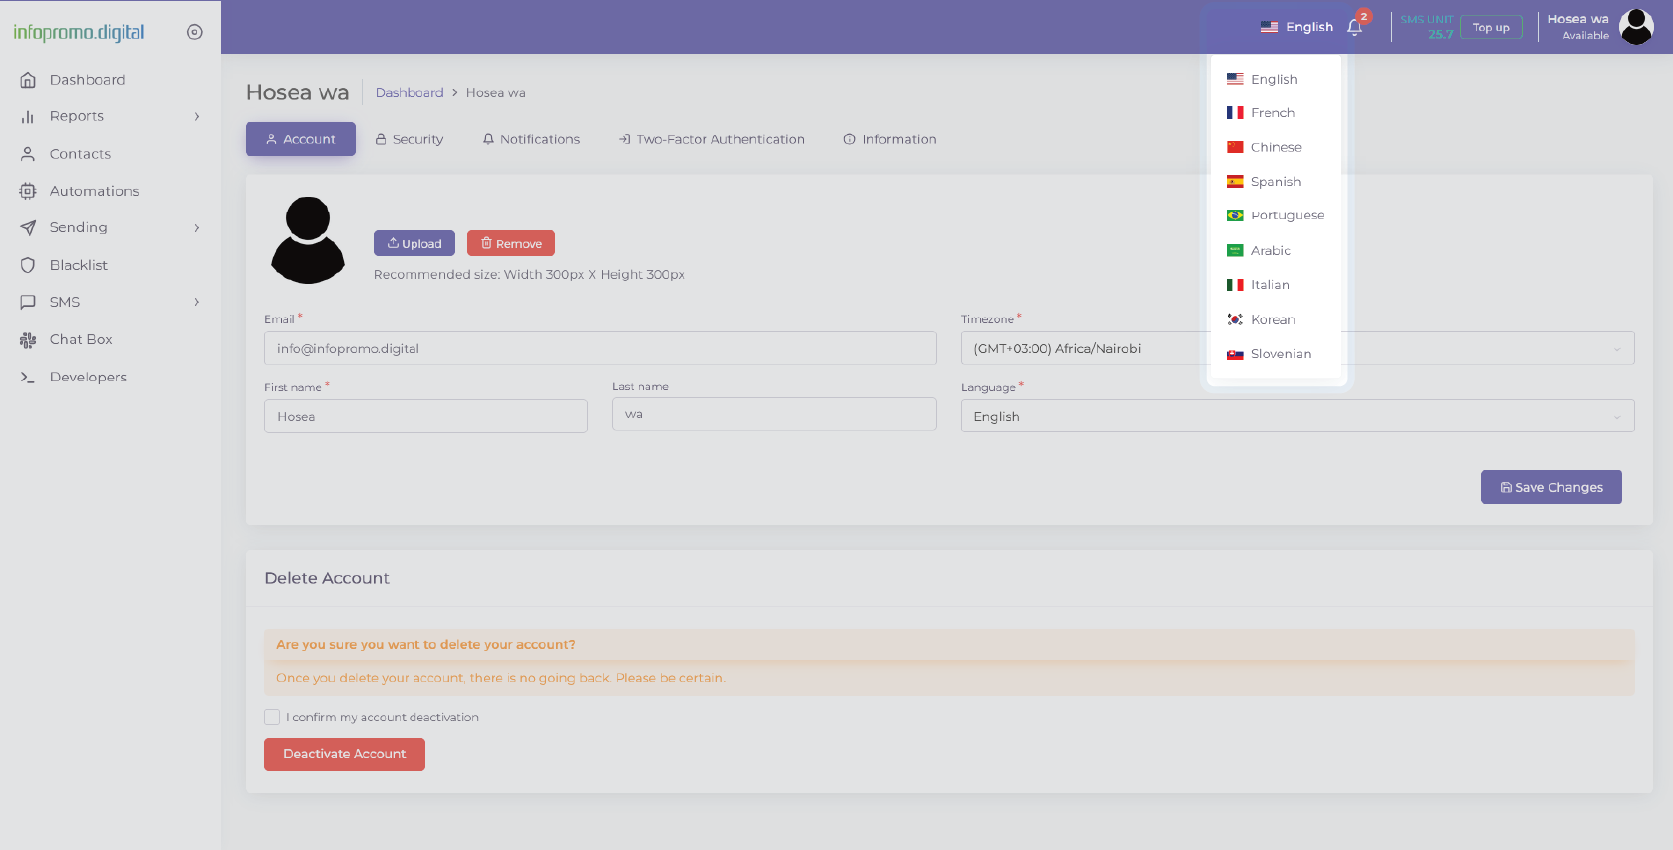
Step 5: Choosing language
On the top right corner of your dashboard, click on the US Flag icon next to ‘English‘ and a list of the available languages will be shown in a drop-down list. You can proceed to select one of your choice.
Step 6: Logout using the last drop-down option, “Logout“
[ The Infopromo Library ]
Unlocking the Potential of Bulk SMS
Learn practical tips, best practices, and real-world examples to leverage bulk SMS effectively and drive results.
A Comprehensive Guide To Bulk SMS
Delve into the world of bulk SMS and uncover its potential as a powerful marketing tool; guide to navigating our portal.
Learn More
Crafting Bulk SMS Campaigns
Explore proven strategies for crafting compelling bulk SMS campaigns that resonate with your audience.
Learn More
Legal And Ethical Bulk SMS Practices
Stay informed about bulk SMS regulations and compliance standards to protect your brand reputation and maintain customer trust.
Learn More


