Utilizing Email Automations
By leveraging these advanced email features, users can enhance the effectiveness of their email marketing campaigns through personalization, automation, segmentation, dynamic content, and A/B testing.
SMS
Email
WhatsApp
Social Media Management Panel
Utilizing Email Automation
Automation Trigger
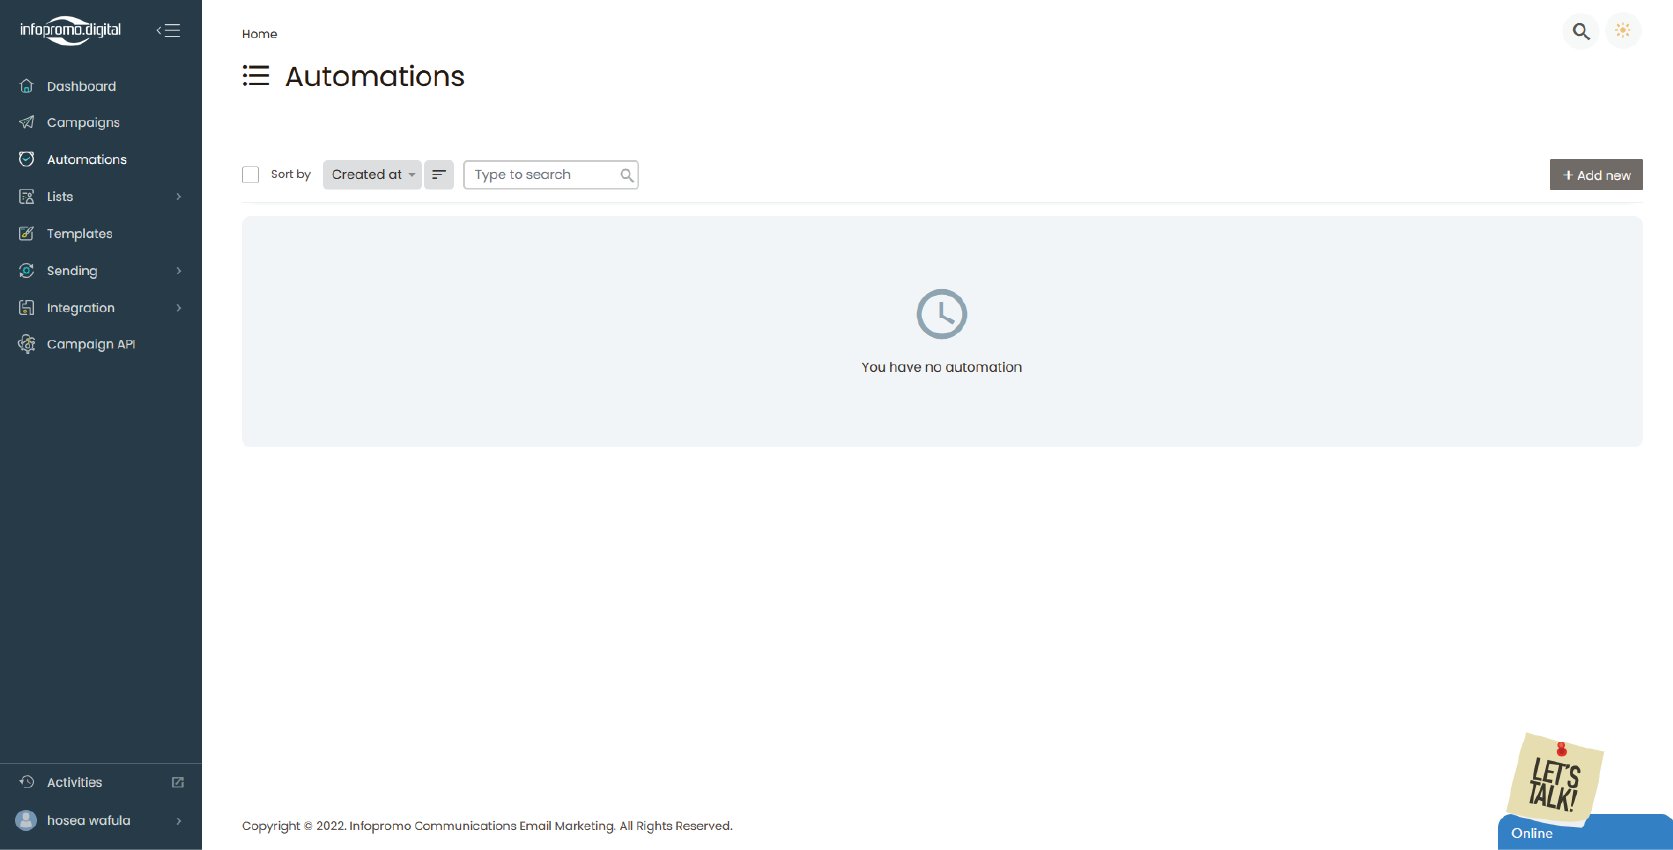
A trigger is the action that starts an automation. For example, the system can trigger an automated email when someone subscribes to your audience or purchases a certain product. We offer a wide selection of preset automation types with built-in triggers, ranging from abandoned cart emails to a simple welcome message.
Step 1: Navigate to the Automation Section
– Go to the “Automation” section of your dashboard.
– Click on “+Add New” to start a new automation trigger.
—
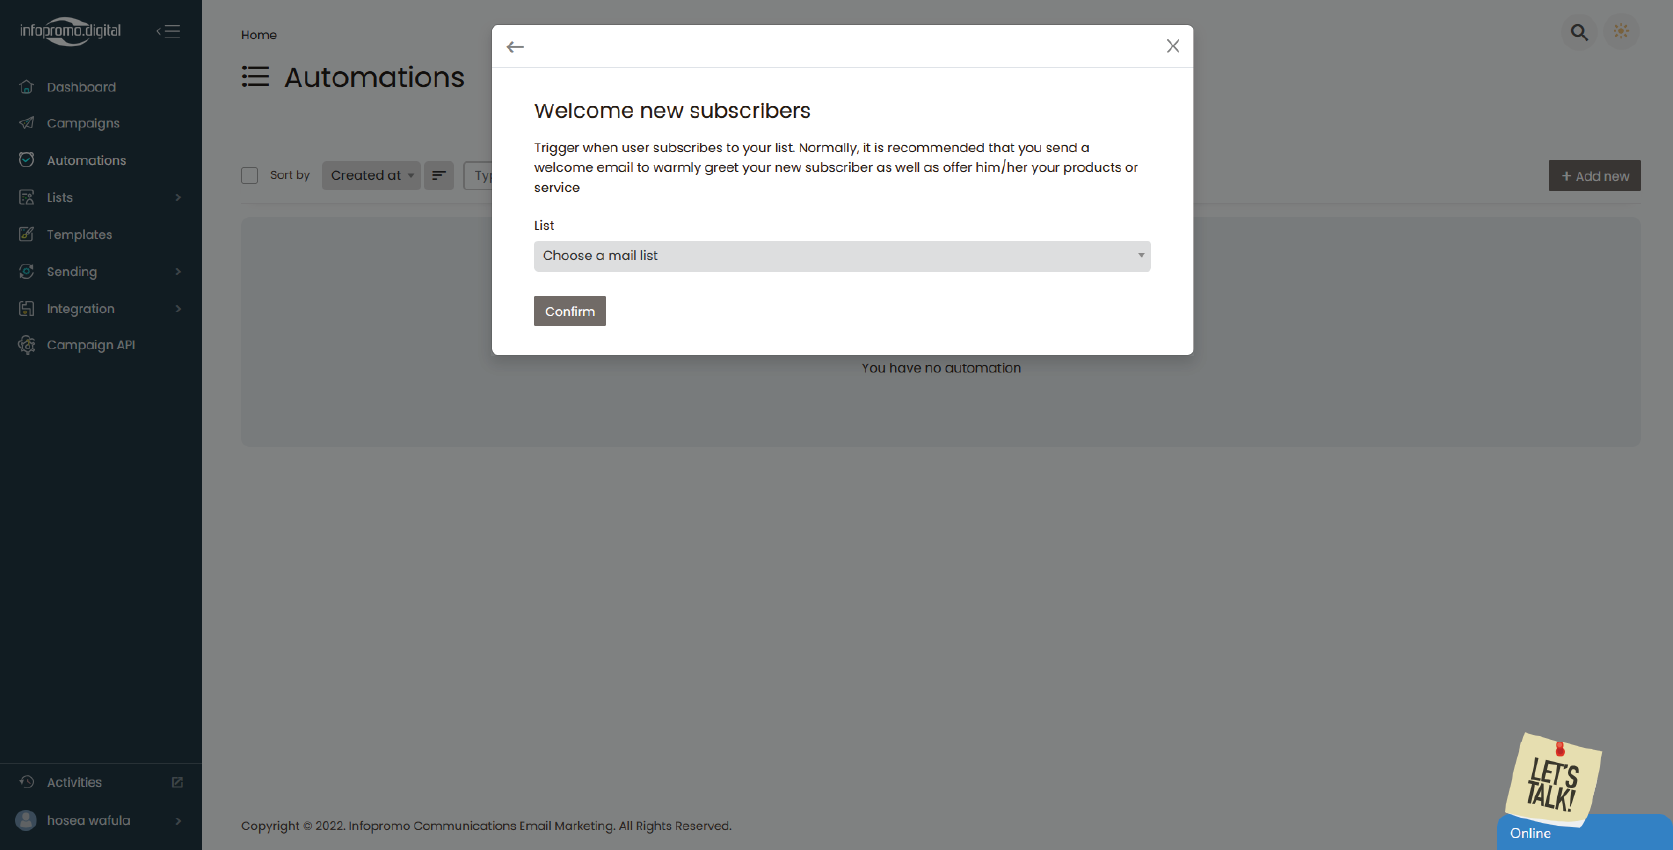
– Select the list & segment upon clicking the list section to be associated with the automation trigger. For instance, if you select, ‘Welcome new subscribers‘ as the automation trigger, you will choose an email list and after email contacts subscribe to that list, the automation trigger will be activated, then click “Confirm“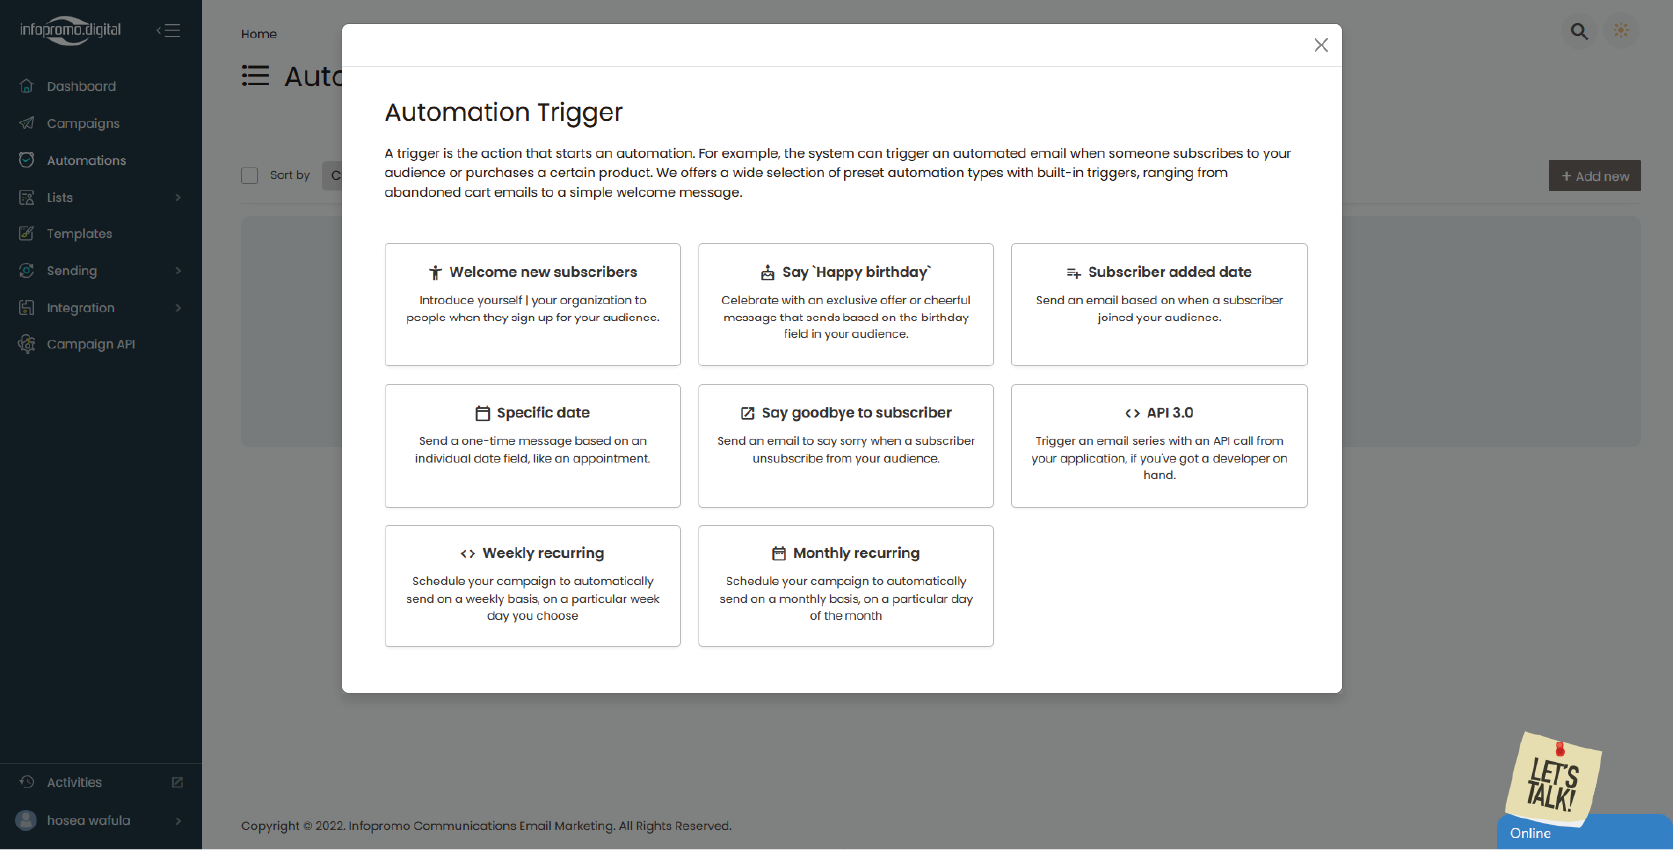
—
Click here to learn how to create an email list & segments within the list.
Step 2: Define Triggers
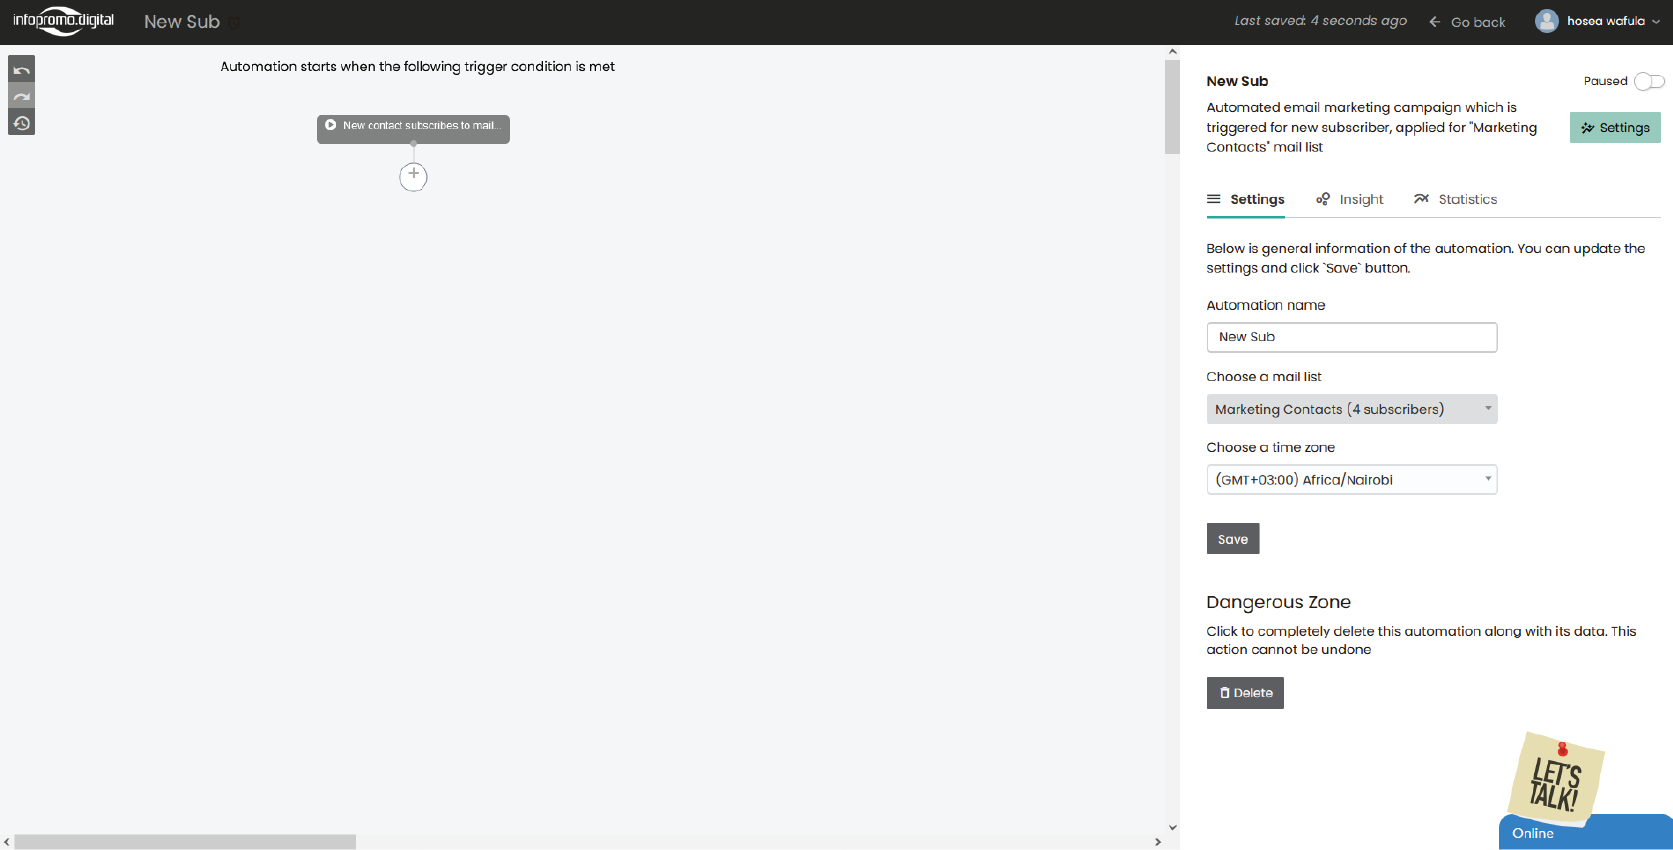
– Select & click the trigger event that will start the automation, such as new contacts subscribing to the mail list or a specific date depending on your use case, and by default, if you choose, the automation type: ‘Welcome new subscribers‘, you will find a default trigger: ‘New contact subscribers to mail list‘.
– You can click the trigger (eg. Welcome new subscribers) and an interface will appear on the right to change the trigger.
– On the right view, you can also perform settings such as automation name change, mail list, and segments change and you can modify time zone, more so you can delete the automation by clicking the “Delete” button.
—
– You can also check insights and statistics and also pause the automation.
– Configure the trigger settings to specify the conditions under which the automation should activate.
Step 3: Set Up Actions
– Click on the “+” icon under the trigger to add an action that will be followed after the trigger is done.
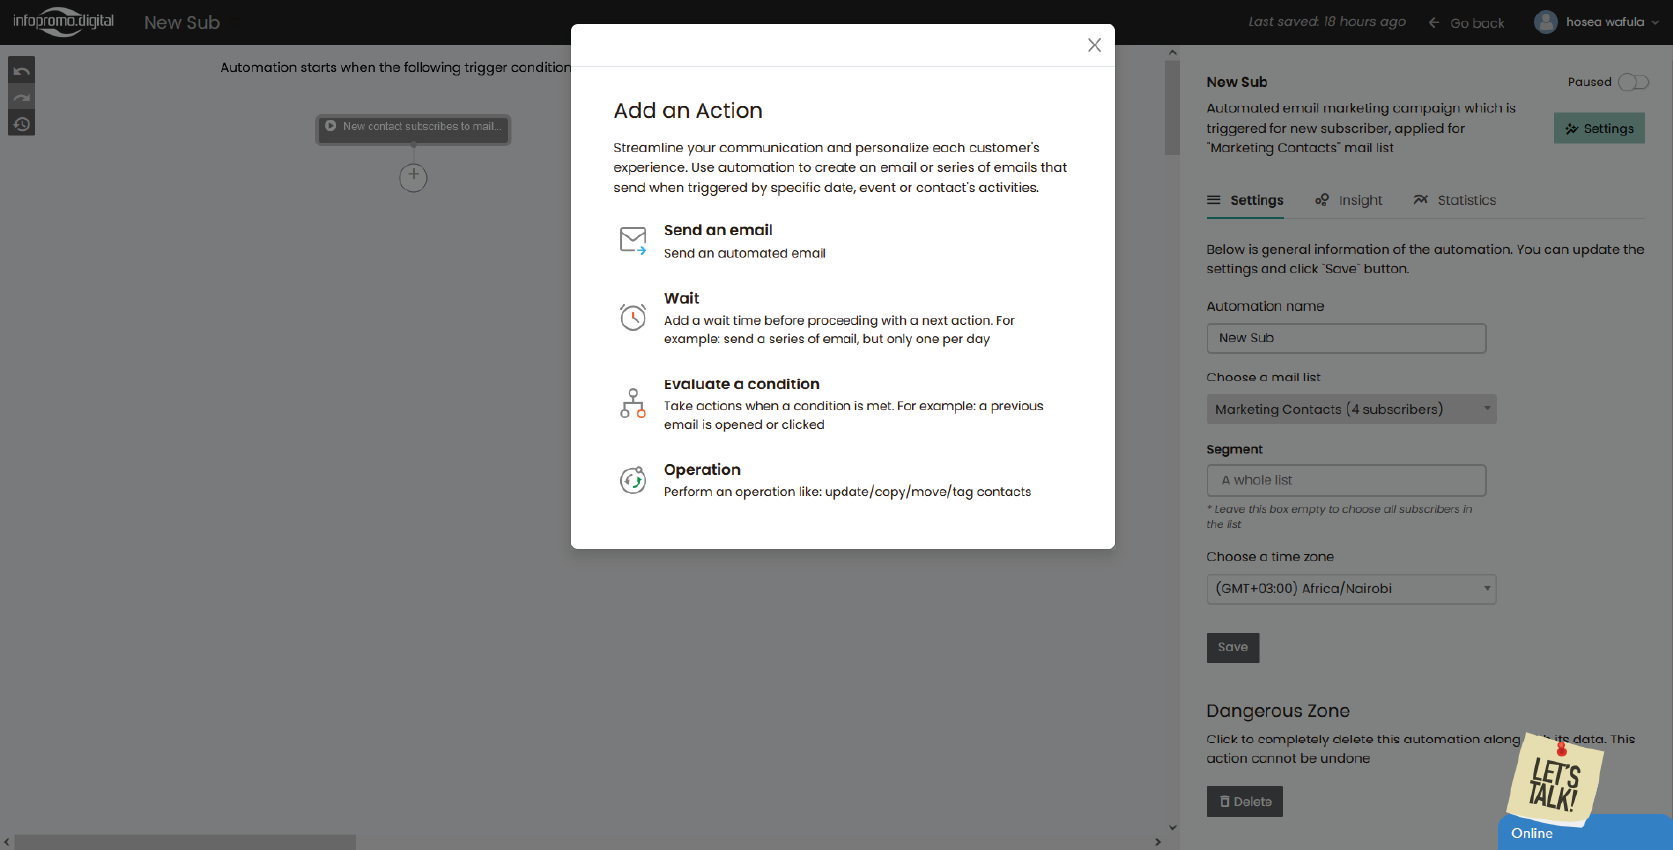
– Define the actions that will occur once the trigger event happens. You can be able to perform the following;
A) Send an automated email
B) Wait: Add a wait time before proceeding with the next action. For example: send a series of emails, but only one per day
C) Evaluate a condition: Take action when a condition is met. For example: a previous email is opened or clicked
D) Operation: Perform an operation like update/copy/move/tag contacts
—
The above actions can be different depending on the type of trigger chosen depending on your use cases.
Sending an automated email
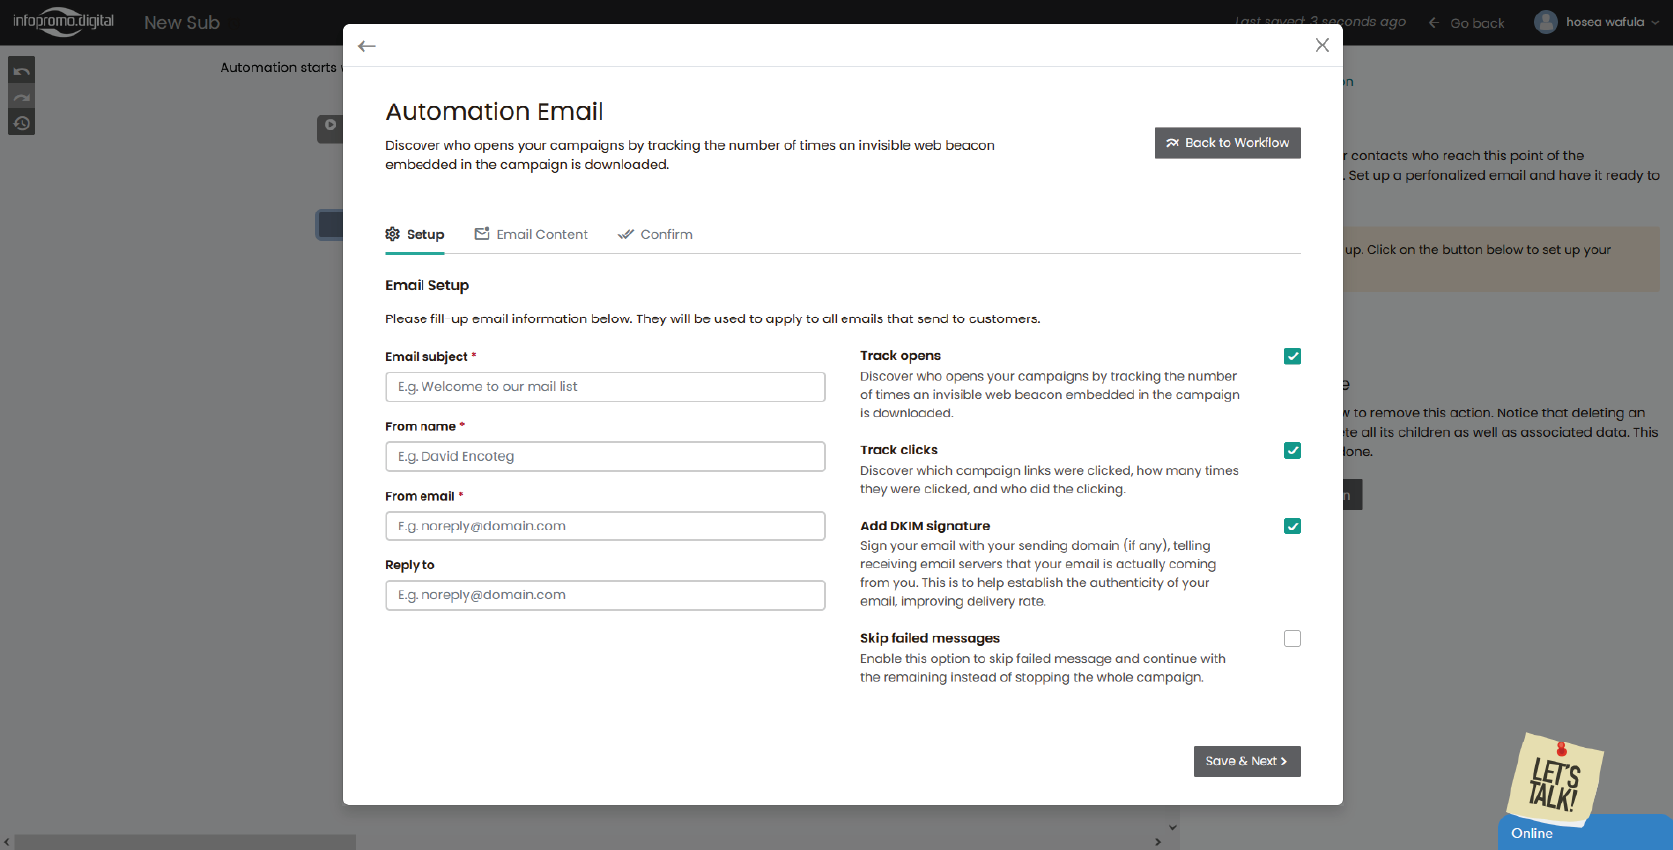
When you select the action: send an automated email, you will be guided to do email setup, select email content, and confirm.
To select an email template, you will have to have an email template created previously first then you can select it.
Click here to see how to create an email template
—
Configure Timing and Delays
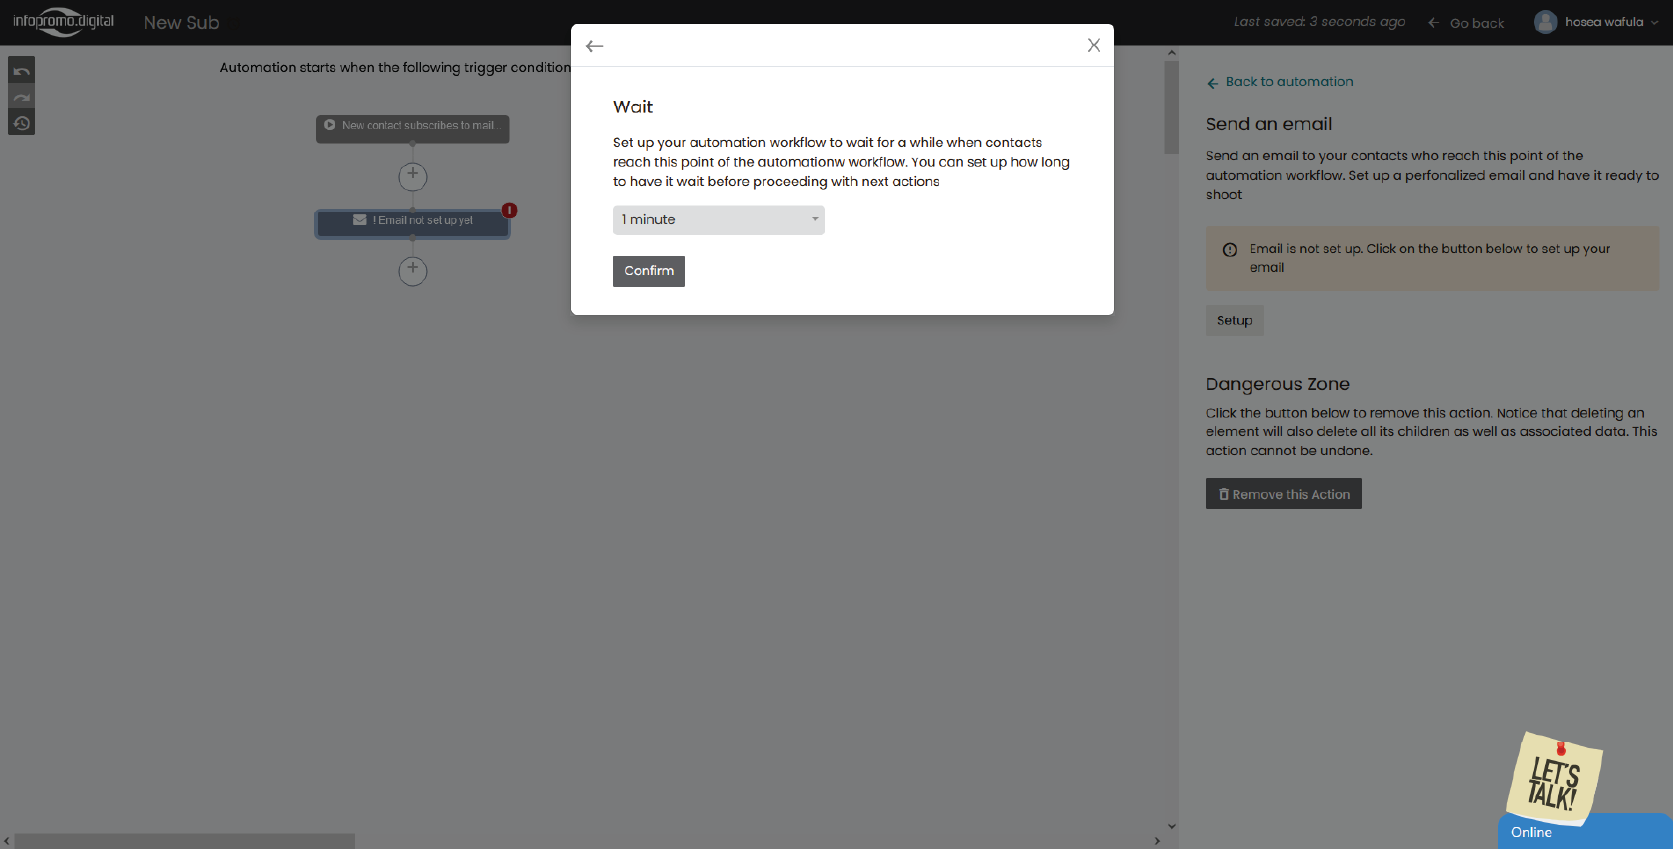
– When you click on “Wait“: Set up your automation workflow to wait for a while when contacts reach this point of the automation workflow. You can set up how long to have it wait before proceeding with the next actions
– Set delays between actions if necessary. For example, wait two days after the trigger event before sending the next email.
– Adjust timing to optimize engagement and avoid overwhelming recipients.
—
Workflow evaluation
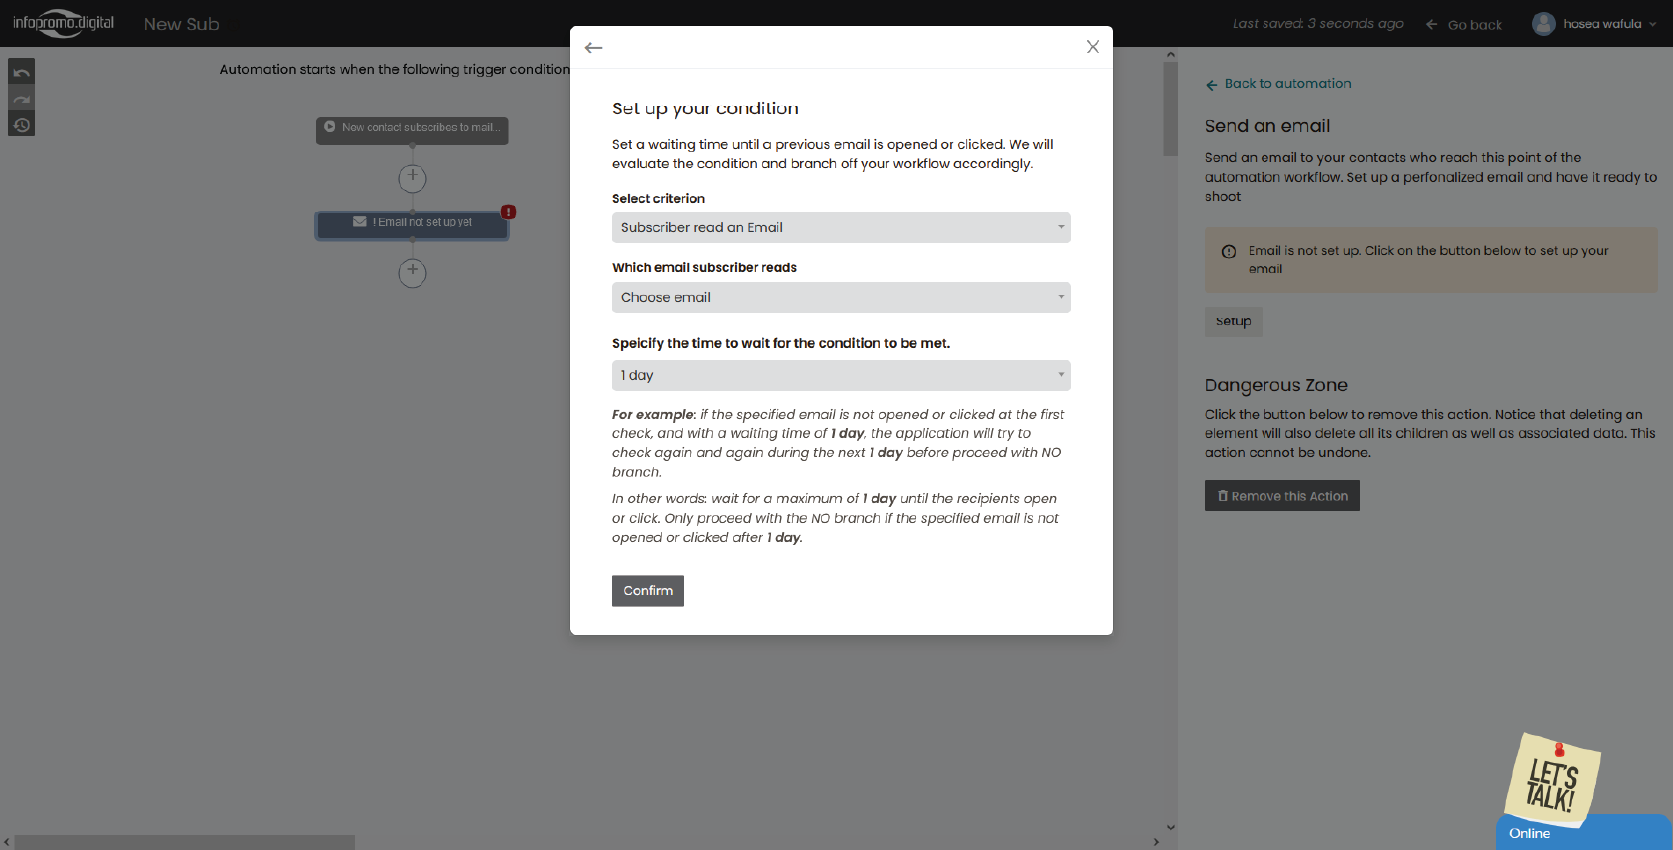
Set up your condition
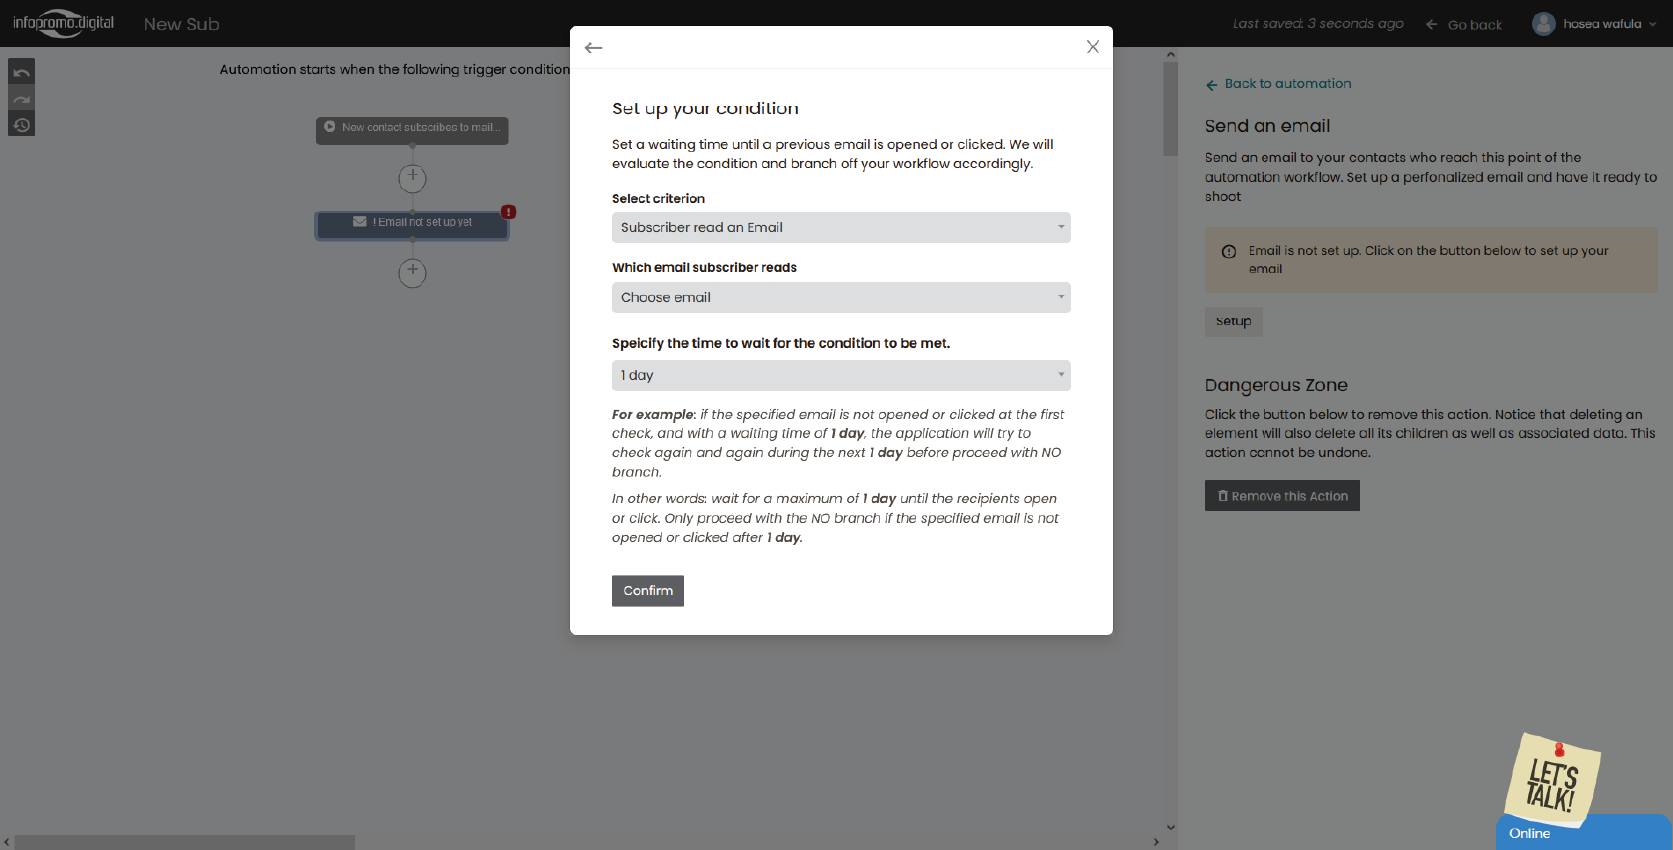
– Set a waiting time until a previous email is opened or clicked. We will evaluate the condition and branch of your workflow accordingly.
You will select a criteria eg when a subscriber selects or clicks on an email, when an email subscriber reads a particular set email previously and you specify the time to wait for the condition to be met.
—
For example: if the specified email is not opened or clicked at the first check, and with a waiting time of 1 day, the application will try to check again and again during the next 1 day before proceeding with NO branch.
In other words: wait for a maximum of 1 day until the recipients open or click. Only proceed with the NO branch if the specified email is not opened or clicked after 1 day.
Choose an operation
Perform an operation on the contact who reaches this point of the automation.
Some of the operations include: updating contact attributes, assigning tags to your contacts, or copying contacts to another list.
—
You can add as many triggers and actions in your workflow
Step 4: Activate the Automation
– Review the entire workflow to ensure all triggers, actions, and delays are correctly set up.
– As you set up your workflow, it automatically saves and you can go back and see your automation workflow in the automation list in the “Automation” tab.
[ The Infopromo Library ]
Stay Ahead of the Curve With Bulk Emails
Dive into the latest trends, best practices, and industry news shaping the world of email marketing and beyond.
Getting Started With Bulk Emailing
Step-by-step guides and tutorials to help you master email marketing strategies, tools, and techniques.
Learn More
Decoding Email Deliverability
Understand email deliverability and discover actionable tips to improve inbox placement and maximize campaign effectiveness.
Learn More
Mastering Email Metrics
Dive into essential email marketing metrics such as open rates, click-through rates, and conversion rates and learn how to interpret.
Learn More


