Managing Email Contacts
By following these detailed steps, users can efficiently manage their contact lists by importing new contacts into the platform and managing contact lists ones for various purposes.
SMS
Email
WhatsApp
Social Media Management Panel
Creating Contact Lists
Step 1: Set your email list
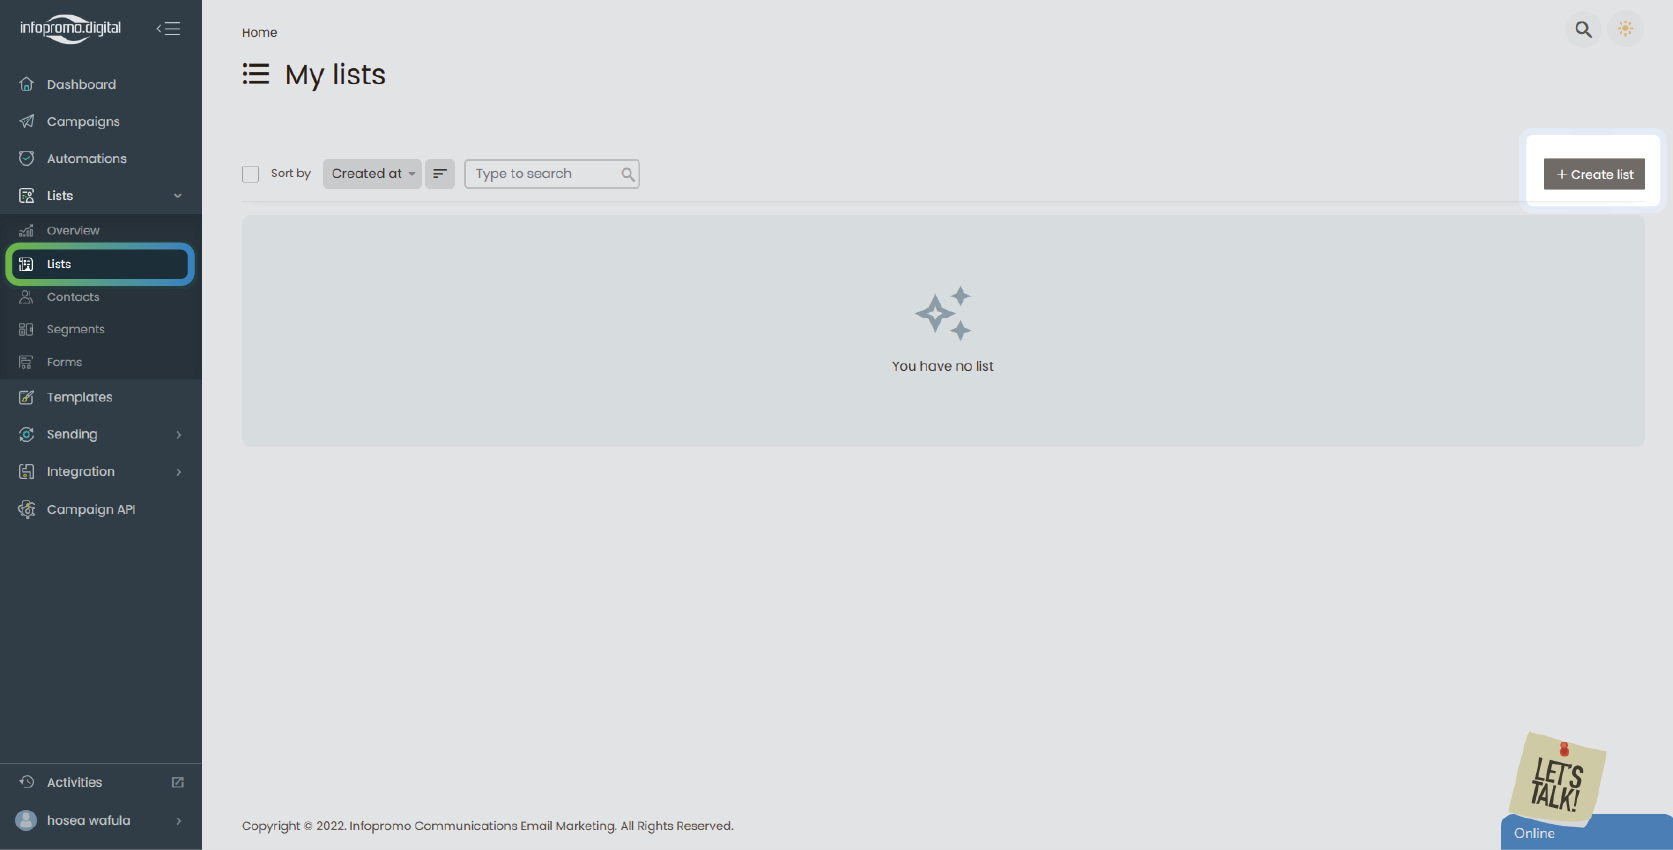
– Locate ‘Lists‘ in your account dashboard on the extreme left and click on ‘Lists’ options in the dropdown list under it.
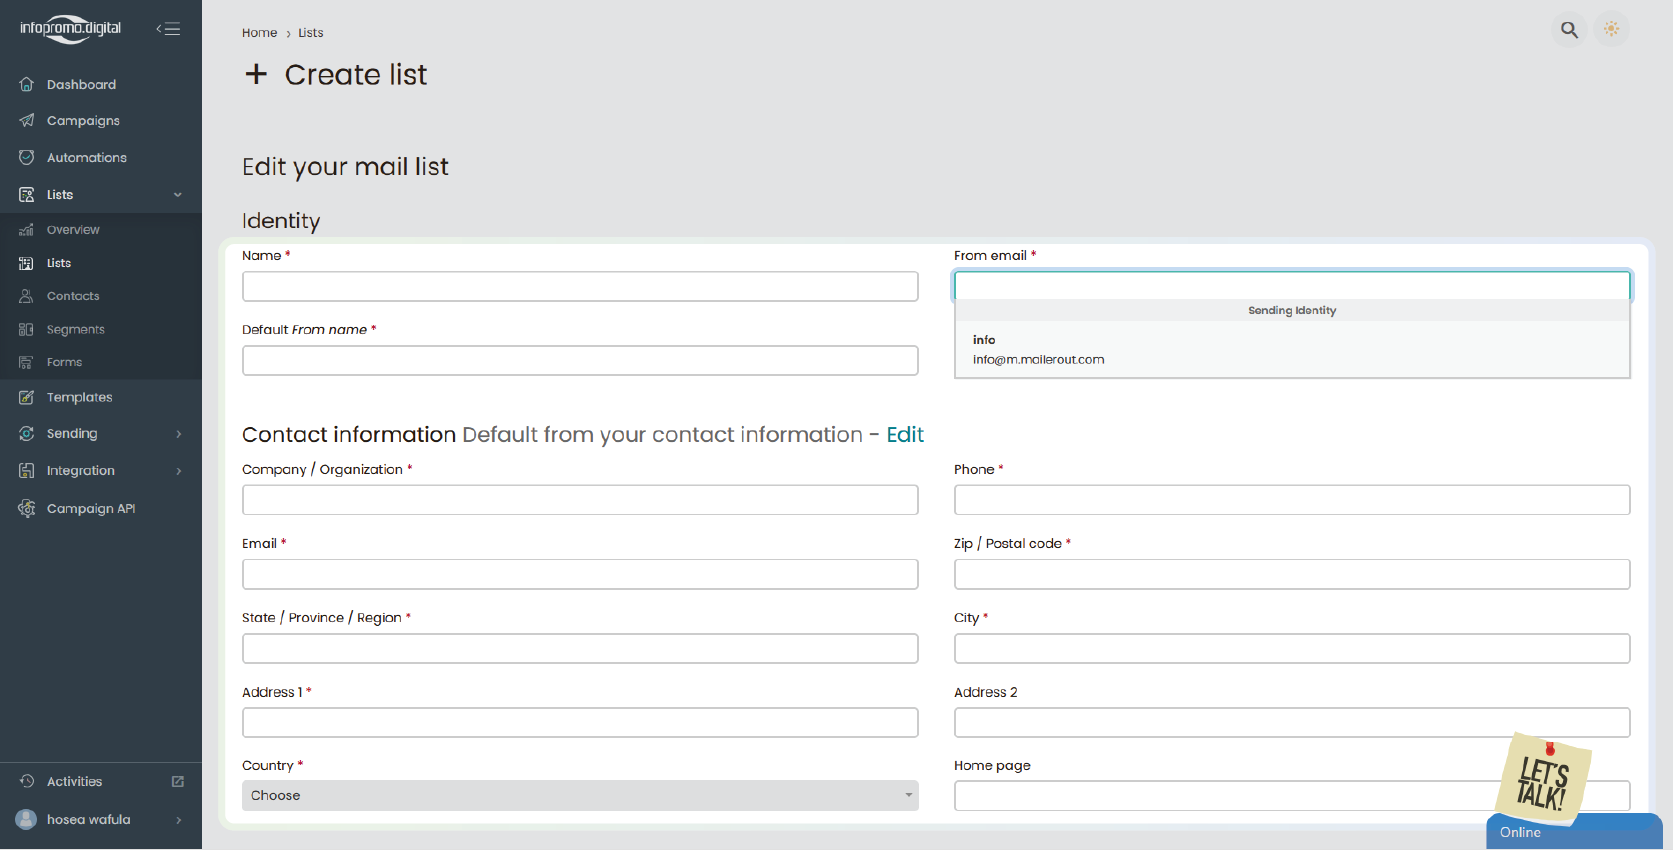
– Locate the ‘Create List‘ on the extreme right and proceed to create a list by giving your list a name, setting a default FROM name (a name that will be appearing on your contacts inboxes as from whom the email is coming), and by default your FROM email (email address that your contacts will be receiving emails from) will be set to default, prepopulated when you click the FROM email part. Click here to learn how to change it
—
You will proceed to add contact information associated with your list such as company name, phone, email, address, etc then on scrolling below, you will have a subscription setting to send the subscription confirmation email (Double Opt-In), send unsubscribe notification to subscribers & send a final welcome email.
—
Step 2: Adding contacts to a contact list
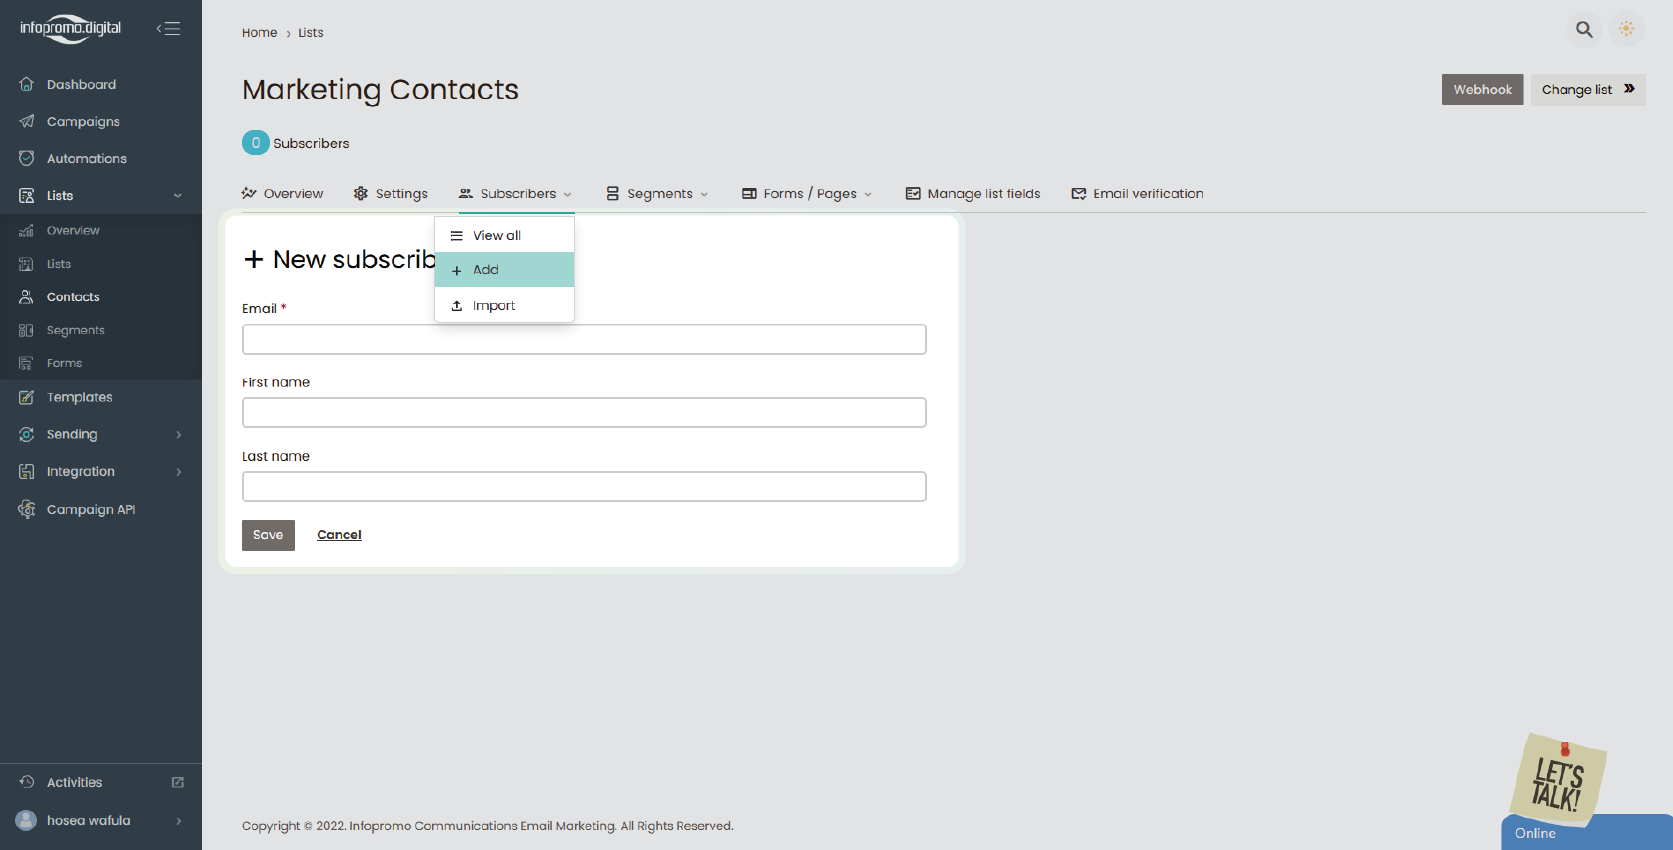
– Click on a particular contact list and navigate to the ‘Subscribers‘ tab to either add a single contact or import a contact list. A form will enable you to add a single contact entry by adding an email, and first & last name.
– To add many contacts, look for an option to “Import” under the ‘Subscribers‘ tab and click on it.
—
Step 3: Upload the CSV File
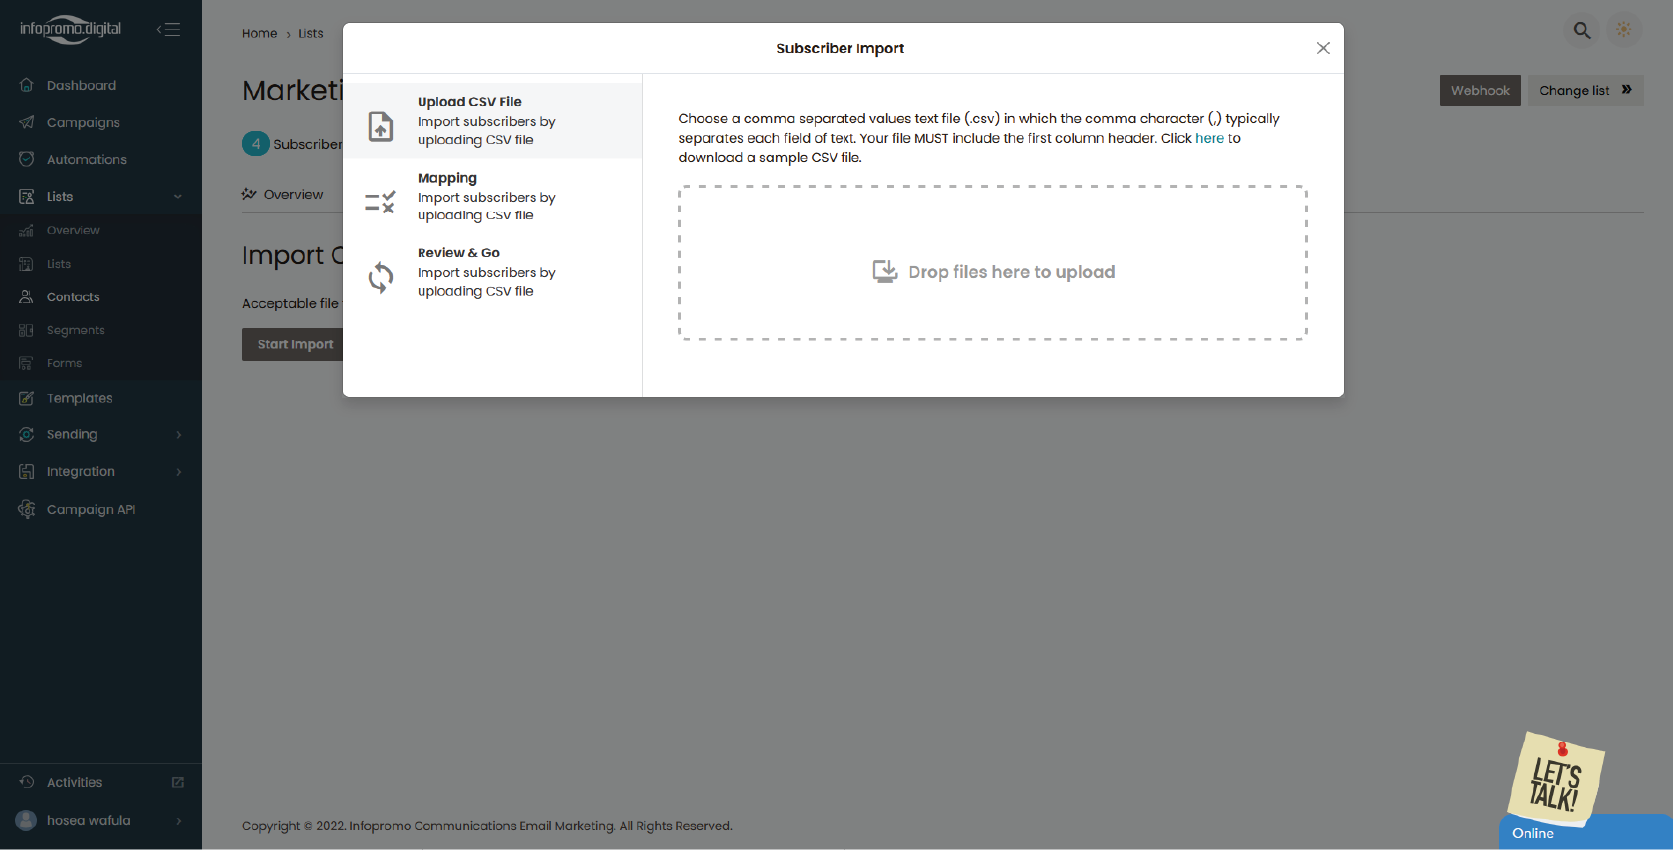
– Click on the ‘Sample CSV‘ file to download a sample file, fill in the contacts entries
– Review the mapped fields and make any necessary adjustments.
– Click the “Start Import” button to select the CSV file from your computer to start the import process.
– Wait for the platform to process the file and add the contacts to your list. A confirmation message will appear once the import is complete.
– Once selected, click “Finish” to proceed.
Managing Fields
– The platform will display the columns from your CSV file. Map each column to the corresponding field in the platform (e.g., map “Email” to “Email Address”) when uploading.
– The fields can be set in the ‘Manage List Fields‘ tab in the particular contact group.
– Also your email sign-up forms can include the various fields set by you in the ‘Manage List Fields‘ tab.
Email Verification.
At the email verification tab, you will be able to perform email validation before running a campaign to help protect your business reputation & also to know the hygiene of your email list.
Creating Contact List Segments
Understanding Segmentation
Segmentation involves dividing your email contact list into smaller, more targeted groups based on specific criteria. This helps in sending personalized and relevant content to different segments, increasing engagement and conversion rates.
Step 1: Access the Contacts Section
– Log in to your email platform.
– Navigate to the “List” section from the main dashboard and click on ‘Segments‘ under it.
Step 2: Create a New Segment
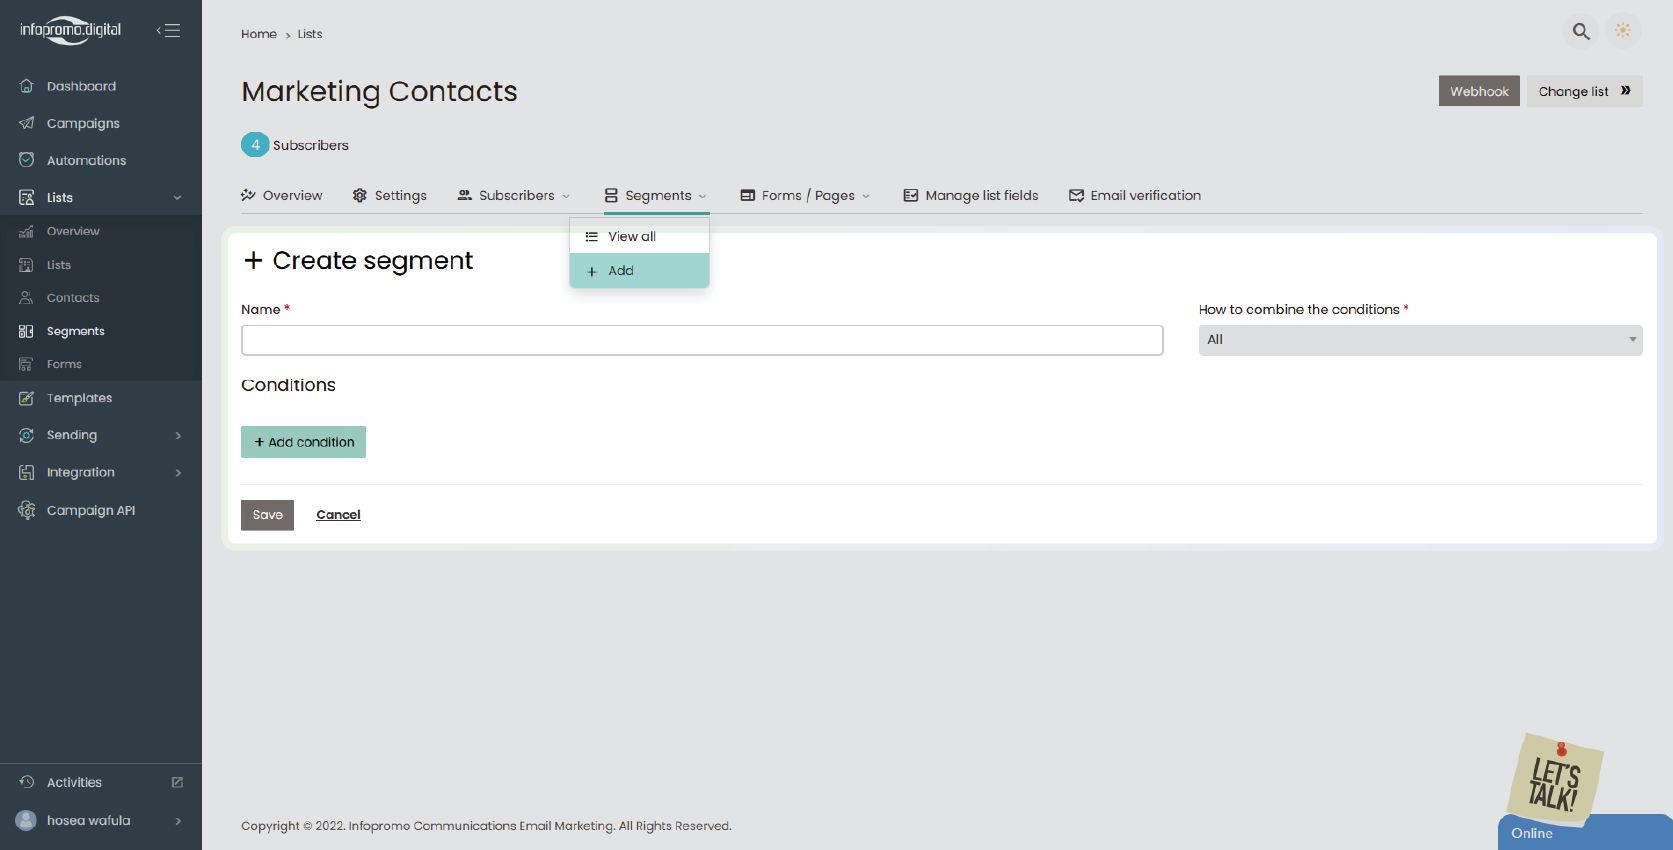
– Look for an option to add a segment; click on “+Add“
– Click on this option to start the segmentation process; and to set various segment criteria.
—
Step 3: Define Segment Criteria
– You’ll be prompted to define the criteria for your segment. This can include:
– Demographic Information: Age, gender, location.
– Behavioral Data: Purchase history, email open rates, click-through rates.
– Preferences: Interests, subscription preferences.
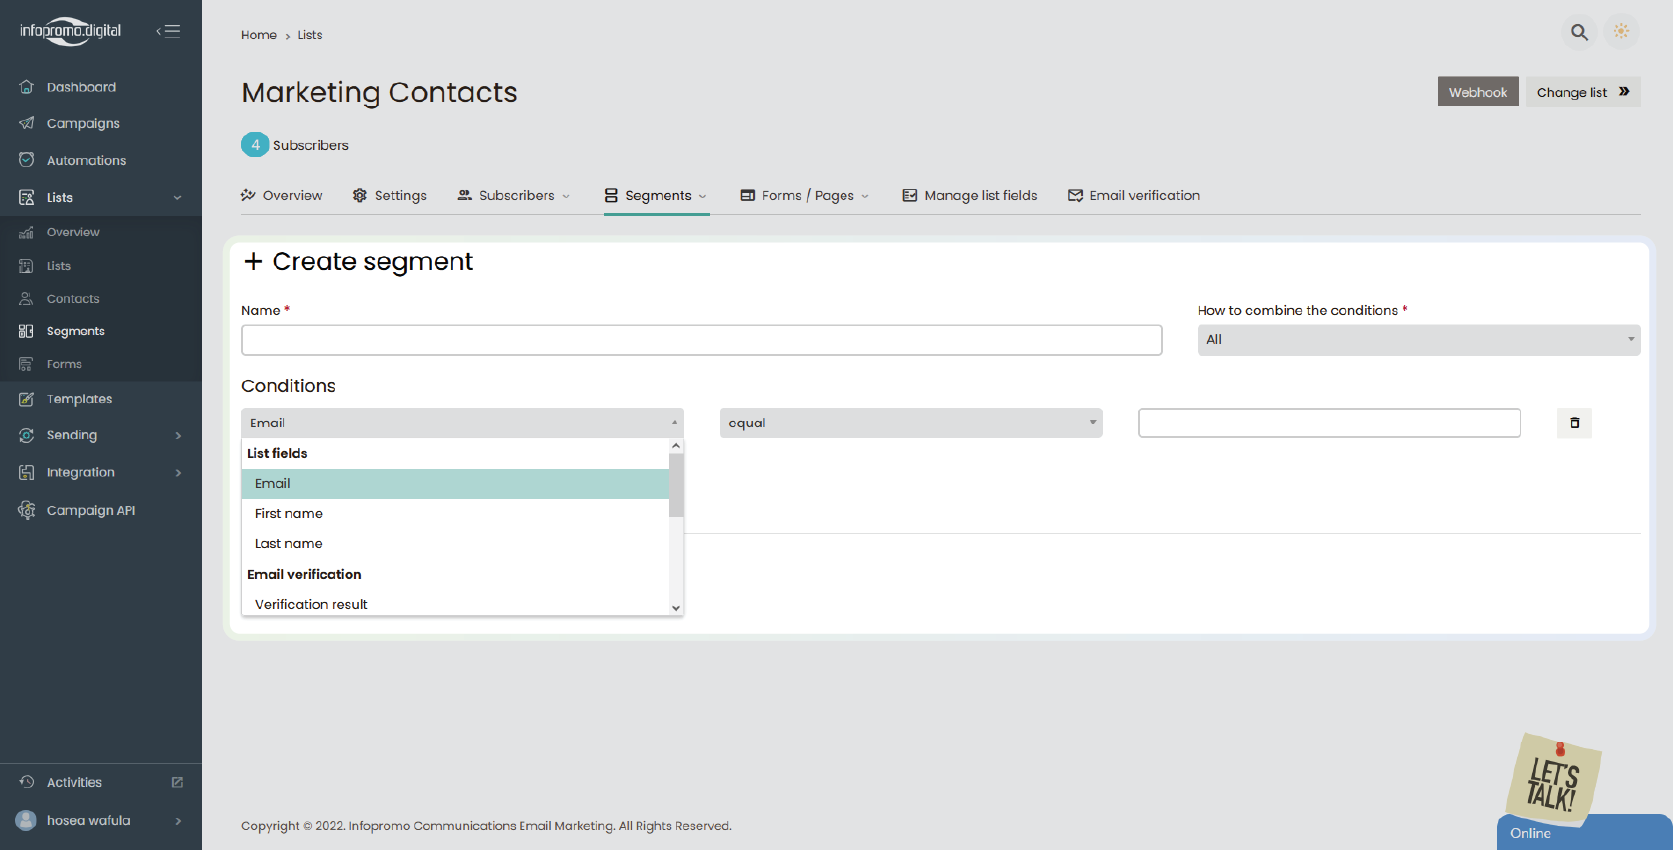
Realize that the above are custom ones that can be set by you in the ‘Manage List Field‘ but by default, you in the ‘+Create Segment‘ section, you will be able to name your segment and choose whether to combine the conditions by selecting any of these; any or all.
Step 4: Set Conditions
– Use the ‘Add condition‘ button to specify the conditions for your segment.
For example:
– Select “email” (however, there will be more options eg. List field options, verification options, activities, etc) and set the filter to “is equal to” and then enter a value such as ‘gmail.com’ or ‘.co.ke’.
In the illustration above you will be able to create a segment that contains all Gmail emails or .com domain extensions emails so in your contact database you can have these sections at a glance as opposed to viewing all contacts at once.
Another example is you can set conditions to give you contacts that have done the following; clicked your emails in the last 30 days, opened your email, etc, and other conditions.
– You can proceed and add other conditions based on your preferences and they can the conditions can be combined by selecting ‘any’ or ‘all’.
—
Step 5: Save the Segment
– Once you’re satisfied with the segment, click “Save”.
Step 6: Use the Segment in Campaigns
– When creating a new email campaign, select the segment you just created as the target audience.
– This ensures that your emails are sent to the most relevant recipients based on the defined criteria.
Click here to learn how to create campaigns
You can add as many segments as possible available according to your purchased plan.
By following these steps, you can effectively navigate segmentation in your email platform, allowing you to send targeted and personalized emails to specific groups within your contact list. This will help in enhancing engagement and achieving better results from your email marketing campaigns.
Contact List Forms & Pages
In this section, you will be able to customize various forms and pages associated with your contact groups. These forms will enable you to create subscription forms and emails, unsubscribe forms and emails, and contact profiles and emails.
By default, these forms have been set and most forms will enable you to change the form name, change default content, set a custom URL, and even preview.
To access the forms, you will go to the “Lists” section on the dashboard and then click on ‘Lists’ then navigate to any contact group then click on the ‘Forms/Pages’ tab

Embedded Form
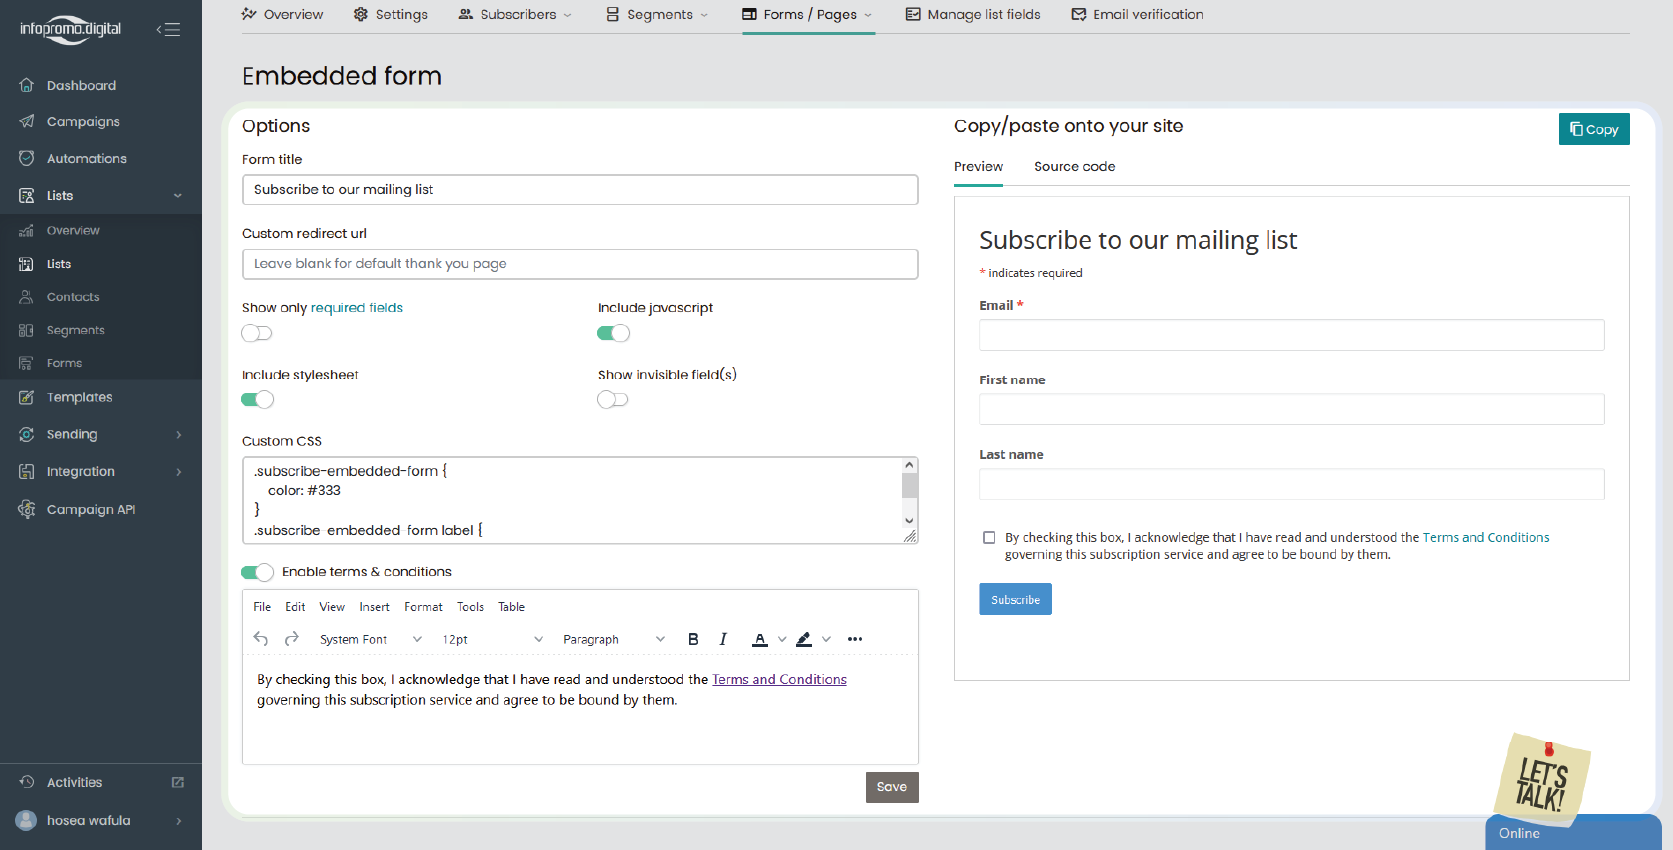
To collect contact entries in the specific contact group, this embedded form comes in handy.
You will be able to change form titles, set custom redirect URLs, customize the form, and copy the form code to paste it in your app.
[ The Infopromo Library ]
Stay Ahead of the Curve With Bulk Emails
Dive into the latest trends, best practices, and industry news shaping the world of email marketing and beyond.
Getting Started With Bulk Emailing
Step-by-step guides and tutorials to help you master email marketing strategies, tools, and techniques.
Learn More
Decoding Email Deliverability
Understand email deliverability and discover actionable tips to improve inbox placement and maximize campaign effectiveness.
Learn More
Mastering Email Metrics
Dive into essential email marketing metrics such as open rates, click-through rates, and conversion rates and learn how to interpret.
Learn More


