Creating Email Campaigns
By following these detailed steps, users will be able to create, schedule, send, and analyze effective email campaigns, ensuring their messages reach and engage their target audience effectively.
SMS
Email
WhatsApp
Social Media Management Panel
Creating Email Campaigns
Crafting Your First Email Campaign
Step 1: Access the Campaigns Section
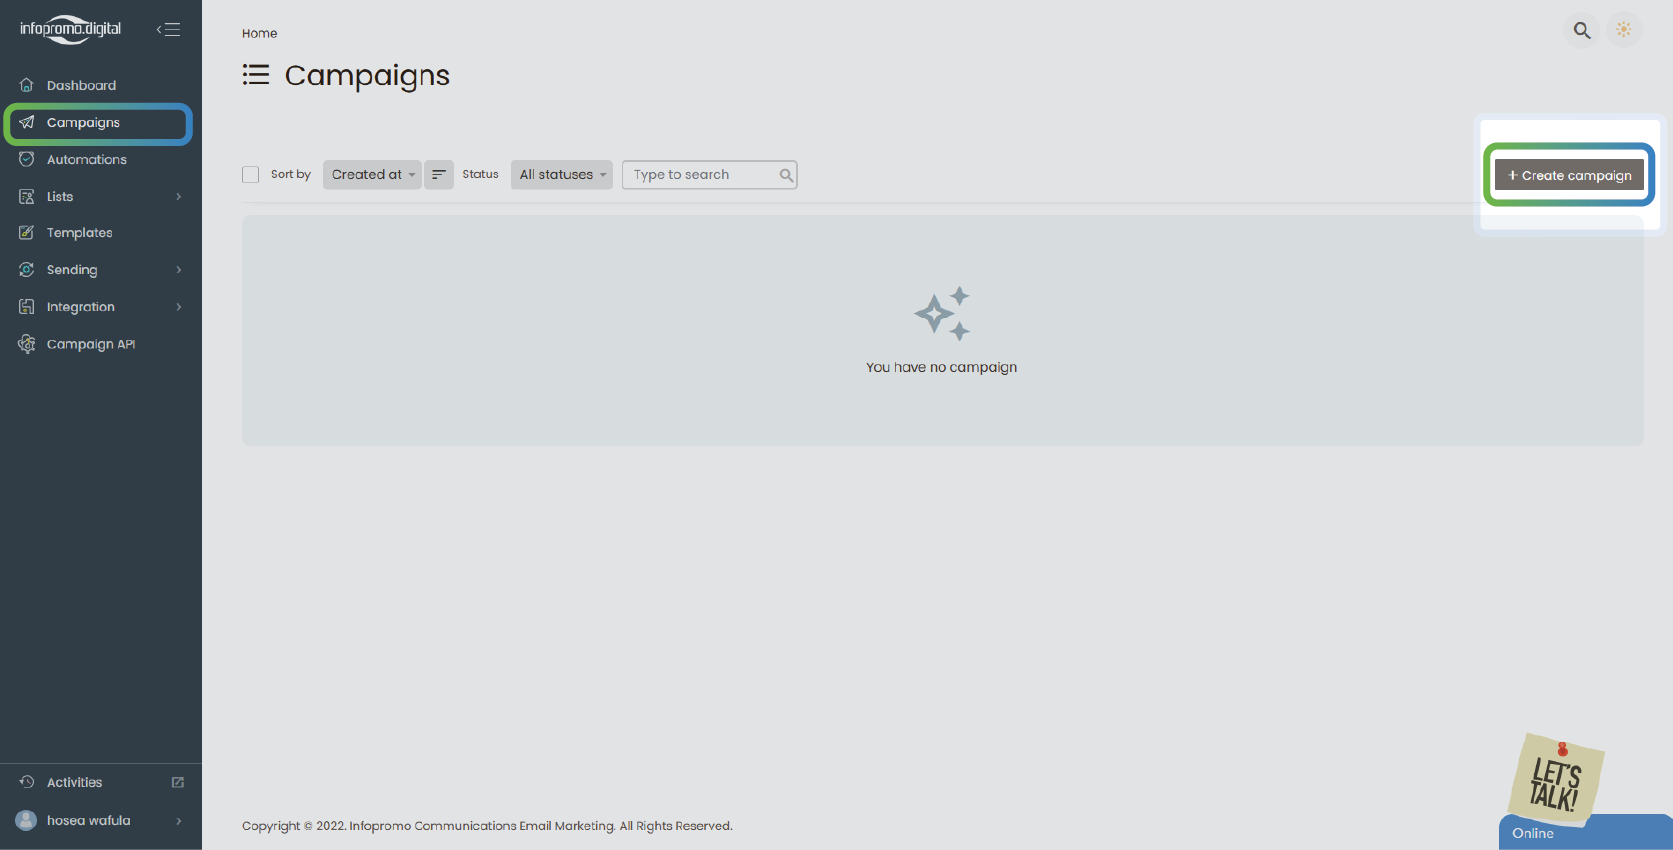
– Log in to your account and navigate to the “Campaigns” section on the dashboard.
– Click on “Create New Campaign” or a similar button to start a new email campaign.
—
Step 2: Choose a Campaign Type
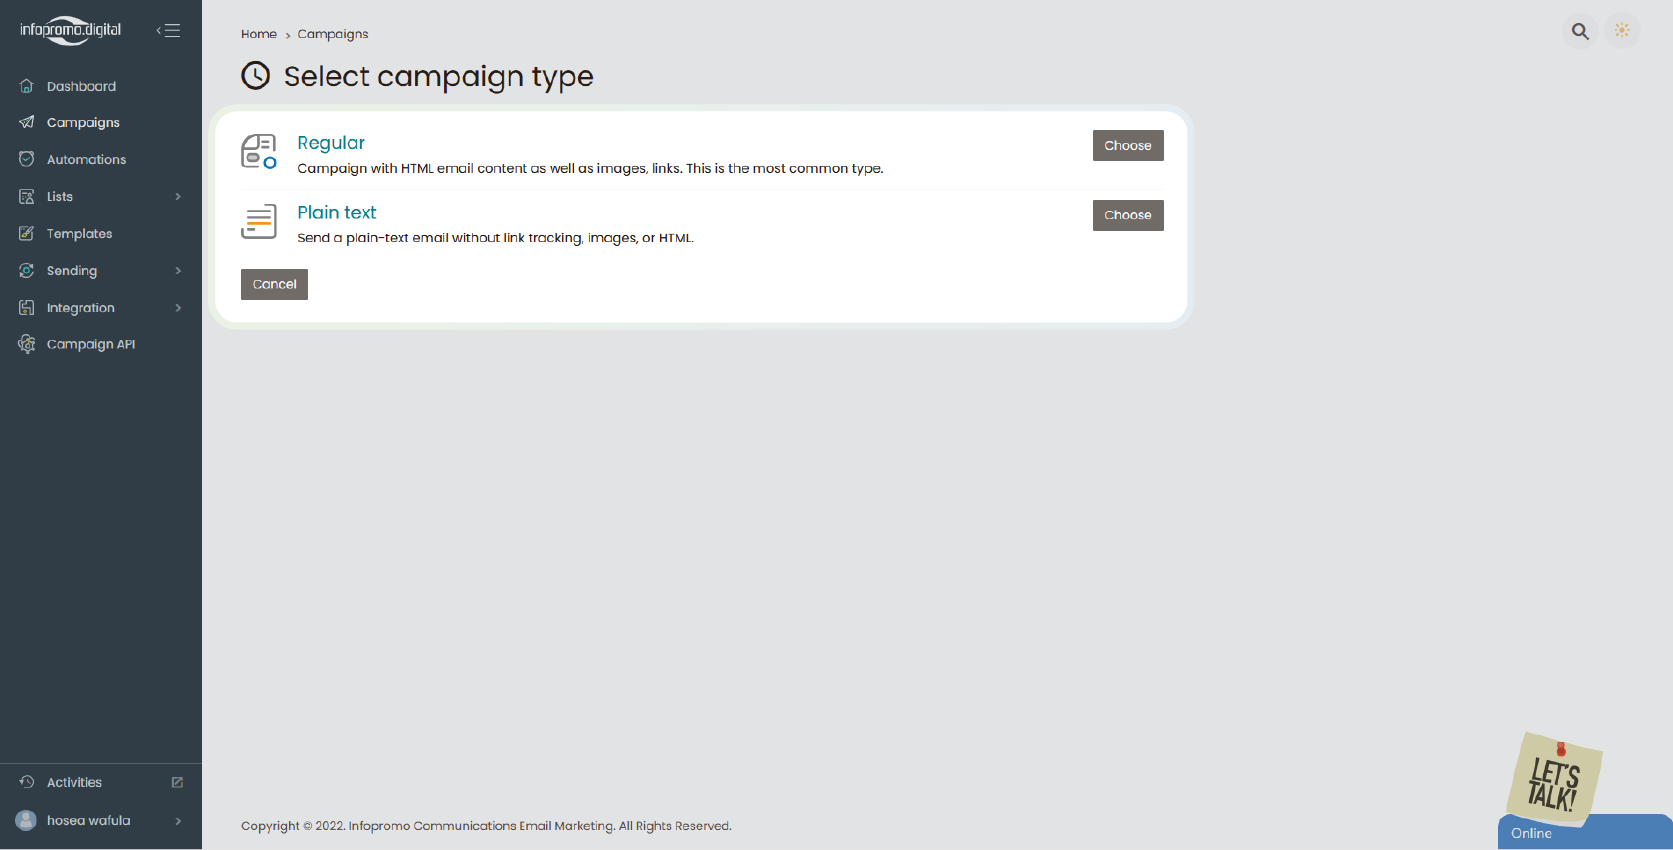
– Select the type of email campaign you want to create:
1) Regular – Campaign with HTML email content as well as images, and links.
2) Plain Text – Send a plain-text email without link tracking, images, or HTML.
– Click “Choose” to proceed.
—
Step 3: Personalize the Email
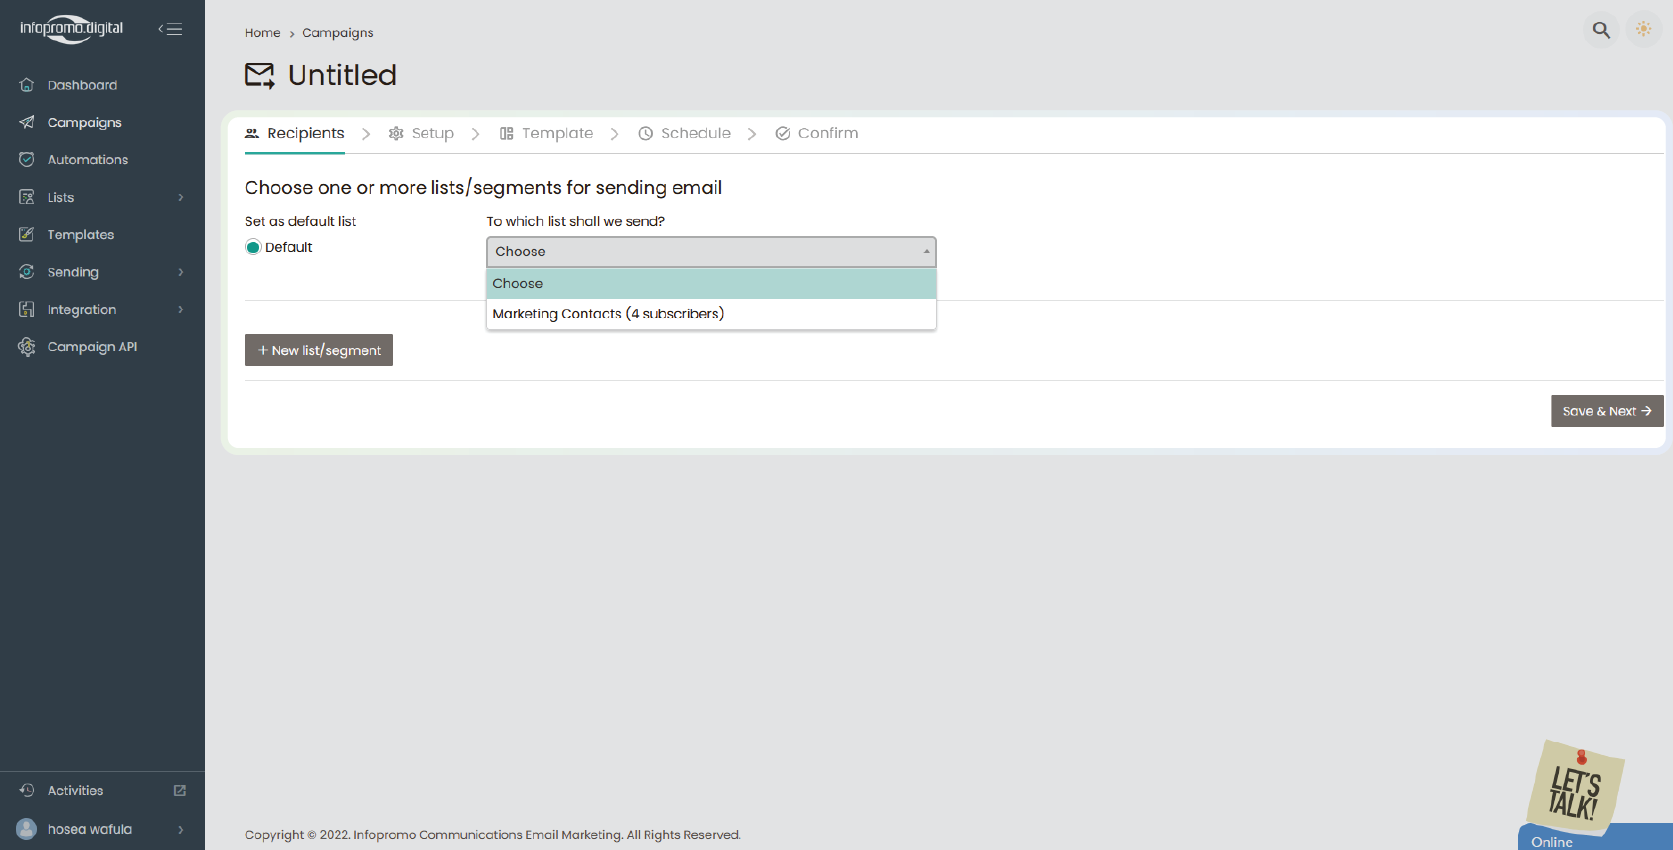
– Select the recipients by selecting the email list to which the email campaign shall be sent under the “Recipients” tab.
– If you have created segments, a box will appear prompting you to select the segment you want to send to and if not, just proceed and click “Save & Next“
—
Step 4: Give your Campaign an Identity
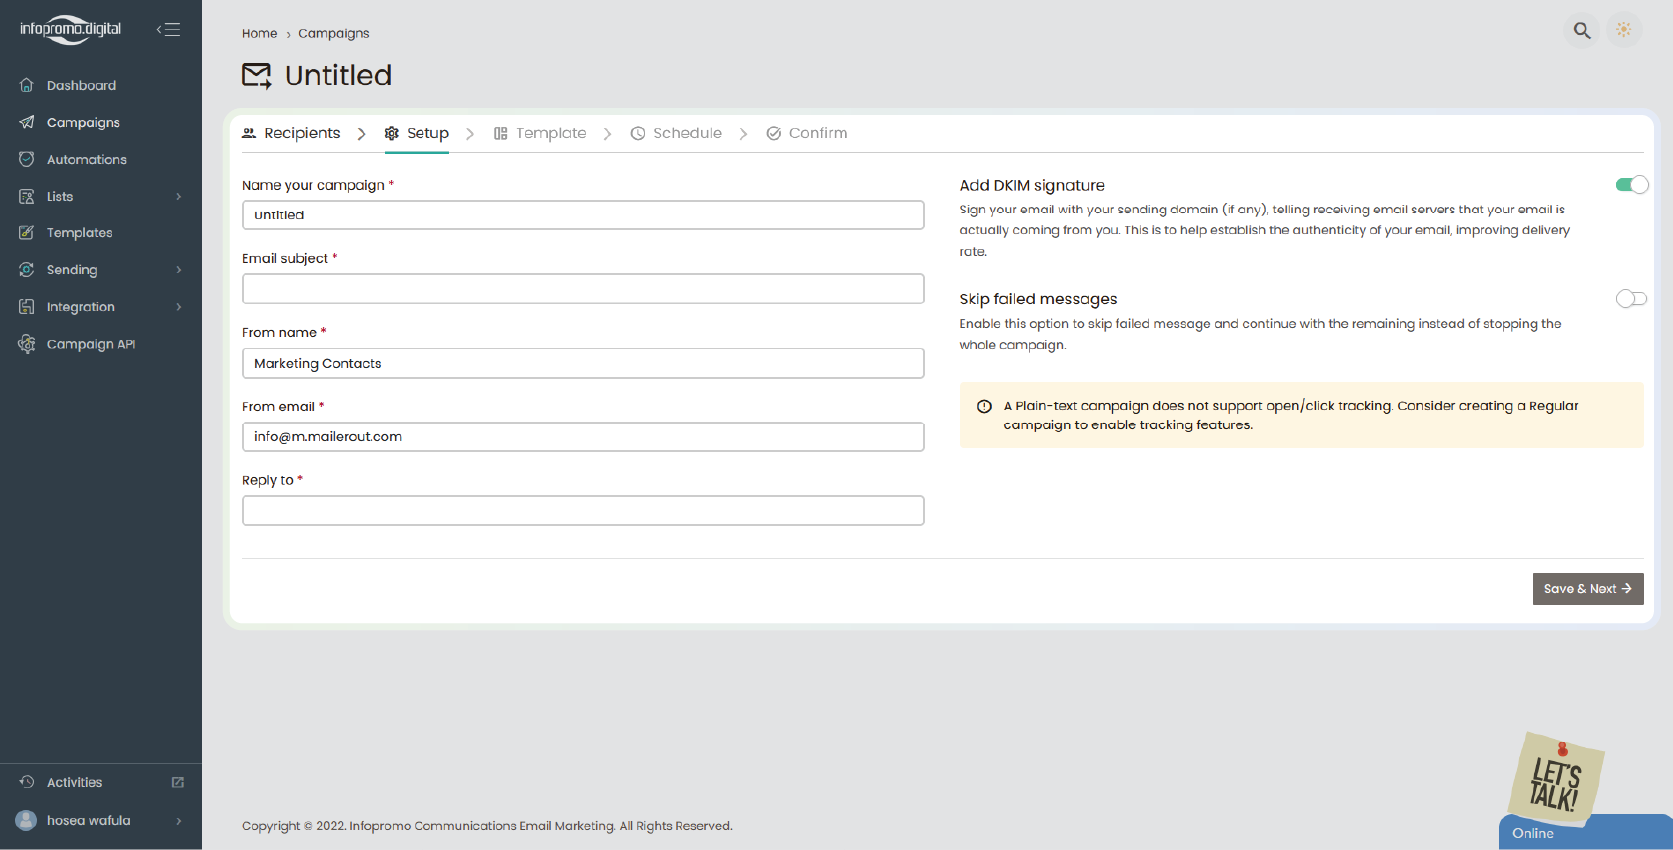
– In the next tab, “Setup“, you will name your campaign, insert your email subject, give ‘from the name‘ and ‘from email‘ as this is what the recipients will see in the mailboxes before opening, then set the ‘reply to‘ email which will enable you to get a reply from your email recipients.
– You will have options to ‘Add DKIM signature’, ‘skip failed messages‘, ‘track open & clicks‘.
– If your sender identity (from email address) hasn’t been set, the ‘from email’ and ‘reply to‘ will be populated with our email address but you can choose to send with your email address if it was added among the sending identities.
—
Click here to learn how to send with your custom email address.
– Click “Save & Next” to proceed.
Step 5: Content Management
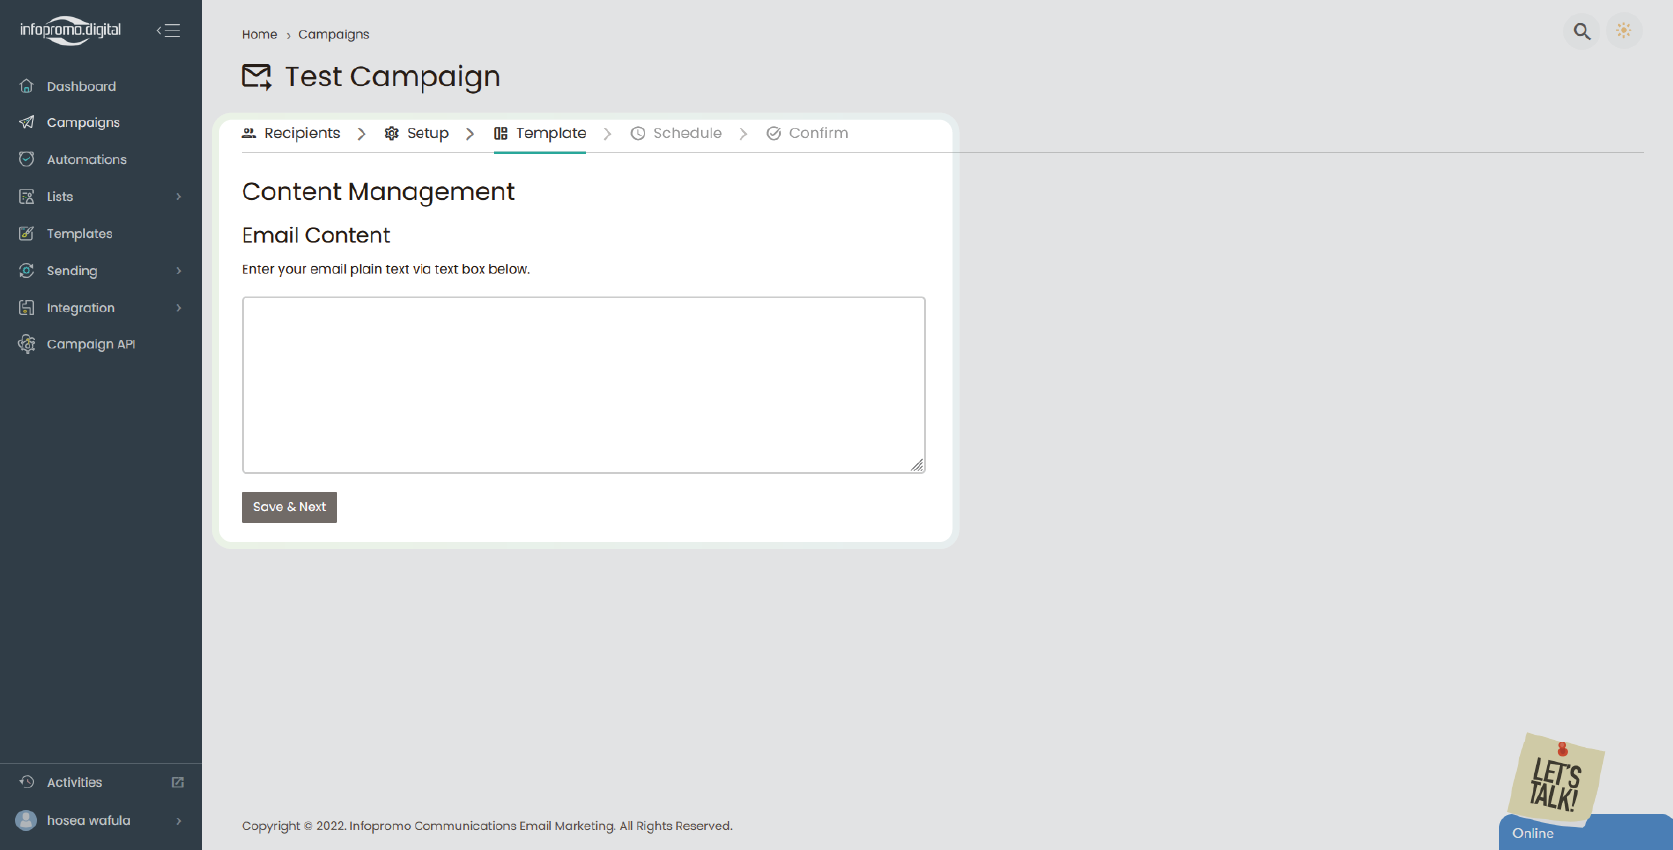
– On the next tab, “Template”, you will proceed and enter your email contents in plain text in the box below if your selection was ‘Plain text‘ campaign type then you will click “Save & Next” to proceed.
—
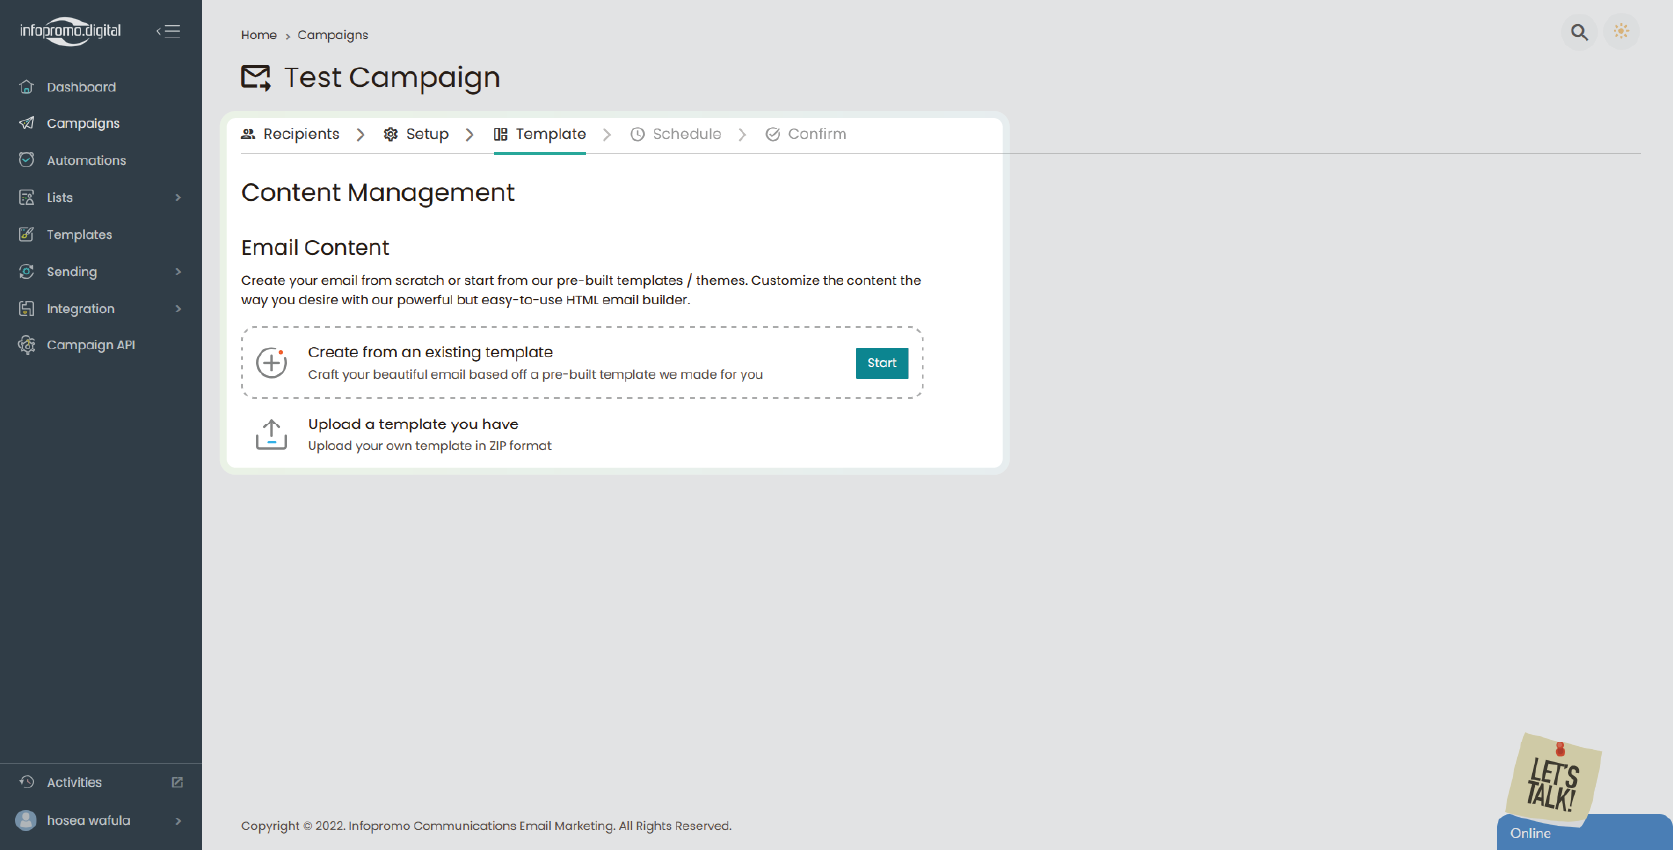
– If you chose the ‘Regular‘ type campaign you will have two options
A) Create from an existing template
B) Upload your own template
—
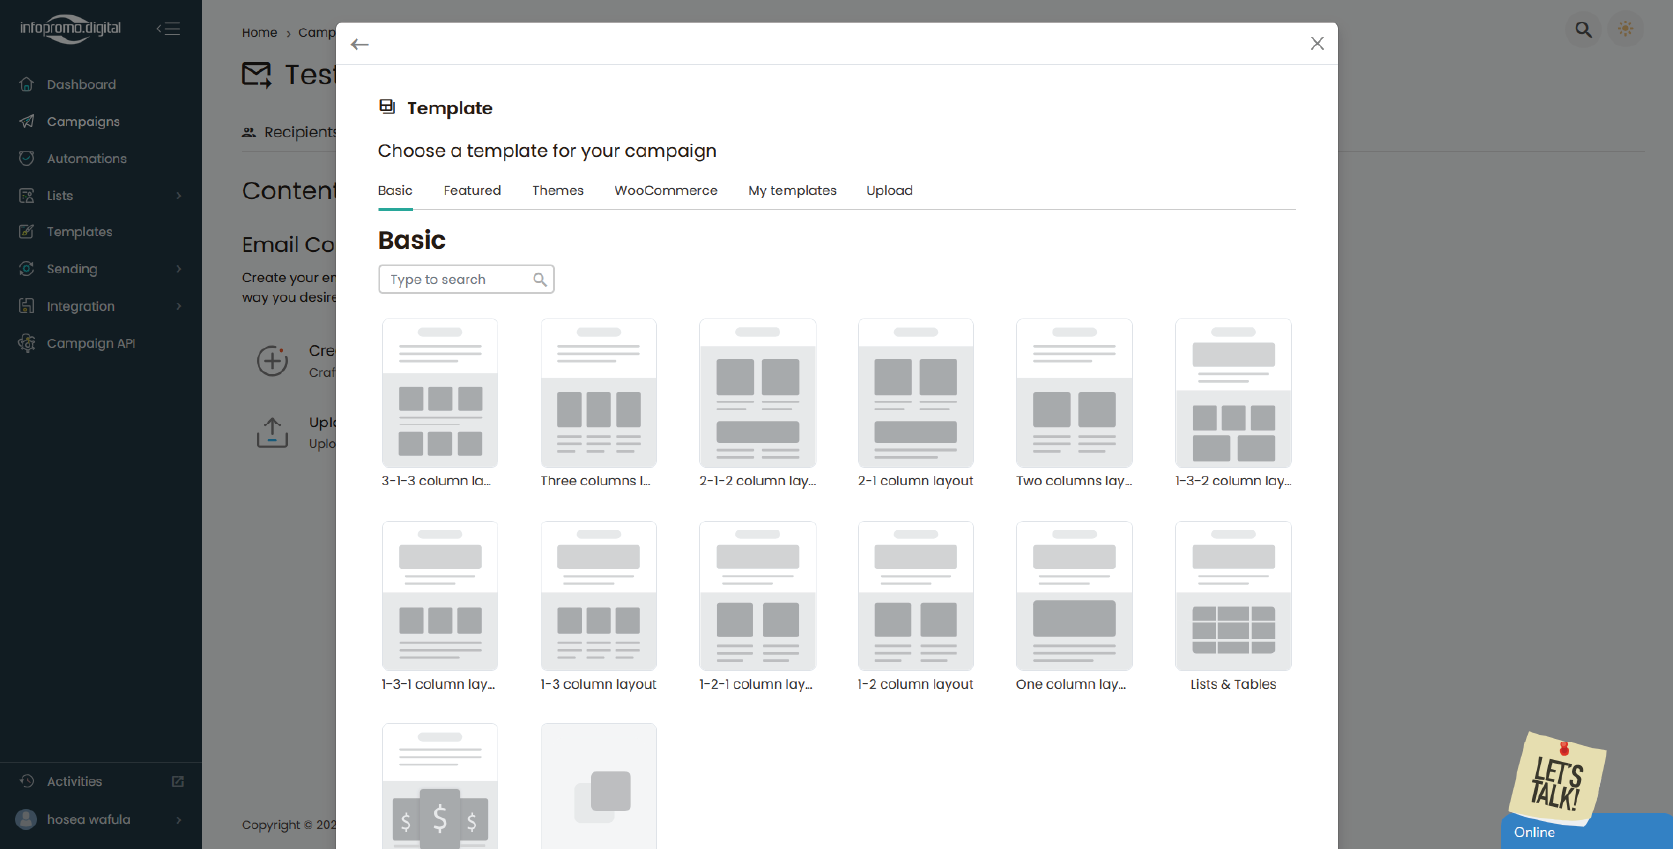
Choose template
You will then select a campaign template for your campaign
—
Manage Content
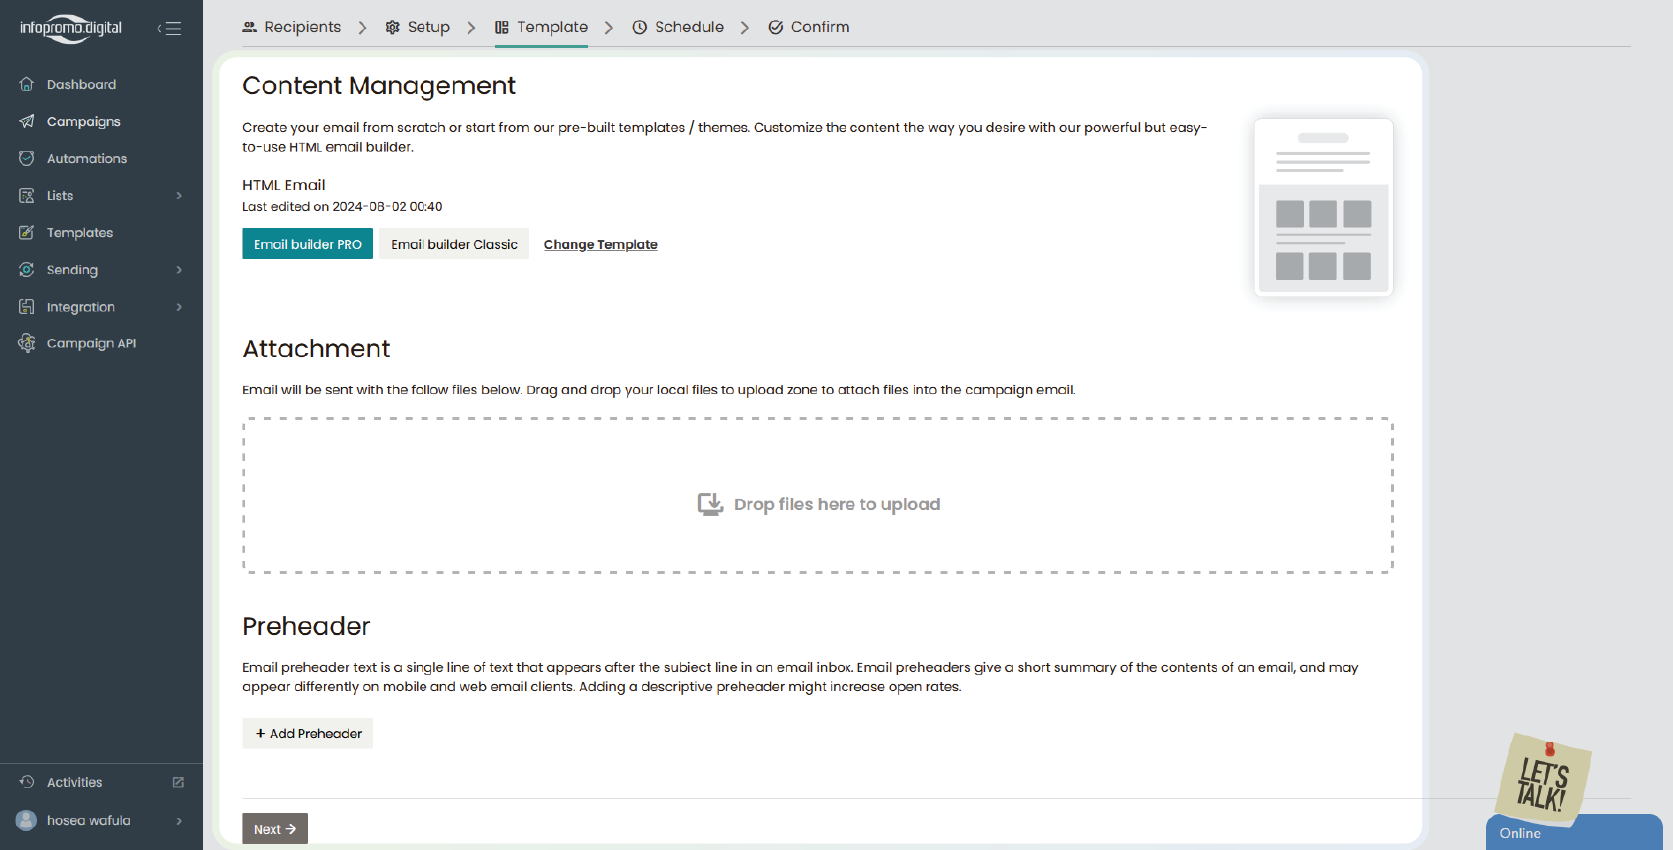
Here, you will create your email from scratch or start from our pre-built templates/themes.
– Customize the content the way you desire with our powerful but easy-to-use HTML email builder using our “Email builder PRO“.
– You can also use “Email Builder Classic” or change the email template select and customize it.
– In the attachment section, you can drag and drop files that you wish to send as attachments accompanied by the email you are sending
– You can optionally also add a ‘Preheader‘. Email preheader text is a single line of text that appears after the subject line in an email inbox. Email preheaders give a short summary of the contents of an email, and may appear differently on mobile and web email clients. Adding a descriptive pre header might increase open rates.
– Click “Next” to proceed.
—
Click here to see how to customize email templates
Step 6: Sending your email campaigns
– In the next tab, “Schedule“, you can send the campaign immediately or schedule for a later date and time.
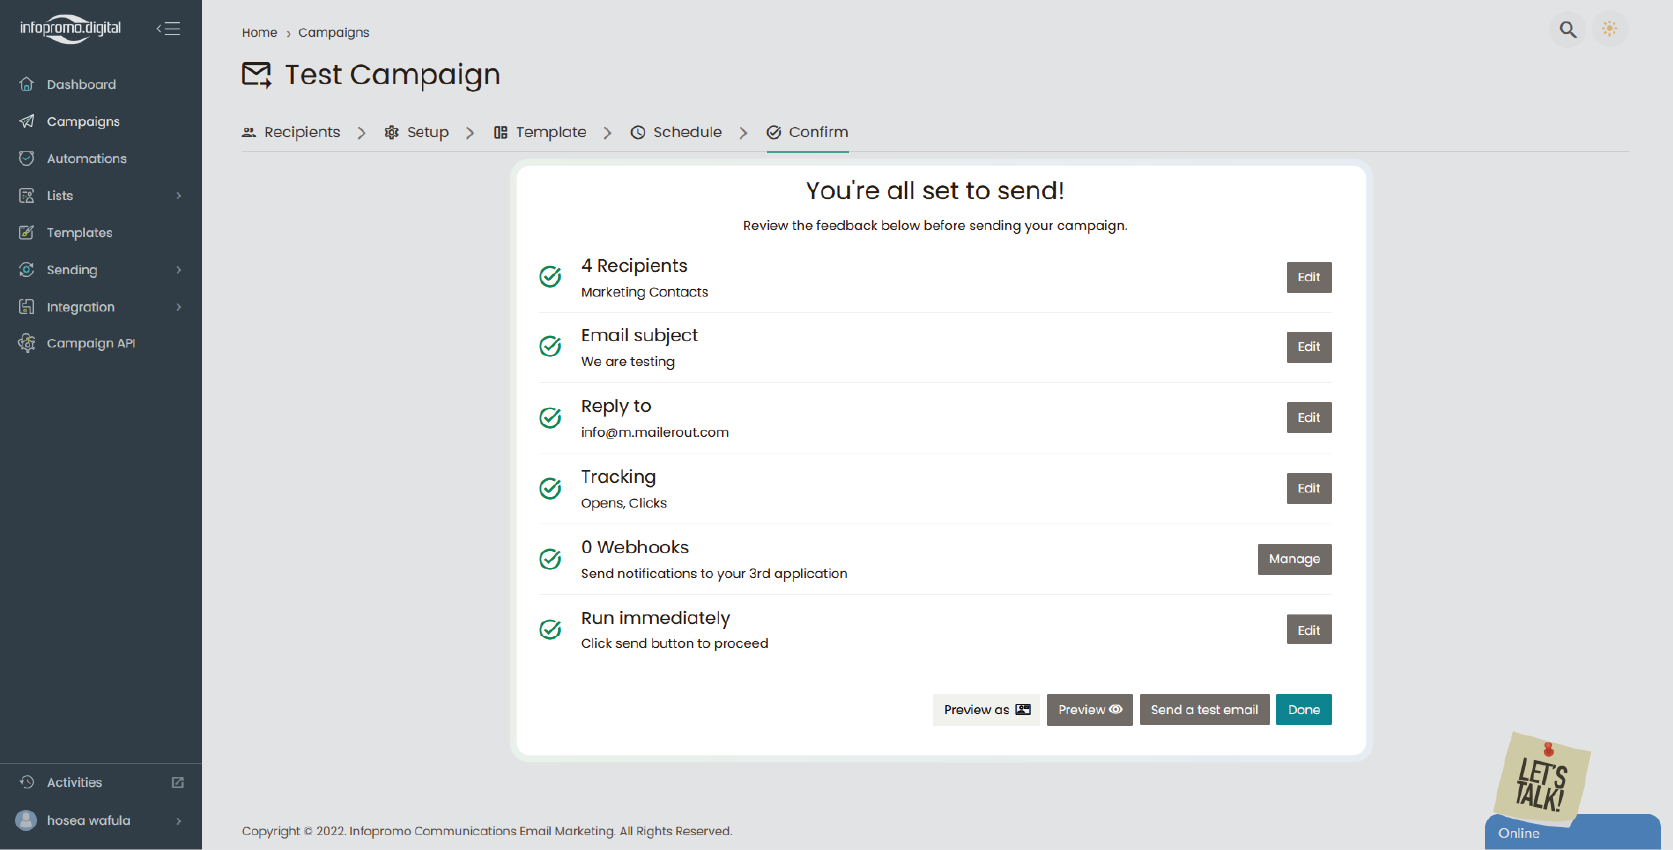
– Click the “Save & Next” button that will lead you to the “Confirm” tab where you will verify the campaign details before you confirm to send or schedule.
– On the next tab, “Confirm“, you will double-check all campaign details, including the subject line, email content, and recipient list, and make necessary adjustments by clicking on “Edit” Besides the specific details you need to make adjustments then when all is done, you can preview, send yourself a test email and click ‘Done‘ to send the campaign.
– Make any necessary adjustments to ensure everything is correct.
After several minutes after sending, you can access the specific email campaign analytics by clicking on the “Campaign” tab on the dashboard and then navigating on the specific email campaign among the campaigns listed. You can also access the dashboard to view various metrics.
Note that to save your email campaign as a draft allowing you to return to it later for further editing or review, just click on any section on the dashboard and the campaign will automatically be saved as a draft for later review and you can view it in the “Campaigns” tab in the dashboard.
—
Analyzing Campaign Performance
Step 1: Access the Analytics Section
– After your email campaign has been sent, navigate to the “Recently Sent Campaigns” section on the dashboard.
Step 2: Review Key Performance Indicators (KPIs)
– Look at essential KPIs such as open rates, click-through rates, bounce rates, and unsubscribes.
– Use the platform’s graphs and charts to visualize the data.
Step 3: Analyze Engagement Metrics
– Drill down into specific metrics to understand recipient behavior. Check which links were clicked the most and which segments engaged the most with your content.
– Compare performance across different campaigns to identify trends and patterns.
Step 4: Use Insights to Improve Future Campaigns
– Based on your analysis, determine what worked well and what can be improved.
– Apply these insights to refine your strategy for upcoming email campaigns, such as adjusting subject lines, timing, or content.
—
By following these detailed steps, users will be able to create, schedule, send, and analyze effective email campaigns, ensuring their messages reach and engage their target audience effectively.
[ The Infopromo Library ]
Stay Ahead of the Curve With Bulk Emails
Dive into the latest trends, best practices, and industry news shaping the world of email marketing and beyond.
Getting Started With Bulk Emailing
Step-by-step guides and tutorials to help you master email marketing strategies, tools, and techniques.
Learn More
Decoding Email Deliverability
Understand email deliverability and discover actionable tips to improve inbox placement and maximize campaign effectiveness.
Learn More
Mastering Email Metrics
Dive into essential email marketing metrics such as open rates, click-through rates, and conversion rates and learn how to interpret.
Learn More


