Advanced Email Features
By leveraging these advanced email features, users can enhance the effectiveness of their email marketing campaigns through personalization, automation, segmentation, dynamic content, and A/B testing.
SMS
Email
WhatsApp
Social Media Management Panel
Website Connections
Adding signup forms to your website on the website load
There are various ways to add a signup form and this is one of them
Step 1: Get the integration code
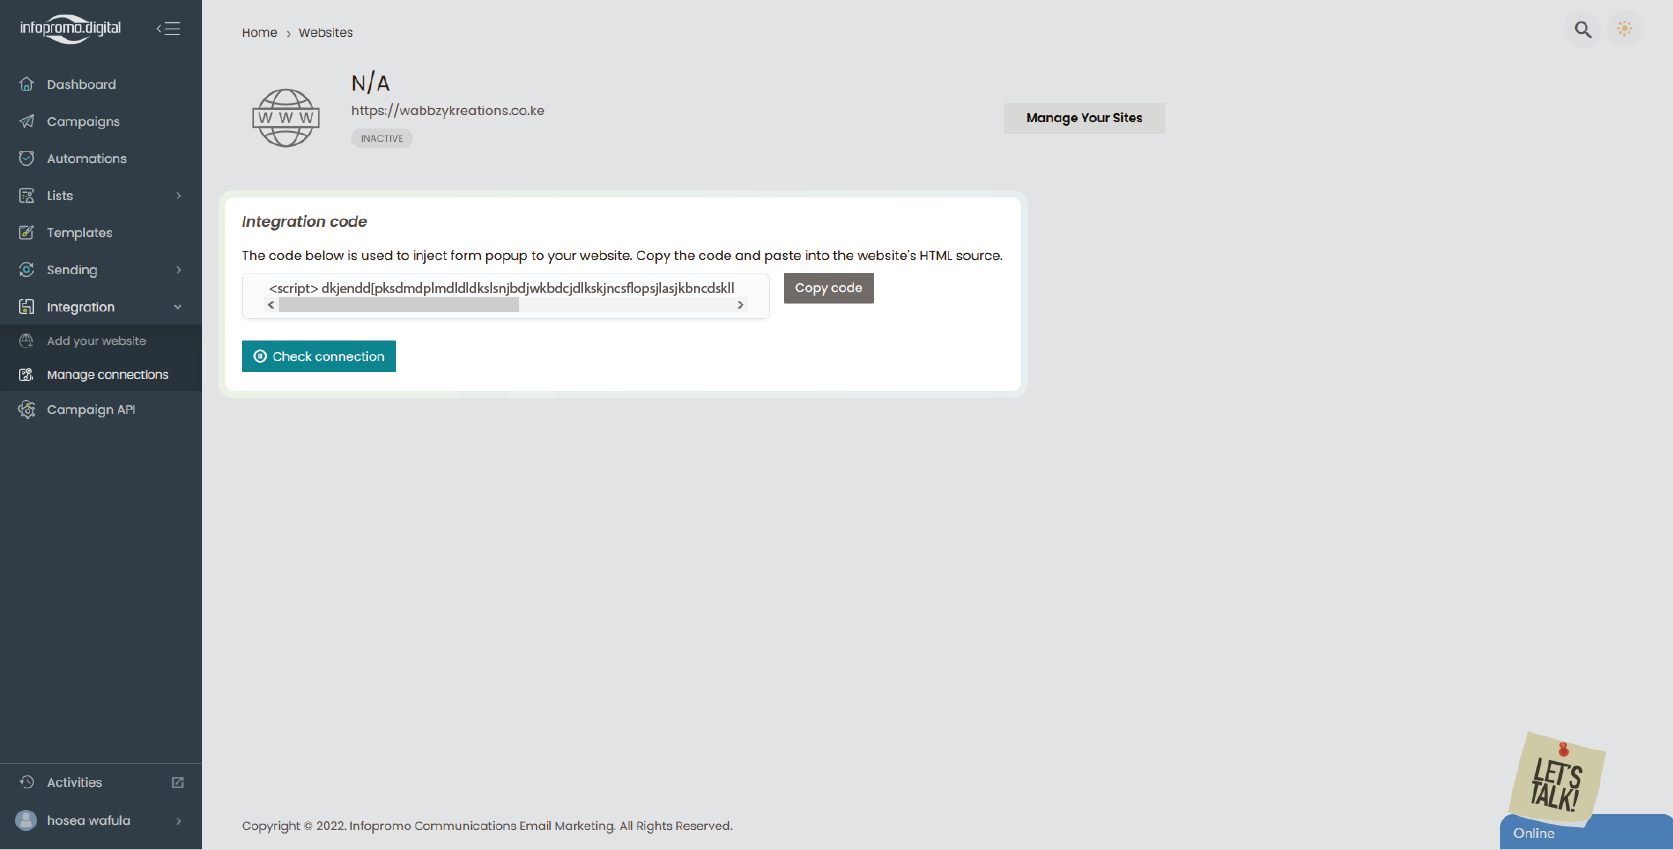
– Navigate to the “Integration” section on the website and click on the first option in the dropdown list “Add your website“.
– Proceed to add your website URL in the text box then click on “Get Code“

—
Step 2: Code update
– After adding your website URL, you will be provided with a code. The code is used to inject form popup to your website. Copy the code and paste it into the website’s HTML source and after successfully integrating the code, click on the “Check connection” button to check the integration success.

—
- You can add as many websites as possible, check connections, and view the integration code again under the “Manage connections” tab.

—
For your form to show on your website, you have to set it in the “Form” tab, under the “Lists” tab.
Sending emails & domains
How to set sending email & domains
The sending domain is used to verify the sender whose email address appears in the FROM header of an email. Add your own verified sending domains to send emails on your or your organization’s behalf.
Step 1: Set a sending domain
– Click on the “Sending” tab in the dashboard section and navigate to “Sending domains” under it.

—
Step 2: Adding sending domain
– Click on the “+New sending domain” button on the extreme right to add you
– Add the domain name in the text box and click “Save“

—
Step 3: Domain verification
– Add the information on the screen to your domain’s DNS records to confirm that you own it and to prevent others from using it. Hit the Verify Now button once you are done.
Note that it may take up to 2 days for the DNS update to fully propagate. You will also need to add a DomainKeys Identified Mail (DKIM) record, which is a way to authorize your email. Once you’re done, any outgoing email whose FROM email address matches the domain will be signed and can be verified by the recipient’s server.
If you are sending directly from the hosting server (i.e. using PHP Mail or Sendmail), you also need an SPF record indicating to ISPs that you have authorized the server’s IP address to send email for your domain.
After doing the above, click “Verify” and just like that you have verified your domain and you can use your domain to send outgoing emails in your email campaigns and your outgoing emails will appear with your domain emails.
Click here to learn how to update DNS records
You can view your verified domains later under the “Sending domains” tab, likewise, you can upload a TXT file of blacklisted sending domain emails from the “Blacklist” tab on upload and the application will not send campaign emails to those email addresses.

[ The Infopromo Library ]
Stay Ahead of the Curve With Bulk Emails
Dive into the latest trends, best practices, and industry news shaping the world of email marketing and beyond.

Getting Started With Bulk Emailing
Step-by-step guides and tutorials to help you master email marketing strategies, tools, and techniques.
Learn More

Decoding Email Deliverability
Understand email deliverability and discover actionable tips to improve inbox placement and maximize campaign effectiveness.
Learn More

Mastering Email Metrics
Dive into essential email marketing metrics such as open rates, click-through rates, and conversion rates and learn how to interpret.
Learn More


